
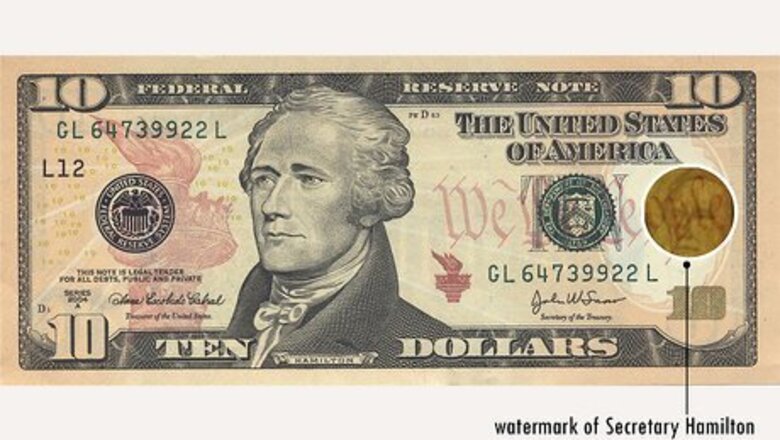
Watermark
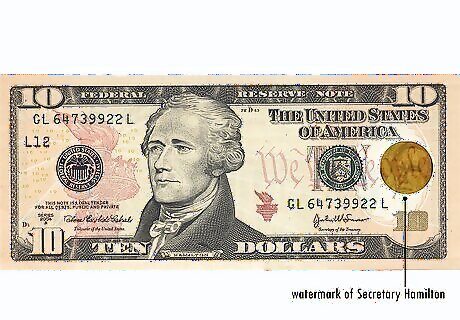
Ensure there’s a watermark of Secretary Hamilton on both sides of the bill. Hold the $10 bill to light and make sure there's a faint image of Secretary Hamilton in the unprinted space to the right of his portrait. It will be visible on both sides of the bill. Fake: Counterfeit bills do not have a watermark when held to a light that is visible on both sides. The watermark portrait usually does not match the portrait on the bill either.
Security Thread
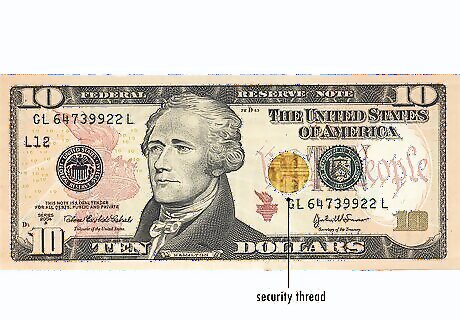
Hold the bill to light to check for an embedded security thread in the paper. The thread runs vertically to the right of Secretary Hamilton’s portrait, with the text “USA TEN” and a small flag in an alternating pattern. It will be visible on both sides of the bill, and it will also glow orange when illuminated by UV light. Fake: Counterfeit bills do not glow orange under UV light. However, the thread text may be recreated.
Color-Shifting Ink
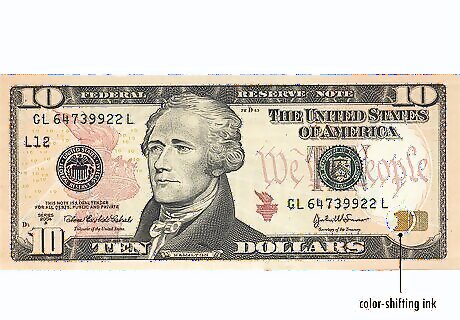
Tilt the bill to see the numeral 10 on the front shift from copper to green. On authentic $10 bills, the numeral 10 in the lower right-hand corner changes color from copper to green when tilted back and forth. This color shift is even more dramatic on new-series bills. Fake: Counterfeit bills usually don’t feature this color-shifting ink.
Symbols of Freedom

Look for 2 red torches on the front of the bill. On a genuine $10 bill, a large image of the torch is printed in the background to the left of Secretary Hamilton’s portrait. A second, smaller metallic red torch is printed on the lower right-hand side of his portrait. Fake: Counterfeit bills usually cannot reproduce the details and crispness of genuine bills, so the images may look blurred, dull, or flat.
Federal Reserve System Seal
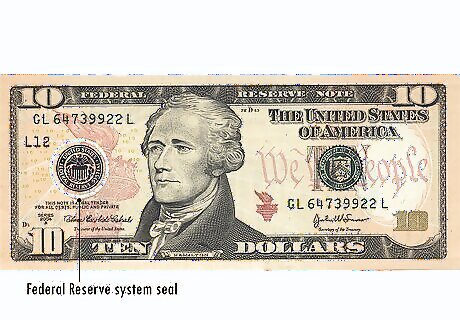
Make sure there is a black seal to the left of Secretary Hamilton’s portrait. This circular seal represents the entire Federal Reserve System. On bills issued between 1990 and 2000, the seal features the name and corresponding letter of the distributing Federal Reserve Bank. On newer bills issued since 2006 and onward, the seal features an eagle perched on top of a crest, surrounded with the text “UNITED STATES FEDERAL RESERVE SYSTEM.” Fake: Counterfeit bills include seals that have uneven, blunt, or broken-tooth saw points.
Treasury Seal
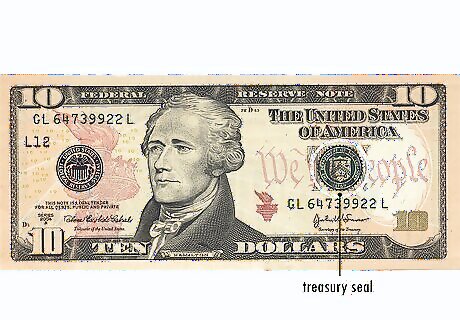
Look for a green seal to the right of Secretary Hamilton’s portrait. This circular seal represents the U.S. Department of Treasury. It features an image of balancing scales, a key, and a chevon with 13 stars, as well as the text “THE DEPARTMENT OF THE TREASURY” and “1789” along the border. Fake: Counterfeit bills have saw tooth points near the border of the seal that are not as sharp or defined as genuine bills.
Portrait and Vignette
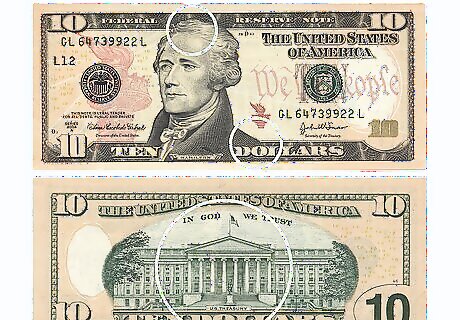
Ensure there aren’t any borders or fine lines around the portrait or vignette. If you have a bill issued from 2006 and onward, check that Secretary Hamilton’s shoulders extend all the way to the bottom edge of the border and his head reaches about half-way into the top border. The image of the United States Treasury building on the back of the bill will also be taken from the front of the building, with the blank space surrounding the building. Fake: Counterfeit bills include portraits that look lifeless and flat. The details merge into the background, which is usually too dark or mottled. On bills issued from 1990 to 2000, Secretary Hamilton’s portrait features an oval border. The image of the Treasury Building looks like it’s taken from the right wide, with a decorative border surrounding the building.
Serial Numbers
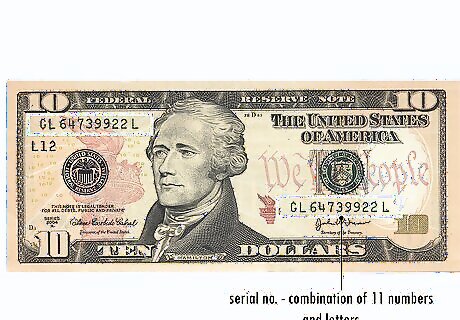
Look for a combination of 11 numbers and letters on the front of the bill. This unique serial number appears twice on the front of the bill—once in the upper left-hand corner and once below the treasury seal. The first letter of the serial number on bills from 1996 and later correspond to the series year: E = 2004, G = 2004A, I = 2006, J = 2009, and L = 2009A. Fake: Counterfeit bills may include a unique serial number, but the numbers and letters may not be evenly spaced or aligned.
Microprinting
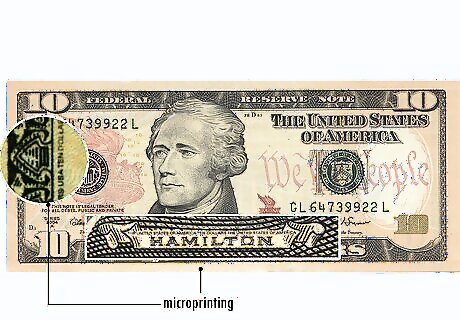
Use a magnifying glass to look for small printed text on the front of the bill. The text is located around the border of the bill in 3 areas: the phrase “USA 10” is repeated underneath the large printed torch, and the words “THE UNITED STATES OF AMERICA” and “TEN DOLLARS USA” are located below Secretary Hamilton’s portrait, as well as vertically inside the left and right borders of the bill. Fake: Counterfeit bills usually cannot replicate the microprinting on genuine bills because the text is so small.
Raised Printing
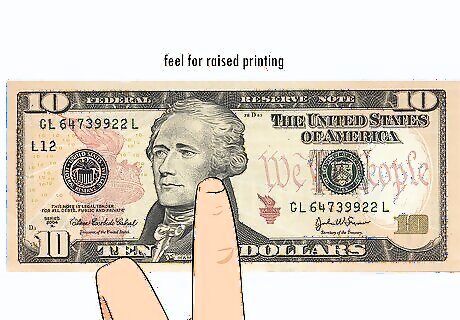
Move your finger along the surface of the bill to feel for raised printing. Run your fingernails over the portrait’s vest of the bill and check for distinctive ridges. Real Federal Reserve bills include ink that is slightly raised, which most counterfeiters cannot reproduce. Fake: Counterfeit $10 bills feel smooth or flat.
Paper
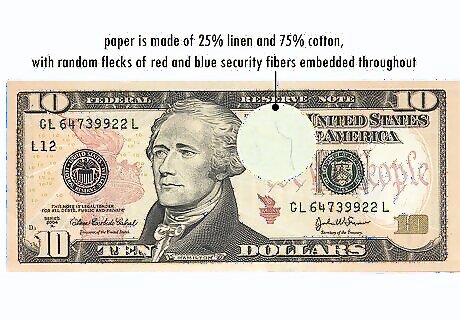
Check for small red and blue security fibers throughout the paper. All Federal Reserve note paper is made of 25% linen and 75% cotton, with random flecks of red and blue security fibers embedded throughout. This can be difficult to detect with the naked eye, so inspect the bill with a magnifying glass if needed. Additionally, real money has a distinct texture that is slightly rough to the touch, and it’s designed to feel crisp with age. Fake: Counterfeit bills are typically made from regular paper, which becomes torn and soft with age. They may include red and blue fibers printed on the paper, but they are not embedded in the paper itself.
Color
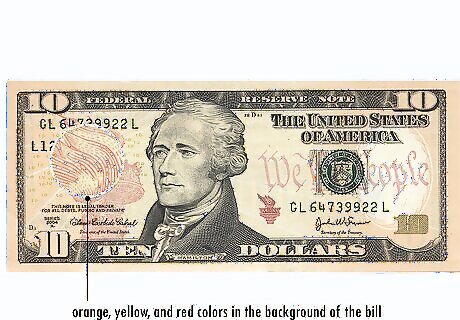
Look for orange, yellow, and red colors in the background of the bill. If you have a newer bill issued in 2006 or onward, make sure the 2 torches and “We the People from the United States Constitution” text in the background of the bill are printed red. There will also be small yellow 10s printed in the background to the left of the portrait on the front of the bill, as well as to the right of the vignette on the back of the bill. Fake: Counterfeit bills may feature these 3 colors, but the colors will look brighter or darker. Compare a genuine bill with one that you suspect is fake to see if the shades match. Authentic $10 bills issued between 1990 and 2000 only include black and green ink. The only color on the bill is the security thread that glows orange under UV light.
Green 10
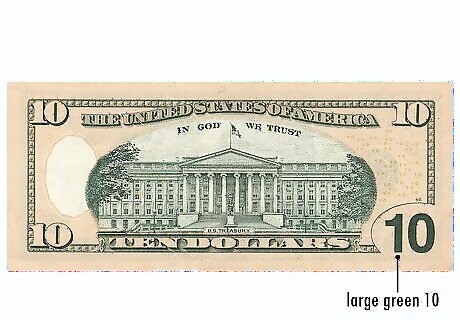
Look for a large green numeral 10 on the back of the bill. If you have a newer bill issued in 2006 or forward, the numeral 10 in the lower right-hand corner is slightly larger to help those with visual impairments identify the bill. On older bills issued between 1990 to 2000, all 4 numerals in the corners of the bill are the same size. Fake: Counterfeit bills may not enlarge the numeral 10 on the back of the bill.


Comments
0 comment