
Cutting around a Vertical Crack
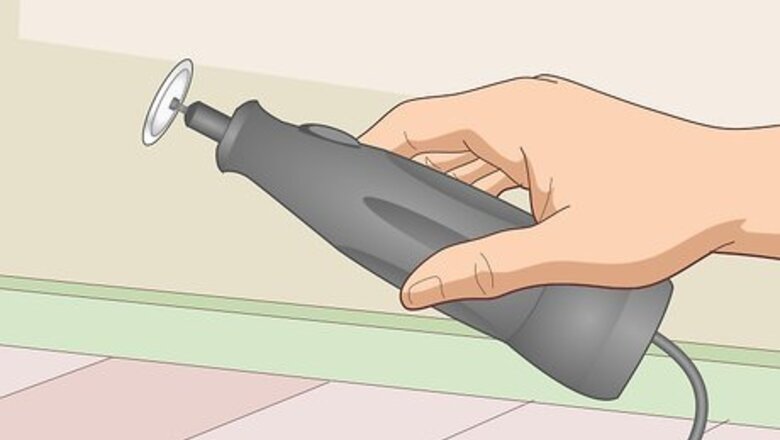
Grab a Dremel tool to cut around the crack on the rim. Pick up a Dremel tool, which is a small drill-like tool with a cutting disc on the end. Attach a carbide bit to the end of the tool by unlocking the tip and sliding a new bit into the slot before tightening it. This is the ideal option if you have a crack on the external rim leading towards the center of the cymbal. These cracks are caused by striking the cymbal too hard, but they can be cut out to improve the cymbal’s sound. You can use a table or band saw if you have one, but most people don’t have these tools sitting around and they’re pretty hard to use if you aren’t familiar with them. You can buy a Dremel for $50-100, or rent one from your local hardware store for $15-20. This really only works if your crack is 2–3 inches (5.1–7.6 cm) long. Cutting out anything bigger than that will drastically damage the sound of the cymbal.

Put on some thick gloves and protective eyewear to stay safe. Get some thick gloves to protect your hands from any sparks as you cut the crack out, and wear protective eyewear to keep bronze shards from flying into your eyes and hands as you’re cutting the cymbal.

Draw a 1–2 inches (2.5–5.1 cm) V- or U-shape around the crack in marker. You can do this by hand, or place the edge of a can or stencil over the crack and trace around it. Use a dark permanent marker to draw 1–2 inches (2.5–5.1 cm) around the crack to cover it in a big half circle or V-shape. This marks the edge you will cut around, so the shape of the cut is entirely up to you.Tip: A V-shape is less likely to cause sound to resonate or echo, but it’s more likely to cause a tinny sound when you hit the cymbal. The U-shape will have the lowest impact on the sound, but may cause noise to linger for a little longer. Either way, you won’t see a massive difference in the sound if the crack is shorter than 2–3 inches (5.1–7.6 cm). If you cut a V-shape out, make each line the same size so that the point at the top of the V points directly towards the center of the cymbal. It must be a V or U because the cut needs to be symmetrical. If you cut an asymmetrical shape out of the cymbal, you may end up with some funky textures in the sound.
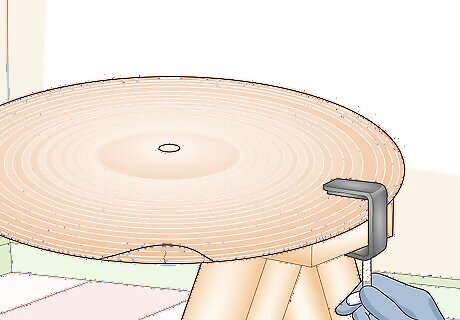
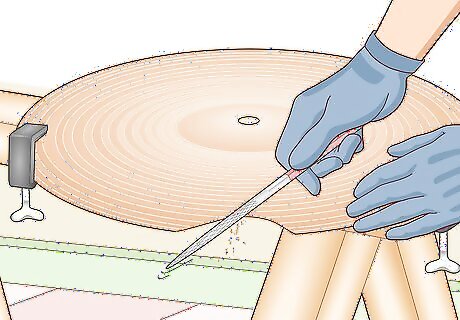
Clamp the cymbal down on a sawhorse or table edge. Get some hand clamps and set your cymbal on a sawhorse or table edge. If you’re using the edge of a table, leave the cracked area hanging over the edge. Squeeze each clamp and set the jaws down over the cymbal and the surface underneath to hold it in place. Use at least 2 clamps to hold the cymbal down. This will keep the cymbal from rattling around while you’re cutting into it.

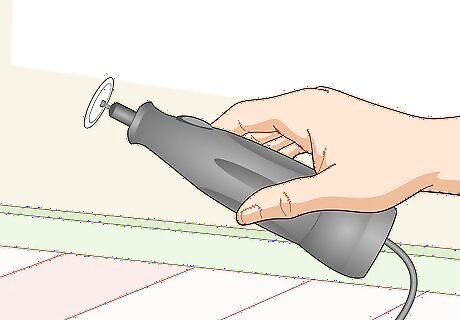
Line the Dremel blade up with the edge of the outline to start cutting. Hold the Dremel with both hands and set the blade up next to one end of the outline. Hold the Dremel horizontally pull the trigger to turn it on. Slowly press the blade into the edge of the shape you outlined to begin cutting it out. Always hold the Dremel away from you to avoid accidentally cutting yourself.
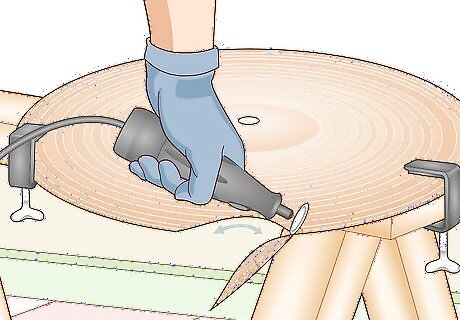
Move the Dremel blade back and forth to cut the outlined portion out. Slowly move the blade back and forth to continue removing portions of the outline. Maneuver the blade carefully to avoid cutting the portion surrounding the outline. Work your way around the entire outline to remove the cracked portion of the cymbal. Be careful to cut inside of the outline. You may find it easier to slowly remove portions of the outline one bit at a time instead of cutting all the way around the shape you drew. If you’re using a band or table saw, hold the cymbal on the opposite side of the cracked edge and slowly move the cracked portion under the blade to cut the shape out.
File or sand the edges down to smooth them out. Either grab a file or a sheet of 200-grit sandpaper. Grip the sandpaper or file on opposite sides and carefully run it back and forth over the edge you cut out to smooth it down. Cover each portion of the cut edge 5-10 times to smooth it out and keep the edges from cutting you in the future. The cymbal will be missing a portion of the rim, but the crack won’t continue to spread and the sound will be much better than it originally was. At worst, you can expect some added reverb and the occasional inconsistency. You can now use the cymbal the same way you normally would! The sound will certainly not be perfect, but many people use cymbals like these as effects cymbals for accent sounds or unique patterns.
Drilling out a Horizontal Crack
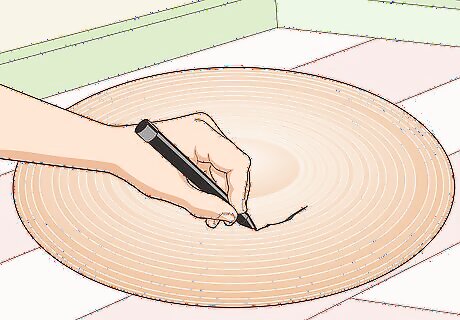
Outline the crack in permanent marker to make it easier to work with. Grab a dark permanent marker and carefully run the tip over the edges of the crack. These horizontal cracks are pretty easy to lose track of, so outlining it will make it much easier to work with. You’ll also be able to tell when you’ve completely removed the cracked portion.Tip: Horizontal cracks are typically caused by manufacturing defects. Contact the company that manufactured your cymbal to see if they’ll cover these kinds of cracks. Many companies cover them for 2-4 years after you purchased the cymbal. This is basically the only way to deal with cracks in the middle of a cymbal. This will work for any horizontal cracks that take up less than ¼ of the symbol. For anything bigger, you really won’t be able to repair the sound of the cymbal in a meaningful way.

Wear protective eyewear and gloves to protect your eyes and hands. Do not skip out on the eyewear. In the event that the drill bit slips, you’ll be happy you have something keeping bits of bronze out of your eyes. Put on some thick gloves to keep your hands safe.
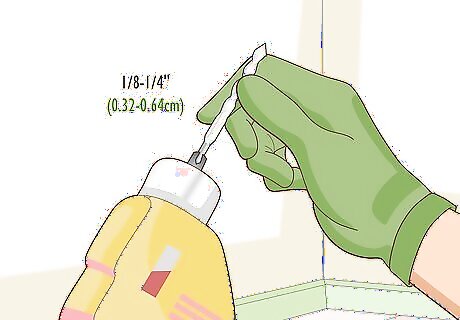
Attach a ⁄8–⁄4 in (0.32–0.64 cm) bronze-cutting bit to your drill. Unlock the head of your drill and remove whatever drill bit was installed there. Then, slide a bronze-cutting drill bit into the drill and lock it. The size of the bit depends on the width of the crack, but in most cases you’ll need a ⁄8–⁄4 in (0.32–0.64 cm) drill bit for this. If you don’t have a drill bit designed specifically for bronze, any carbide or diamond bit should work. In terms of the size of the bit, you need it to be slightly bigger than the width of the crack. Most of these horizontal cracks are pretty thin, so you won’t need a massive drill bit most of the time.

Clamp the cymbal to a set of sawhorses with nothing under the crack. Set 2 sawhorses down on either side of the cymbal. Wrap the jaws around the cymbal and the sawhorse to hold it in place. Be sure to orient the cymbal so that there’s nothing underneath the crack to keep your drill from being damaged.
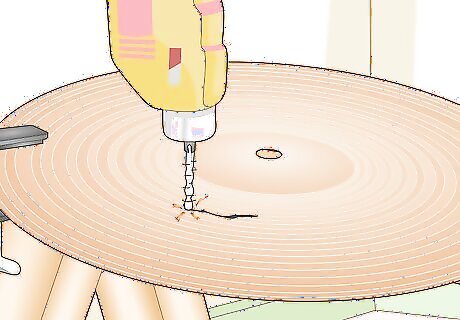
Drill a hole clean through the end of the crack on either side. Start on either end of the crack. Slide the tip of the drill bit into the opening at the end of the crack and hold the drill perpendicular to the cymbal. Pull the trigger on your drill slowly to begin driving the bit through the crack. Continue drilling through the crack until you cut clean through the cymbal. Depending on the thickness of the cymbal, this make take 10-45 seconds. Take your time doing this and release the trigger whenever you find yourself losing control of the drill bit. This can be kind of awkward, so just go slow.
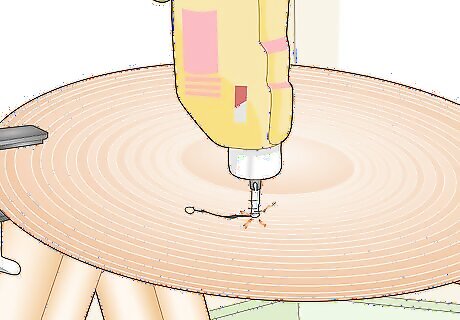
Add another hole on the opposite edge of the crack. Repeat this process on the opposite end of the crack by drilling through the top of the cymbal. Hold the bit in the location where the crack ends and slowly drive the bit through the cymbal. This will keep the crack from spreading while you drill through the rest of the crack. If you don’t drill holes through the 2 ends of the crack while you’re working, the crack may get bigger as you work.

Place additional holes every ⁄4–⁄2 in (0.64–1.27 cm) to connect the holes. For the rest of the crack, repeat this process by drilling a sequence of holes right next to one another. Move from one end of the crack to the other side and drive the drill bit through each portion of the crack. This will weaken the remaining portions of the bronze considerably and make it much easier to shape as you keep working.
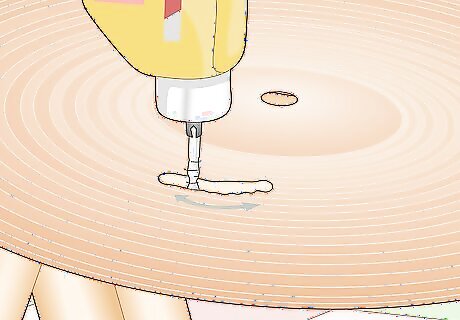
Slide the bit from one hole to another to connect the holes. Insert your drill bit into any hole you’ve drilled. Pull the trigger to spin the drill bit and gently rub it back and forth in the hole to erode layers of the bronze inside the crack. Continue doing this until you break through to your next hole. Repeat this process until you’ve completely worn through the entire crack. You can use a Dremel tool with a really thin bit to cut through the crack if you prefer. Just drive the Dremel bit vertically through the crack to remove the remaining metal.

Sand and shape the edges with a sanding bit or sheet of 200-grit sandpaper. One way to sand the crack down is to attach a small sanding bit to your drill and run it in between the crack to smooth the edges down. You can also slide a sheet of sandpaper in between the crack and move it back and forth over each portion of the crack. Sand each section 5-10 times to smooth the edges out.Tip: You can now easily turn the cymbal into an Ozone effect cymbal by drilling a symmetrical shape on the opposite side of the first piece you removed. To do this, simply measure the length of the crack and the distance from the center of the cymbal. Draw a symmetrical shape on the opposite side of the first hole you punched out and repeat the entire process. The missing material in the cymbal will change the sound it makes when you strike it, but it will still sound relatively good and the crack won’t continue to spread.


Comments
0 comment