
- FAT32 and ExFAT both have nearly universal support on Windows, Mac, Linux, & mobile devices.
- FAT32 cannot support drives or volumes larger than 2TB, or files larger than 4GB.
- ExFAT has no limitations on hard drive size or file size.
Format Drives Smaller than 2TB in Windows
Back up the drive. Because formatting the drive will delete all of your data, make a backup of anything you want to keep on your drive before you start the formatting tool. You can back up a hard drive using another hard drive, or to a cloud storage service like Google Drive, iCloud, OneDrive, or Dropbox.
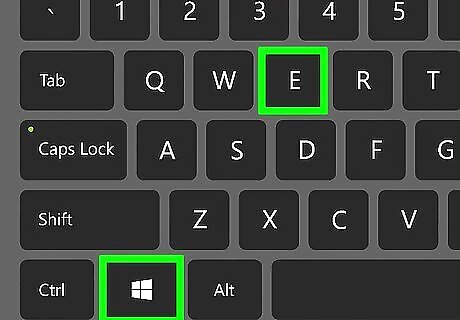
Press ⊞ Win+E to open the File Explorer. You can also open it by right-clicking the Start button and selecting File Explorer.
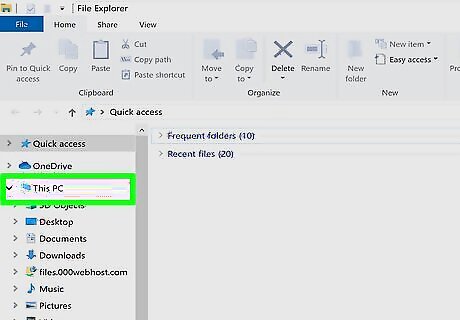
Click This PC or Computer. One of these options will be in the left panel of the File Explorer. Clicking it displays a list of drives connected to the PC.
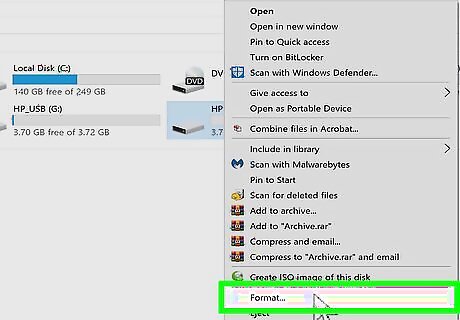
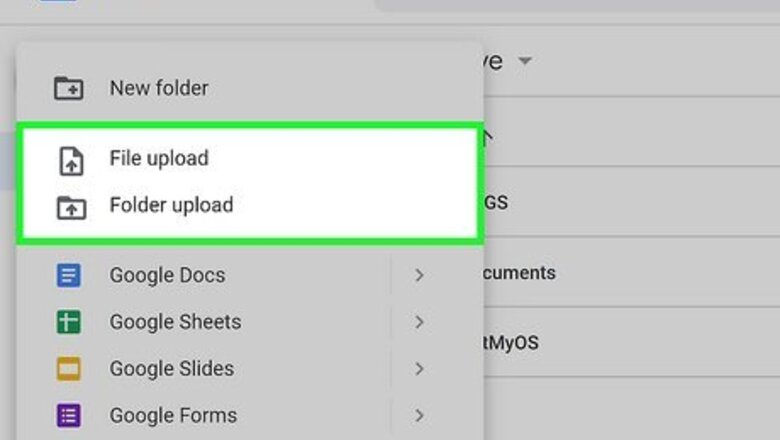
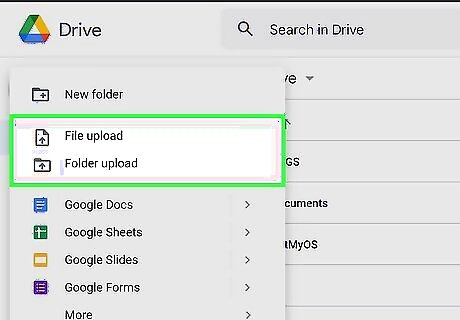
Right-click the USB drive and select Format. You should see the drive listed in the panel to the right This opens the Format window. If you don't see your drive listed here, press the Windows key + R, type diskmgmt.msc, and press Enter to open the Disk Management tool. If the drive or USB port is not physically malfunctioning, the drive should be listed here. If you see it here, right-click the drive and select Format.
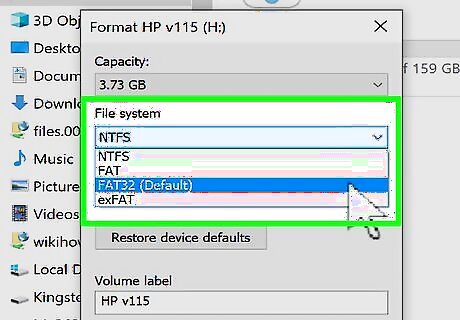
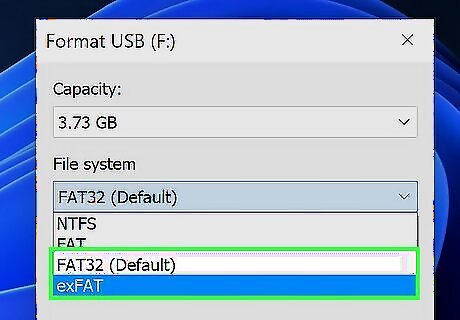
Select FAT32 or ExFAT from the "File system" menu. Unless you're working with a specialty device (or an older computer) that requires FAT32, exFAT is the modern choice. Still, FAT32 won't do any harm—you just won't be able to work with files 4 GB and larger. If you have specific instructions that say to use FAT32 (such as if you're using a drive in a car or another specialty device), stick to FAT32. If not, use ExFAT so you can manage larger files. Leave the "Perform quick format" option checked to ensure a timely format. It's not necessary to do a full format unless there's something wrong with the drive or you really need to cover your tracks.
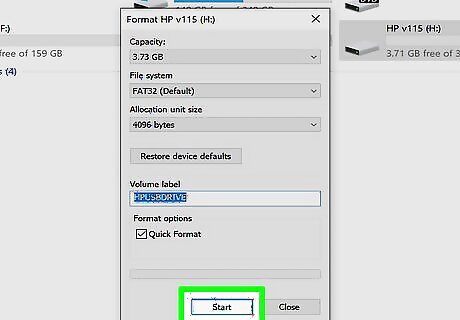
Name the drive and click Start. The "Volume label" field allows you to enter a name that will identify the drive anywhere you plug it in. Type your desired name here, and click Start to format the drive to FAT32 or exFAT. For most drives, the format should only take a few moments. Performing a full format will take longer. Once the drive is formatted, you can copy files to and from the drive on any operating system.
Format a Drive Larger than 2TB in Windows
Decide whether to use FAT32 or exFAT. ExFAT, the successor to FAT32, also works on Windows, macOS, Linux, and other devices. The main difference is that you can't work with files larger than 4GB on FAT32, nor can it work with drives larger than 2TB. If your drive is larger or you need to work with big files, it's better to use exFAT, which has almost identical compatibility. If your drive is larger than 2TB and you just want to use it to share files between multiple modern operating systems (Windows 8 and later, macOS X 10.6.6 and later), use this method instead, and be sure to select exFAT as the file system type. If you have specific instructions to use FAT32 and your drive is larger than 2GB, you'll need a third-party tool to format it as FAT32—continue with this method. Because formatting the drive will delete all of your data, make a backup of anything you want to keep. You can back to another drive, or use a cloud storage service like, Google Drive, iCloud, OneDrive, or Dropbox.
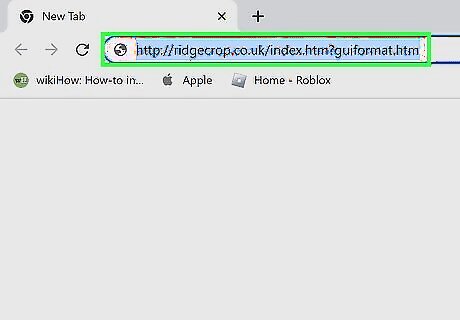
Go to http://ridgecrop.co.uk/index.htm?guiformat.htm in a web browser. This is the download site for a free app called fat32format, a tool that can format larger drives (up to 2 TB) as FAT32. This tool has been around for many years and is safe to use. If you don't want to or can't download a third-party tool, you can format in FAT32 using the Command Prompt or PowerShell, however, it will take a bit longer.
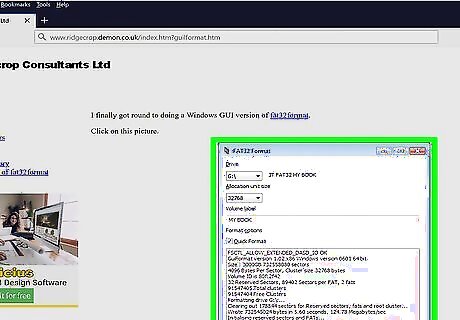
Download the tool. If you have a 32-bit system, click the picture at the top to download the file. If you're using a 64-bit version of Windows, scroll down and click the link at the bottom next to "There is an x64 build of Guiformat here" instead. If you're not sure whether your version of Windows is 32-bit or 64-bit, see this guide.
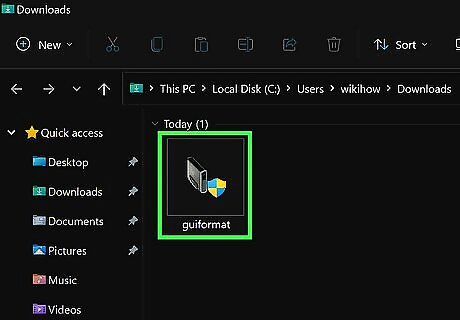
Double-click the downloaded file to open it. The file is called guiformat.exe or guiformat-x64.exe, depending on the version you downloaded. Double-click the file in your web browser or Downloads folder to open the tool. The tool does not need to be installed—as soon as you double-click it (and confirm that you want to open it), it'll be ready to use.
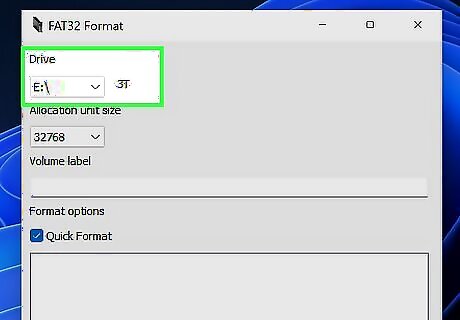
Select your drive from the "Drive" menu. It's the menu at the top of the screen. Leave the "Allocation unit size" option as the default setting unless you have a specific need to change it.
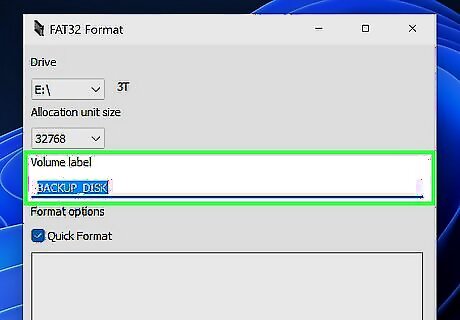
Type a name for the drive. This goes into the "Volume label" field. This name is how the drive will be identified when plugged in (in addition to its drive letter).
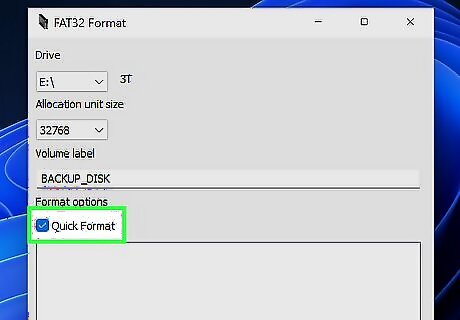
Choose whether to do a quick format. Quick Format should be fine for most people and is definitely the faster option. If you're having trouble with the drive or are giving it to somebody else, remove the checkmark to do an extensive format.
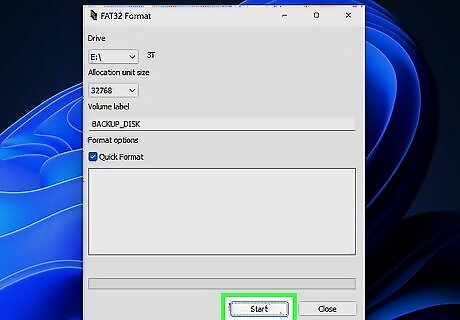
Click Start to format the drive. If you're doing a quick format, the process should only take a few minutes (depending on the size of the drive). A full format can take several hours. Once the format is complete, you'll be able to copy files to and from the drive as normal.
Format on a Mac
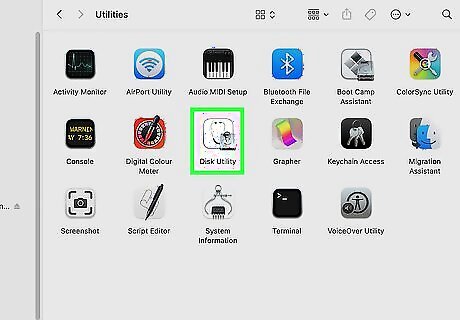
Open Disk Utility. This Disk Utility app has an icon of a hard drive with a stethoscope icon, and you'll find it in your Applications folder under Utilities.. Alternatively, you can click the magnifying glass icon on your desktop and type disk utility into the search bar. Click the Disk Utility icon when you find it. Formatting deletes everything from the drive, so make sure you back up the files you want to keep. If you're formatting a flash drive or other external drive, you can just drag the files to another drive on your Mac to back them up. Otherwise, you can upload them to iCloud, Google Drive, or any other cloud-based backup service.
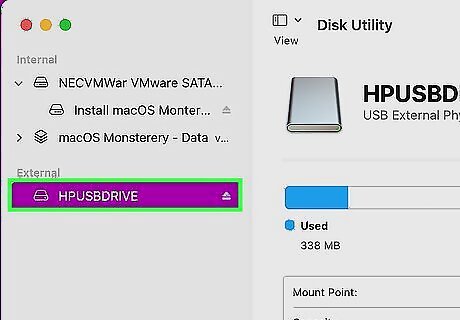
Select the drive you want to format in FAT32. It'll be in the left panel under "External." If you don't see it listed, try plugging it into a different USB port.

Click the Erase tab. It's near the top of the window.
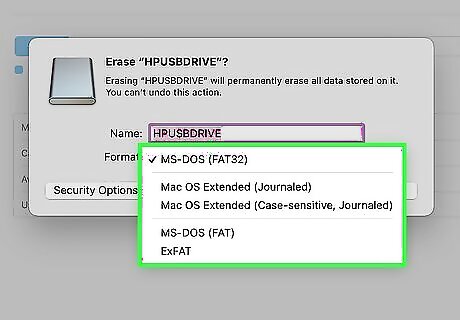
Select a file system from the "Format" menu. The exFAT filesystem is an updated version of FAT32 that works almost the same, except there's no 4 GB file size limit, and you can use it on drives larger than 2TB (unlike FAT32). This is the best, most up-to-date option for working between Windows and Macs. If you have specific instructions to use FAT32, such as an older electronic device that requires it, go with MS-DOS (FAT). If the drive is larger than 2TB but you absolutely need FAT32, you can create multiple 2TB partitions on the drive and format each as a separate FAT32 partition. Click the Partition tab, then click the + button to create new partitions. Set the size of each to 2 GB or less and select MS-DOS (FAT) from the Format menu for each.
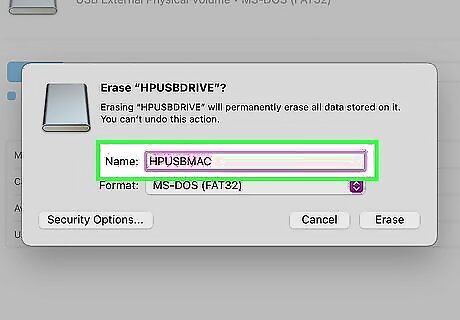
Give the drive a name. Type a name for the drive into the "Name" field (up to 11 characters). This name will appear whenever the drive is connected.
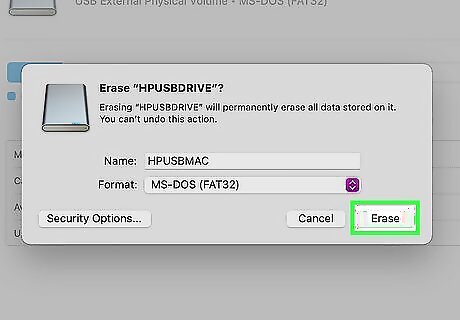
Click Erase to begin the format. All of the data on the drive will be deleted and it will be formatted in FAT32 or exFAT, depending on your selection.
Format on Ubuntu Linux
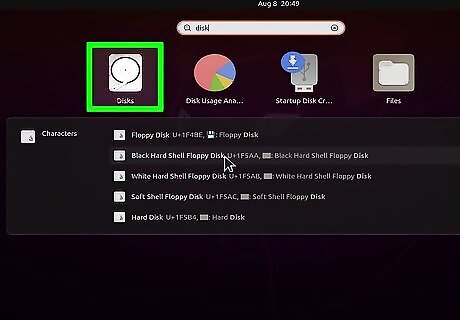
Open the Disks utility. This utility allows you to format drives connected to your Linux system. The easiest way to open it is to click the icon with 9 squares, type disks, and then click Disks. If there is any data on the drive you want to format, you should back it up before you continue. On newer versions of Ubuntu, you'll only have the FAT option when formatting, which is actually exFAT. There is no longer a way to choose FAT32 specifically in the Disks utility.
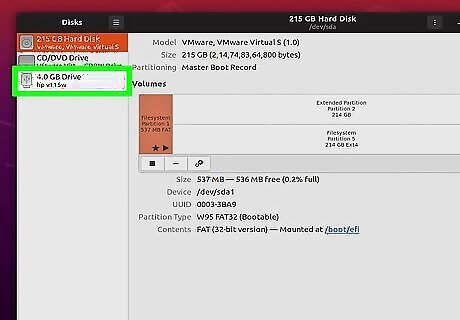
Select the drive you want to format. You'll find it in the list of drives on the left side of the Disks window. If the drive is mounted, click the Stop button in the Volumes section to unmount it now.
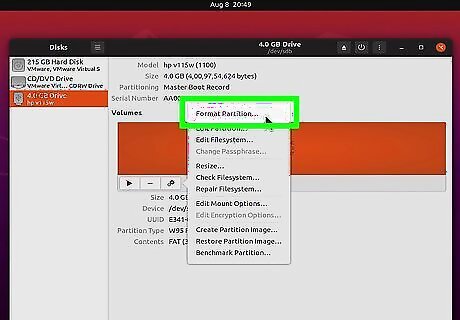
Click the gear icon and select Format Partition. The gear icon is below each volume in the list.
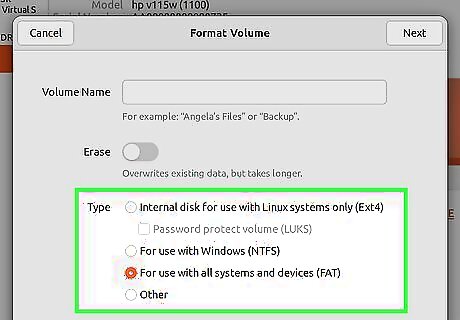
Select the FAT file system and click. To do so, click the radio option next to "For use with all systems and devices (FAT)."
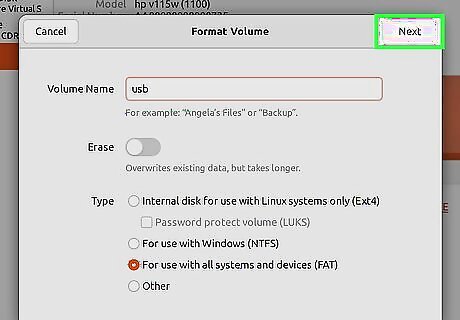
Name the drive and click Next. Type a label for the drive into the "Volume name" field at the top of the window. This is how the drive will be identified when plugged in. Now you'll see a confirmation window.
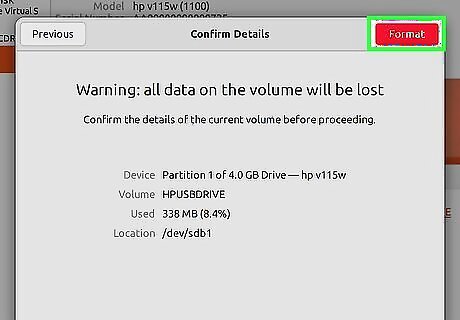
Review the information and click Format. Look over the information in the window and make sure everything is correct. Then click Format in the upper-right corner to begin formatting your hard drive.


Comments
0 comment