
Making Easy Paper Fairy Wings
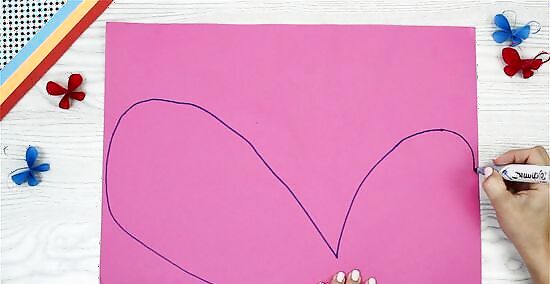
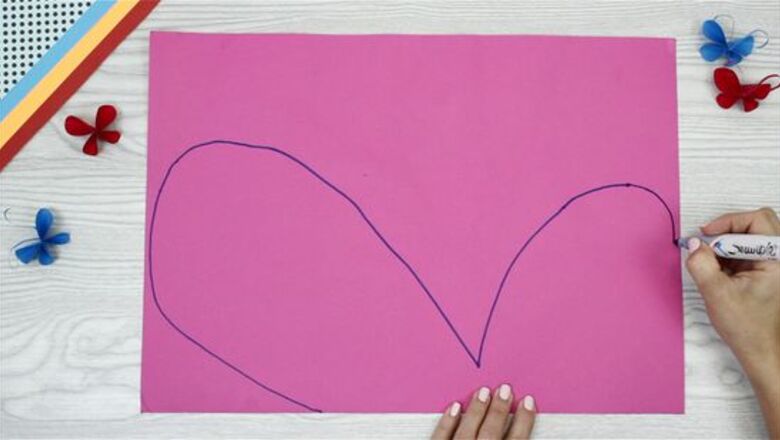
Draw the shape of the wing. Using any kind of paper, draw the shape of your wings. Use two pieces of paper with each wing on a different sheet. Make sure each wing is exactly the same shape and size. If you want double layered wings, draw the same wing shape out twice, but with one bigger than the other. For 3D wings, cut multiple layers of wings is descending sizes. You can also make the wings out of cardboard for sturdier wings.
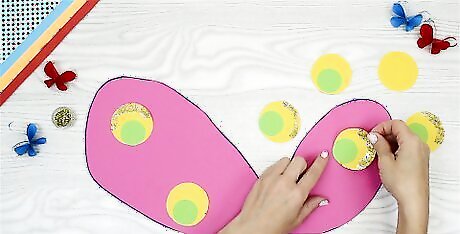
Cut the wings out. Use a pair of scissors to cut the wings out. Try to cut the edges as smooth as possible. Follow the lines so your wings stay the same size and shape. If you drew on white paper, color the wings. You can color them before or after you cut them out. Cutting them after you color may make it easier since you can color over the lines and then cut off the excess. Be creative with the way you draw or decorate them. Draw veins along the wings, glue flowers, or tape sequins to them. Try covering the paper with glitter, gold or silver paint, or gold trim. If you drew them on cardboard, try painting the cardboard. Just make sure to let the paint dry before building the wings.
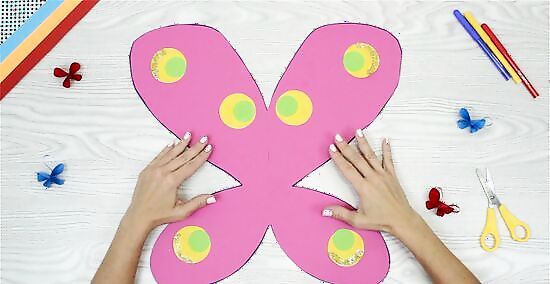
Build the wings. Tape the wings together in the center. On the back of each wing, place straws. The straw acts as the support for your paper wings so they keep their shape and don't tear. Try to have at least 3 straws on each wing. There should be one at the top, one at the bottom, and one at the bottom. Use bendy straws so that you can shape them to your wing. If your wings have points, each straw should run from the center of the wings towards the points. If your wings are rounded, place straws on the top, bottom, and middle. If you want 3D wings, tape the layers of wings together. You can leave just the wingtips untaped, or more of the wing to give it a fluttering look. Place the straws on the back of the bottom wing.
Making Paper Fairy Wings with Wire

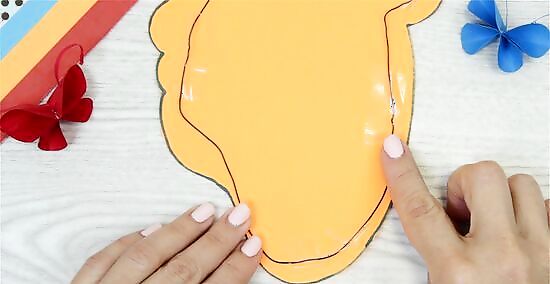
Cut out the wings. Draw the shape of your wings on colored paper, tissue paper, or white paper. Each wing should be on a different sheet of paper. Make sure to use a sheet of paper that will be large enough for the wing size you want. Use scissors to cut out the paper. Use any wing shape you desire. You can have rounded tips or pointed tips. They can be large like angel wings or narrow like dragonfly wings. This is up to your imagination.

Place the wire on the wing. Using gauge wire (or any kind of other thin wire), outline the wings. Place wire along the top of the wing, the bottom of the wing, and along any veins you want in the wings to help strengthen the paper. The wire should extend beyond the edge of the wings. Tape the wire down to hold it in place. Bend the wire so that it follows the contours of the wings.
Connect the wires to the paper. There are a couple of ways you can connect the wires to the paper. Cover the wires with tape to keep them in place. An alternate way to adhere the wires is to use Fimo gel. Fimo gel is a craft adhesive. Squirt it onto the wings so it seeps beneath the wire, or use a sponge brush to dab under it. Just don't lift the wires. Try to get the Fimo gel under the wires. Start with the outer wires and set that. Then, spread it over all of the wing. Use an embossing gun to set the gel. Fimo gel has to use heat to harden. Usually, Fimo gel is put into the oven, like when it's used with polymer clay. Since you can't put paper in the oven, use an embossing gun instead.

Finish the wings. After the wings cool, take needle nose pliers and twist any separated wires together near the base. Use wire cutters to cut the end of the wires that extend beyond the paper. Add any embellishment to the wings. You can use glitter, paint, flowers, beads, or anything else to decorate the wings.
Making Paper Fairy Wings with Wire Hangers
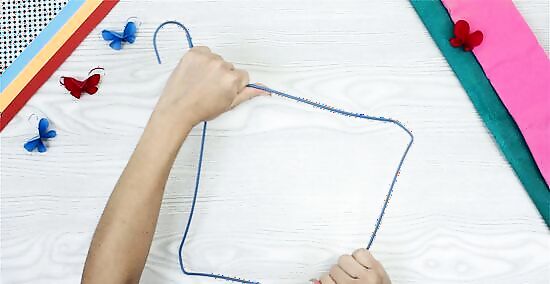
Bend the hangers into wings. Take two wire hangers and undo them. Straighten the hanger into a straight line. Then, bend the hangers into the shape of your wings. Make sure to leave enough wire at the base of the hangers so you can connect them. Use pliers to straighten the kinks in the hanger, especially where the hanger was wrapped around the neck to keep it together. You can also use the pliers to help you bend the hanger into the proper shape. For easy wing shapes for the hanger, try making long, narrow wings like dragonflies. You can also use 4 hangers and make four balloon-shaped circles. Attach two of them together, one on top and another on bottom, so that they look like butterfly wings. You can also draw the shape of the wing first, and then lay the hanger on top of the paper and bend it so it matches the outline of the wing. An alternative to undoing the hanger is to bend the wide part of the hanger into a wing shape, leaving the hooks in tact.
Connect the wings together. Take the ends of the hangers and twist them together to connect the wings together. Use the pliers to bend the wire so you can secure them. If you left the hanger in tact, twist the hooks together to connect the wings. Cover the twist with a piece of fabric or felt so it doesn't poke you in the back.
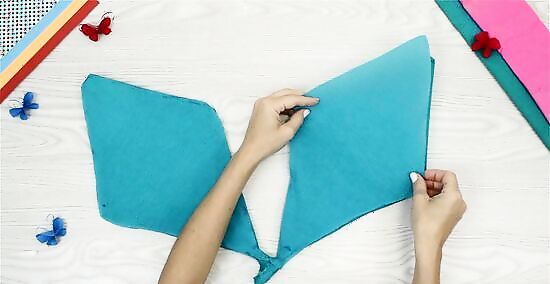
Cover with paper. Take a piece of paper and spread it over the edges of the hanger. Fold the paper over the edges and secure to the back with tape. If you are going to use this paper as the base, make sure you have colored it before attaching it to the hanger. If you try to color it while on the hanger, you could tear the paper. An alternate to regular paper is to use contact paper. Cut contact paper so that it fits the hanger. Make sure there is enough to bend over the edge to secure it. Decorate the sticky side of the contact paper with flower petals, leaves, glitter, fabric, or anything else. Place another piece of contact paper over the decorations, sticky side down. Smooth it down to seal the wings. Cut around the wire hangers and fold the ends over the edges.

Decorate the wings. After you have placed the paper on the wings, decorate them how you desire. Paint them, add glitter, attach flowers, or embellish with ribbon. To make rows of feathers, cut smaller pieces of paper into half-ovals. You can make a lot of smaller individual ovals, or you can create a long piece of paper with one flat edge and one edge of half-ovals. These ovals should stack on top of each other so that your wings look like they have rows of feathers. You can cut them out of different colored paper, or color and decorate them after you cut them. When you have the feathers ready, tape or glue them to the paper wings. If you want to make paper wings that look like angel wings, try using paper fringe for feathers. Take tissue paper and cut into half. Then, fold those in half and staple along the folded crease. Cut along the paper, about 1 inch apart. You can cut it closer or further apart depending on your preference. You just want it to look like fringe. When you're done, separate the fringed edges and fluff. Use a hot glue gun to glue the fringe to the paper wings.

Make a harness. To make a harness so you can place it on your back, connect ribbon or thin strips of material to the wings. You can connect them with either tape or staples directly onto the paper. You can also tie ribbon or strips of paper directly to the hangers. Before securing the straps, adjust them so they are short enough that the wings will not fall off.


Comments
0 comment