
views
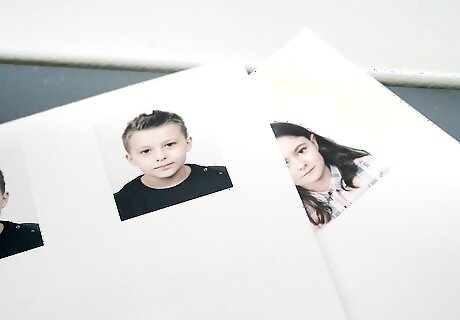
Choose a recent picture of your son or daughter. In case your child ever goes missing, having a good picture of them to provide to the police will be extremely valuable. Pick a picture that is clear and well-lit, so that you can easily see your child's face. Avoid using a full-body shot - instead, choose one where just your child's face and shoulders are visible. If possible, use a picture with a light background, or at least one with a solid-colored background, to ensure that your child's face is the focus of the image. If you don't have a good enough picture, you can always take one yourself with these considerations in mind.

Write down the information you'd like to put on the card. It's up to you to decide how much personal information you'd like to include on your child's ID card. While you may not want to put down all of their personal information, some things you may want to include are: Your child's name Your child's date of birth Your child's gender Your child's hair and eye color Your child's height and weight Any allergies, medical conditions, or disabilities your child has Any emergency contact information
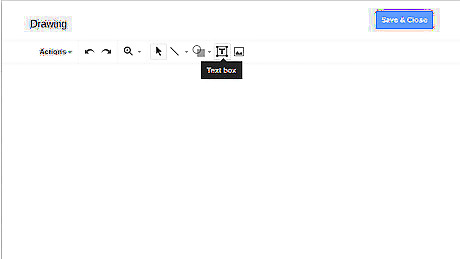
Create a text box on your computer. To do this, open up a program like Microsoft Word or Google Docs. Remember to make the text box a similar size as a credit card (roughly 2x3 inches), so that you can easily keep a copy of the ID in your wallet.
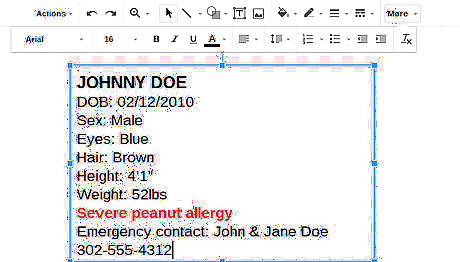
Type your child's information in the box. Input all of the information you'd like to include, and play around with the formatting until you're happy with how it looks. Use a font that's clear and easy to read, such as Arial or Times New Roman. You can use colors, bold, italics, or underlines to draw attention to the most important pieces of information on the card.
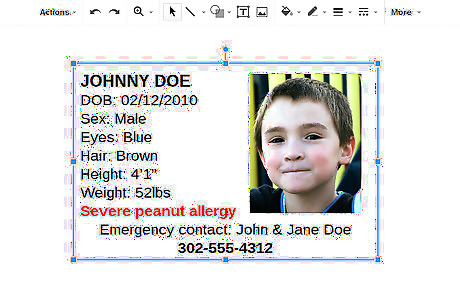
Add your child's picture. To complete the ID card, insert a copy of the picture you chose earlier, and fit it into your text box. The image should be approximately 1.5x1.5 inches, and is usually placed in the upper right corner of the card.
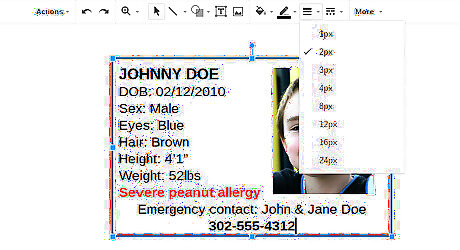
Insert a border. To make a border around your child's ID card, adjust the line weight as shown, using whichever line weight you feel looks the best.
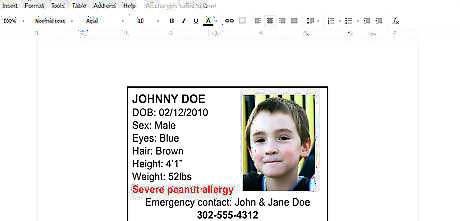
Save your file. Once you're happy with the way your child's ID card looks, save the file so that whenever you need to update it, you won't have to start the process all over again.

Print and laminate the ID card. If possible, print the ID in color so that your child's picture will be as accurate as possible. From there, laminate the ID card to protect it.


Comments
0 comment