
Caulking Hairline Cracks
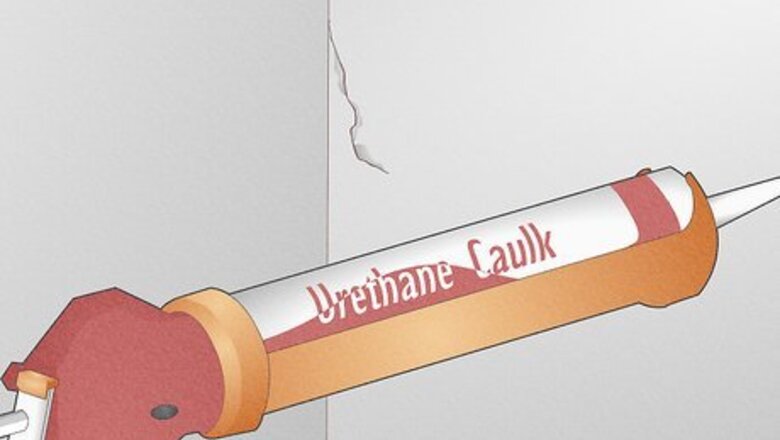
Seal thin, non-structural cracks with urethane caulk. While it's the easiest method, caulking is usually a surface-level, temporary fix. Caulking is best for cracks in joints between a foundation and concrete surfaces, such as a driveway or sidewalk. It's also suitable for shallow hairline cracks in basement floors and non-load bearing walls. Find urethane concrete caulk online or at hardware and home improvement stores. Go with urethane caulk if you're confident the crack doesn't run deeply through your foundation wall or slab. Caulk can't penetrate the interior of a deep crack; a concrete injection kit is the way to go if the crack is more than 2 or 3 in (5.1 or 7.6 cm) deep.Warning: Cracks that are ⁄4 in (0.64 cm) or wider, horizontal cracks, and basement walls that bulge inward are signs of structural problems. Consult a structural engineer for these issues. Look online or ask a local contractor for a referral.
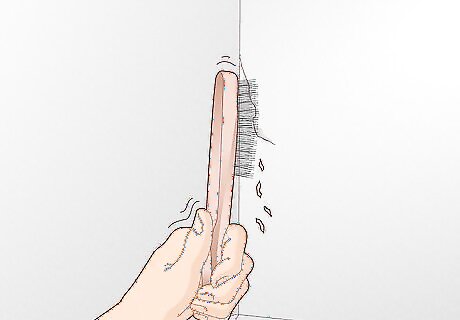
Scrub off any loose concrete, paint, or old filler. Dislodge loose debris around the crack with a wire brush to make the surface more receptive to the caulk. If necessary, knock off thick deposits of mortar, concrete, or old repair compound with a small hammer and chisel. After scrubbing the surface, sweep or vacuum any remaining dust and debris. Lingering dust will prevent the caulk from bonding with the concrete.
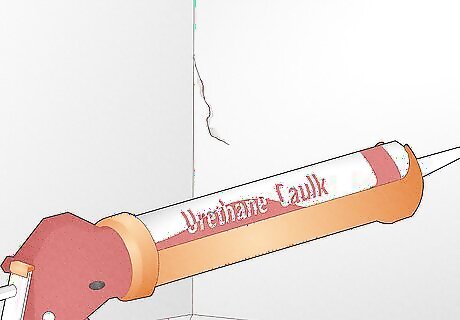
Use a caulk gun to fill the crack with the urethane compound. Load the caulk cartridge into the cradle of a caulk gun, then snip about ⁄8 in (0.32 cm) off of the tip. Squeeze the trigger and slowly run a bead of caulk into the crack. Pause periodically so the compound can seep into the crack as deeply as possible. Wear work gloves when working with urethane caulk. If you get any on your skin, promptly wipe it off with a cloth dipped in paint thinner or mineral spirits.
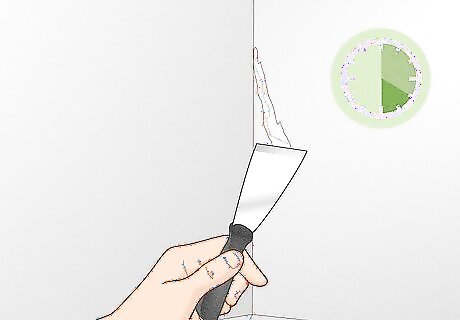
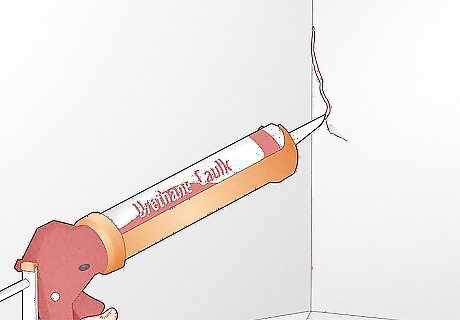
Level the caulked surface, then allow it to cure for 4 to 6 hours. Run a 1 ⁄2 in (3.8 cm) putty knife over the filled crack to smooth the surface and scrape away excess caulk. Level the compound with the surrounding surface, then let it cure for at least 4 to 6 hours, or according to the manufacturer's instructions. Wipe your putty knife with mineral spirits as soon as you've finished using it.
Using a Concrete Injection Kit
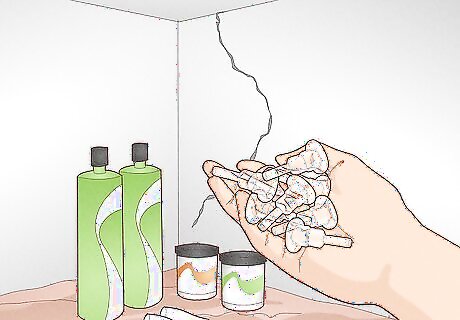
Go with an epoxy or polyurethane injection kit for a longer lasting fix. Buy a kit that includes a 2-part epoxy sealer, caulk-type cartridges of repair compound, and injection ports, which are small plastic nozzles that allow you to fill the inside of the crack. You'll attach the ports to the wall, cover the crack's surface with the 2-part epoxy sealer, then inject the crack with the repair compound. There are 2 types of injection compounds available. Epoxy is the preferred option for dry cracks in load bearing foundation walls and slabs. Since epoxy can't bond to wet surfaces, polyurethane is best for cracks that are actively leaking.The application process is basically the same for both compounds. Feel around the crack to test for dampness. If it feels at all damp, dry it thoroughly with a blow dryer, then check it again after 15 minutes. If it's still dry, go with epoxy; if it's wet and won't dry out, inject it with polyurethane.
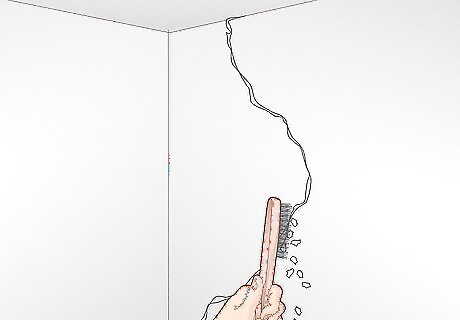
Scrub and sweep the area around the crack. To prepare the surface for repair, remove loose concrete, paint, and old sealer with a wire brush. Then sweep or vacuum up any lingering dust and debris. If you're repairing a crack in a foundation wall, lay a drop cloth beneath the work area to protect your floors from drips of repair compound.
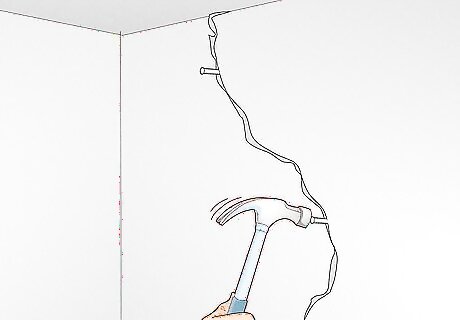
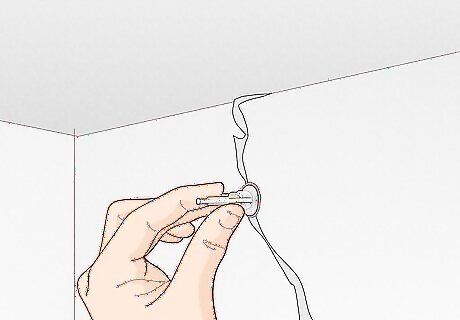
Tap 10d nails halfway into the crack in 12 in (30 cm) intervals. Gently hammer 3 in (7.6 cm) 10d finishing (headless) nails into the crack. They'll help you line up the injection ports' nozzles with the crack. You'll eventually remove the nails after you've slid the injection ports over them. Leave enough of each nail's shaft exposed so about ⁄2 to 1 in (1.3 to 2.5 cm) will protrude past the port's nozzle. That way, you'll be able to grasp the extra length to remove the nail. In a pinch, use pins, toothpicks, or thin coffee stirrers instead of nails to align the ports with the crack.
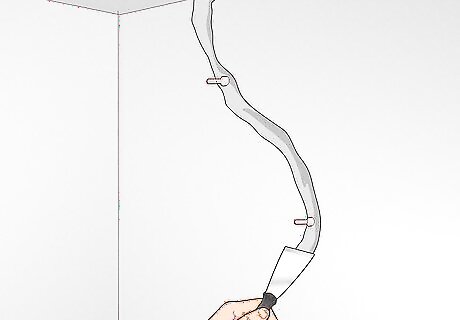
Slide the plastic injection ports over the nails. Scoop smalls amounts of each epoxy part onto a piece of scrap wood, then mix them until they're a uniform gray color. Dab the base of a port with a small amount of epoxy, slide the port over a finishing nail, and press the epoxy-covered base against the foundation surface. Repeat the steps to install the remaining injection ports. Make sure you don't cover the injection port's hole with epoxy. Don't apply so much epoxy that it'll spread and clog the hole when you press the port against the wall. When mixed together, the 2 parts form a compound that will cure and harden. Use separate sticks to scoop out the 2 parts to avoid contaminating the containers.

Remove the nails after installing the ports. Hold the base of the port against the wall with one hand. With the other, pinch the length of the nail that protrudes past the port's nozzle, then pull the nail directly out of the wall. Continue removing the remaining nails before injecting epoxy into the ports.
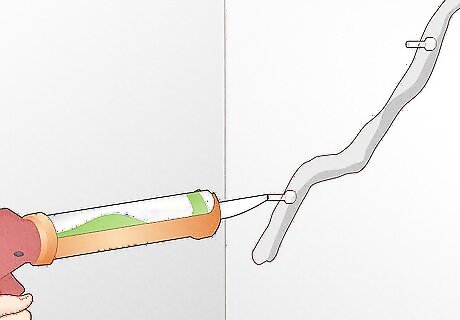
Spread the 2-part epoxy over the crack and injection ports' bases. Mix together the 2-part epoxy, and spread it over the crack with a trowel or putty knife. Cover the crack and the injector port bases with a ⁄8 in (0.32 cm) thick layer, and spread the compound about 1 in (2.5 cm) on either side of the crack. Allow the layer to cure for 6 to 10 hours, or according to the kit's instructions. Check your product's instructions for the amount of 2-part epoxy needed to cover the crack's surface area. Scoop out the recommended amounts of each part of epoxy with separate sticks, then mix them together on a piece of scrap wood with a clean putty knife. Wipe your putty knife with a rag and mineral spirits or paint thinner as soon as you've finished spreading the epoxy over the crack. The compound will be tough to remove once it has cured.
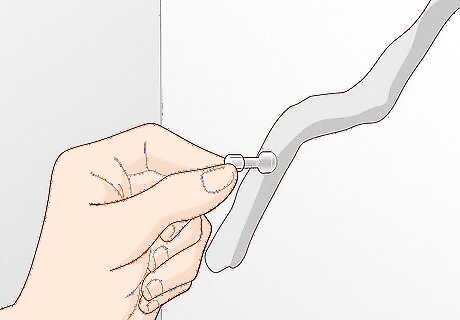
Fill the lowest port until repair compound oozes out of the one above it. Fit the cartridge of repair compound into a caulk gun, then snip about ⁄8 in (0.32 cm) off of the tip. Insert the cartridge tip into the lowest port's nozzle, and squeeze the caulk gun's trigger. Keep squeezing the trigger until the compound starts seeping out of the port directly above the one you're filling. Use gentle pressure to control the flow as much as possible. Stop squeezing as soon as the compound starts oozing out of the port above the one you're filling. If too much seeps out, excess epoxy could drip onto the walls.
Plug the nozzle, then continue filling each injection port. After injecting the first nozzle, plug it with one of the plastic caps that came with the injection port kit. Then insert the cartridge tip into the next port above the first, and inject it with the compound. Stop squeezing the caulk gun's trigger when the compound oozes out of the port above the one you're injecting. Repeat the steps until you've injected compound into each of the ports.
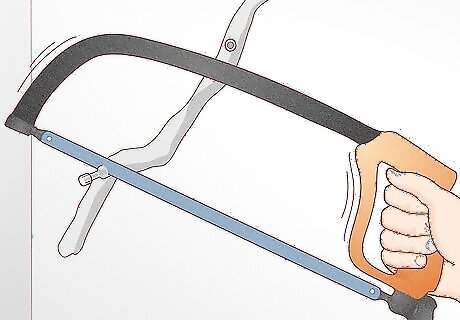
Allow the repair compound to cure, then cut off the injection ports. After you've injected and capped each port, let the compound cure according to your product's instructions. Polyurethane cures within minutes or hours, while epoxy may take up to 5 days. Finally, using a hacksaw, cut off the necks of the injection ports where they meet the foundation wall.Tip: To disguise your work and ensure the crack is sealed, mix a bit of 2-part epoxy compound and patch the spots where you sawed off the ports' necks.


Comments
0 comment