
Creating Photo Slideshows for PC Computers
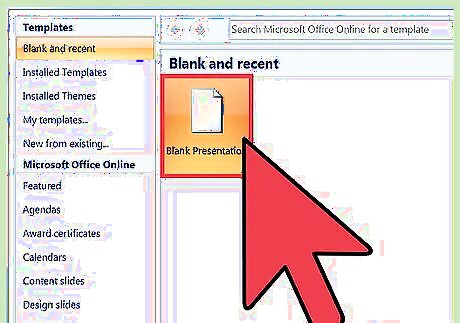
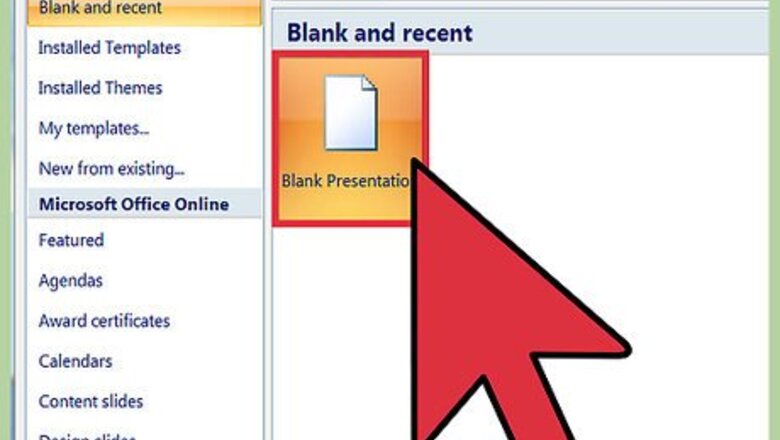
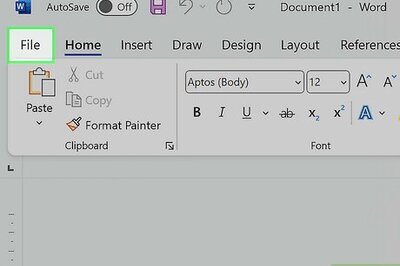
Open PowerPoint and create a new presentation. To do this, click on the PowerPoint icon on your browser. When PowerPoint opens, click on "File" near the top, left-hand corner and then click on "New" listed under "File". From there, you will want to choose "New Presentation" which will open up a new slide show for you to start uploading pictures to.
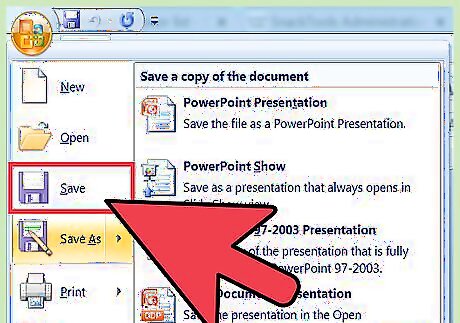
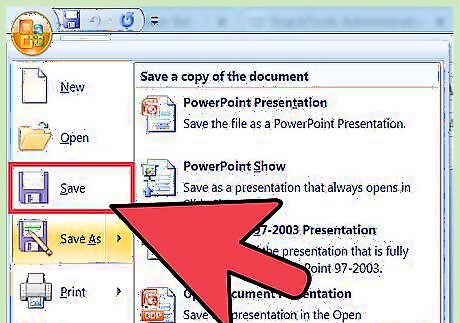
Save your PowerPoint right away. You can do this by clicking on the flash drive icon located at the top, right-hand side of the presentation screen. You will then be able to name your presentation and choose where you want to store the file. Remember to save your presentation after something that will help you to remember what pictures are in the file. This will help you to locate them later on.

Name the title page. Think of a title, and click in the box to type. You can add a name, date, or picture to your title page.
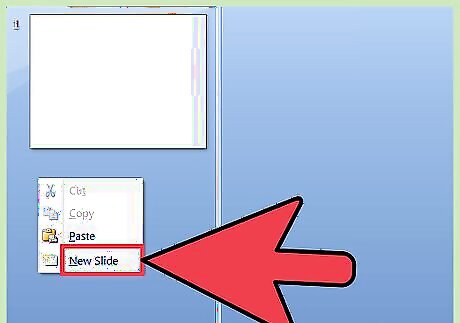
Add slides to your slideshow. There are many different slide layouts and graphics to choose from. You can go to either "Home" or "Insert" and select "New Slide". You can also right-click any slide displayed in the panel to the left and select "New Slide". Select a layout that will accommodate your image, such as a slide with a title box and an image box, a slide with just an image box, or even a blank slide.
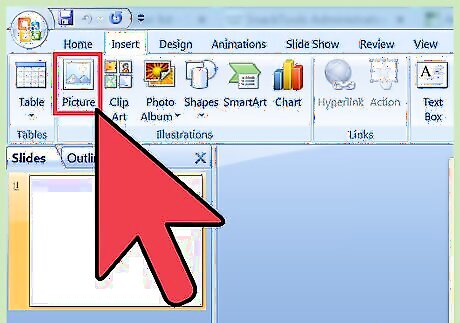
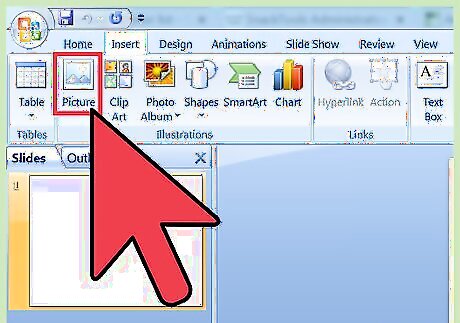
Import pictures to your slides. You can choose to either add one picture per slide or several. It is totally up to you. Double-click inside the image box (or go to Insert > Picture > From File), then browse to the desired image. Click "Okay" or "Insert" to add the image. If you don't like the way it looks, select the image and click on "Picture" to change it out for a different one. You can also select the image and hit "Delete" to remove the picture.
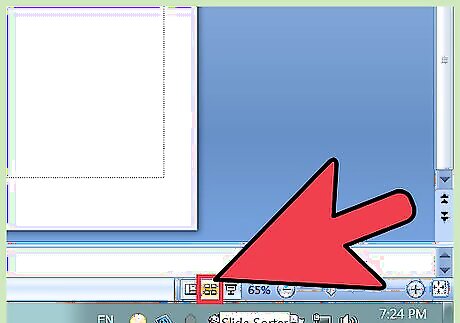
Rearrange the photo order if necessary. Using the slide sorter will make it easier for you to determine the best order for the slides. Locate the "Slide Sorter" button near the bottom of the image pane. Then, click and drag the slides to the desired destinations.
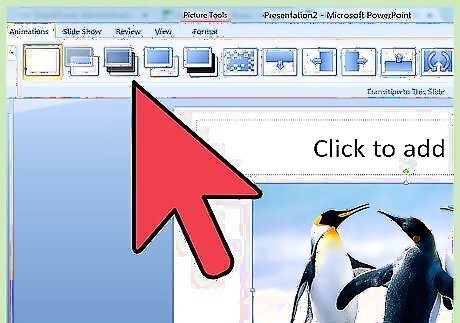
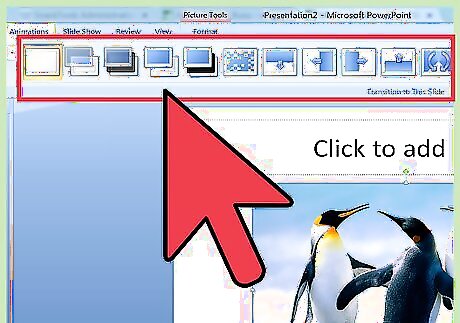
Add transitions to your slide shows. Good transitions help tie the show together and make it flow smoothly from one picture to the next. Simply click on the "Transitions" tab at the top of the bar and play around with the different options offered.
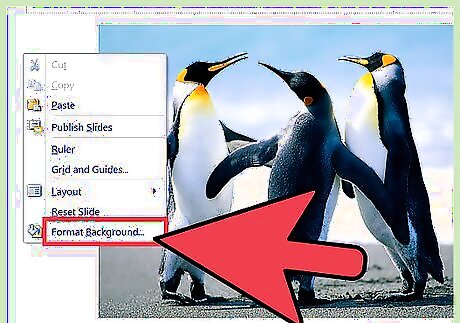
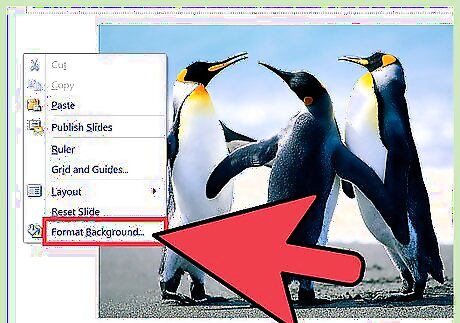
Add a background. If you don’t like the white space on the edges of your images, right-click on any slide, select "Format Background", then manipulate the background fill. You can use a solid fill, a gradient fill, etc. and modify color, direction, and transparency. To give your slides a uniform look, click "Apply to All".

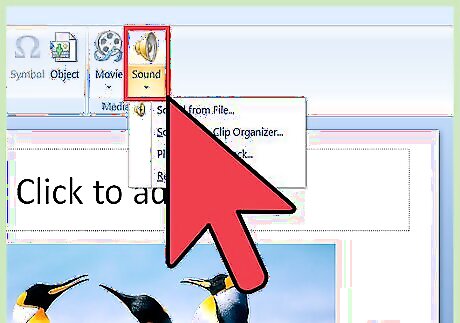
Add background music to your slide shows. If you have music downloaded to your computer, you can add it to your slideshow to make it extra special. The music clip can help break up the montage and is a great way to make the slideshow more engaging. To add music, click on the movies and audio icon located under the "Insert" tab. First, go to "Audio from file", and then, click on "Music" to pull up your music. When you choose the song you want, click on the song, and press "Link to file" before pressing "Insert". You can choose if the song plays for just one slide or the entire presentation by clicking on "Format Audio" next to the "Home" button, and then, clicking on "Play Across Slides" under "Audio Options".
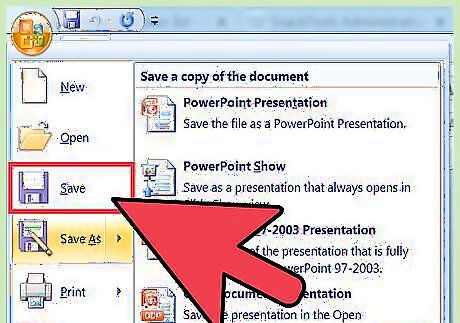
Save your PowerPoint slideshow before you finish. When you are done adding photos and graphics, be sure to save your show before exiting out. If you already named and saved your presentation at the very beginning, all you have to do is click the flash drive icon at the top, left-hand corner again.
Creating Photo Slideshows for Mac Computers

Open PowerPoint by double-clicking on the icon. When PowerPoint opens, you will see numerous designs appear that you can select from. Choose the one that you want to use by clicking on it and then clicking on "Choose".
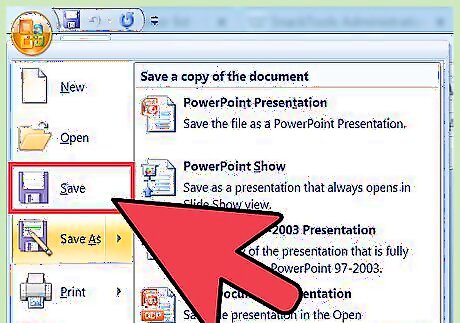
Save your PowerPoint right away. You can do this by clicking on the flash drive icon located at the top-right hand side of the presentation screen. Here, you will name your presentation and choose where you want to store the file. Remember to save your presentation after something that will help you to remember what pictures are in the file. This will help you to locate them later on.

Name the title page. Think of a title, and click in the box to type. You can add a name, date, or picture to your title page.
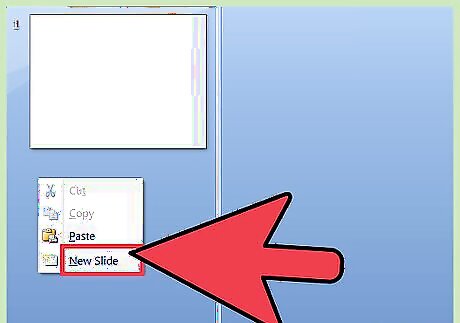
Add slides to your slideshow. There are many different slide layouts and graphics to choose from. You can go to either "Home" or "Insert" and select "New Slide". You can also double-click any slide displayed in the panel to the left and select "New Slide". Select a layout that will accommodate your image, such as a slide with a title box and an image box, a slide with just an image box, or even a blank slide.
Begin adding your photos. Make sure that the "Home" button is clicked and then click on the picture dropdown under "Insert". Several options will appear, but the one you need will say "picture from file". A list of documents will pop up and then you can click on "Photos" on the left-hand side, or if you have your photos saved on a flash drive, click on that file instead. This is where any pictures you have uploaded to your computer will be stored. You can scroll through your photos and choose the ones you want to add to your slideshow by double-clicking on them.

Rearrange the photo order if necessary. Using the slide sorter will make it easier for you to determine the best order for the slides. Locate the "Slide Sorter" button near the bottom of the image pane. Then, click and drag the slides to the desired destinations.
Add transitions to your slide shows. Good transitions help tie the show together and make it flow smoothly from one picture to the next. Simply click on the "Transitions" tab at the top of the bar and play around with the different options offered.
Add a background. If you don’t like the white space on the edges of your images, double-click on any slide, select "Format Background", then manipulate the background fill. You can use a solid fill, a gradient fill, etc. and modify color, direction, and transparency. To give your slides a uniform look, click "Apply to All".
Add background music to your slide shows. If you have music downloaded to your computer, you can add it to your slideshow to make it extra special. The music clip can help break up the montage and is a great way to make the slideshow more engaging. To add music, click on the movies and audio icon located at the top of the PowerPoint screen. Then, click on "Music" and all of your music should appear. When you choose the song you want, drag and drop the file onto one of your slides. You can choose if the song plays for just one slide or the entire presentation by clicking on "Format Audio" next to the "Home" button, and then, clicking on "Play Across Slides" under "Audio Options".
Save your PowerPoint slideshow before you finish. When you are done adding photos and graphics, be sure to save your show before exiting out. If you already named and saved your presentation at the very beginning, all you have to do is click the flash drive icon at the top, left-hand corner again.


Comments
0 comment