

Changing Web Preferences by Website

Open any website in Safari. Beginning with iOS 13, Safari now allows you to choose custom settings for individual websites. Start by visiting a website (e.g., https://www.wikihow.com). Changes you make with this method will only affect the currently-open website. If you want your preferences to affect all websites rather than just for those you customize, see the Changing Web Preferences for All Websites section instead.
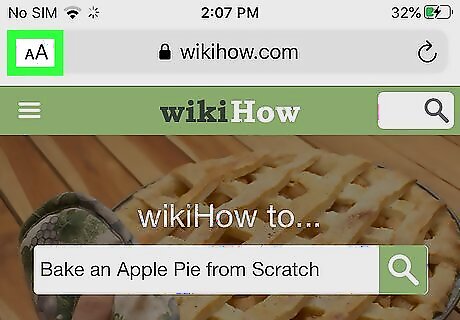
Tap the Aa icon. It's near the top-left corner of the screen in the address bar. All of the settings you can control for the currently-open website appear in this menu.
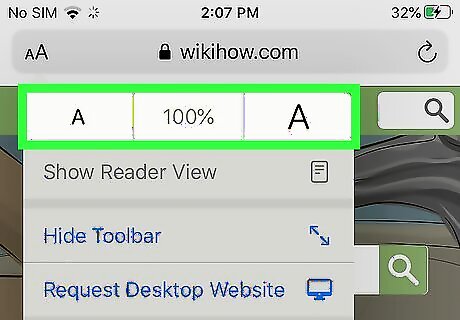
Adjust the font size. The default zoom amount (100%) appears at the top of the menu. Tap the smaller A on the left to decrease the default font size, or the larger A on the right to increase it. Continue taping until you're satisfied with the new size, then tap anywhere on the page to close the window.
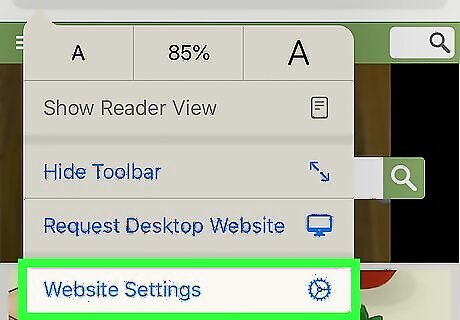
Tap Aa again and select Website Settings. It's the last option. This opens the settings panel for the currently-open website.
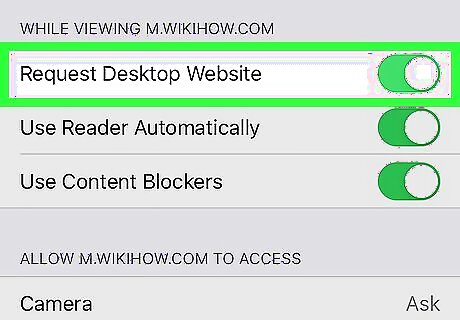
Toggle the "Request Desktop Website" switch to the desired position. Desktop Mode displays a website the same was as it would appear when you're using a computer. Sometimes Desktop Mode can display options that aren't available in a site's mobile version. To set the current website to always appear as the desktop browser version, you can slide the "Request Desktop Website" switch to On (green). If not, leave it Off (gray).

Toggle the "Use Reader Automatically" switch to the desired position. Reader mode (not available for all websites) displays websites with less filler for a more streamlined reading experience. To always display the current website in Reader view, slide the "Use Reader Automatically" switch to On (green). Otherwise, leave it Off (gray).

Toggle the "Use Content Blockers" switch to the desired position. If you've installed third-party content blocking apps (like ad-blockers), you can disable them by website. Slide the switch to the On (green) position to allow your content blocker(s) to run normally on this site, or leave it Off (gray) to disable it on this site only.

Customize the site's access to your camera, microphone, and location. The second section allows you to choose when and how the current site can access these features of your iPhone. Camera, Microphone, and/or Location to choose your preference for each feature. Select Ask on a feature if you'd like to be asked each time the site tries to access the feature (default). Select Deny if you never want the site to access the feature. Select Allow to always allow the site to access the feature.

Tap Done when finished. It's the blue link at the top-left corner of the screen. Your settings for the current site are now saved.
Changing Web Preferences for All Websites
Open your iPhone or iPad's Settings iPhone Settings App Icon. It's the gear icon typically found on the home screen.

Scroll down and tap Safari. It's in the 5th group of settings.
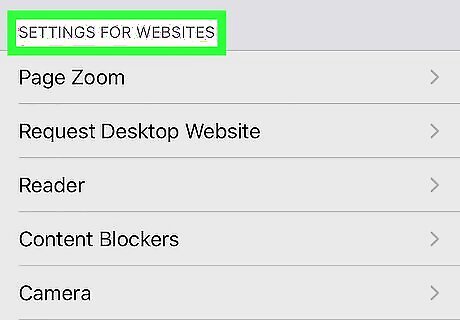
Scroll down to the "SETTINGS FOR WEBSITES" SECTION. It's toward the bottom of the menu. This section is where you can control how all websites appear in Safari, as well as whether sites can access features like your camera, microphone, and location. It is also possible to customize these settings on a per-website basis. See this method to learn how. Changing your web preferences using this method will not affect sites you've customized individually.

Tap Page Zoom to adjust the default font size. The default font size (100%) appears with a blue check mark, but you can choose a different magnification level if you wish.

Tap Request Desktop Website to adjust your default view. Desktop versions of websites are not optimized for small phone screens, but sometimes you'll need to see a desktop version of a site for a specific purpose. Toggle the switch On (green) to always view the desktop version of websites, or Off (gray) to use optimized mobile sites when available.
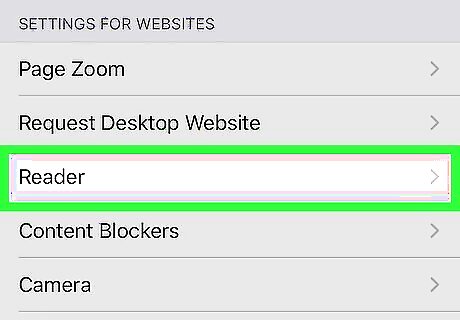
Tap Reader to set Reader mode preferences. Reader mode (not available for all websites) displays websites with less filler (photos, ads, and videos) for a more streamlined reading experience. To automatically display compatible sites in Reader Mode, slide the "Other Websites" switch to On (green).

Customize websites' access to your camera, microphone, and location. Tap Camera, Microphone, and/or Location to choose your preference for each feature on all websites: Select Ask on a feature if you'd like to be asked each time any site tries to access the feature (default). Select Deny if you never want websites to access the feature. Select Allow to always allow websites to access the feature.
Changing General Safari Settings

Open your iPhone or iPad's Settings iPhone Settings App Icon. It's the gear icon typically found on the home screen.

Scroll down and tap Safari. It's in the 5th group of settings.

Tap Siri & Search to customize Siri & Search settings. This option is at the top of the menu. Use the sliders in the "IN SAFARI" section at the top to choose whether Siri has access to Safari. Use the sliders in the "IN SEARCH" section to customize whether Safari options show when searching your iPhone/iPad or using the Shortcuts app. Tap the back button when you're finished.
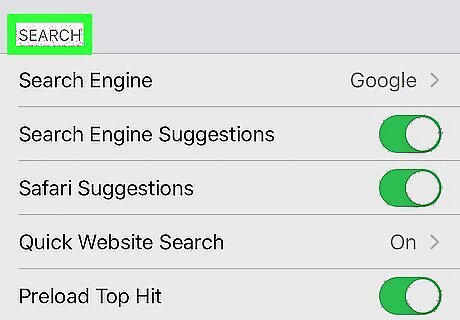
Modify your default search preferences in the "SEARCH" section. The settings in this section determine the behavior of performing web searches in Safari's address/search bar. You can choose a default search engine (e.g., Google), enable suggestions, and more.
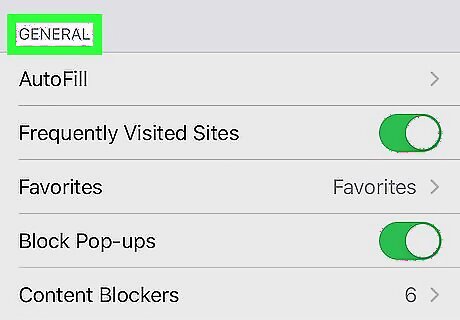
Adjust your preferences in the "GENERAL" section. It's below the "SEARCH" section. Some of the options in this section: Tap AutoFill to adjust which information appears automatically in form fields, such as your name, address, phone number, email, and credit card info. Pop-up ads are blocked in Safari by default. If you'd like to see pop-up ads on websites, slide the "Block Pop-ups" switch to the Off (gray) position. Tap Downloads to choose where to save files and media you download from websites. You'll have the option to choose a cloud storage service or your iPhone/iPad.
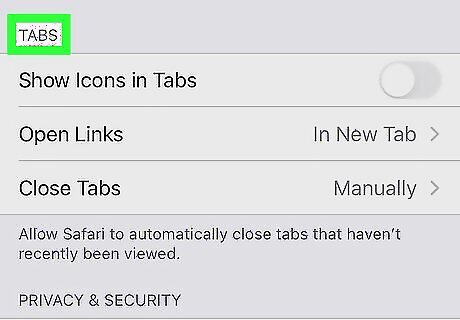
Change tab behavior in the "TABS" section. This section is where you can adjust the way tabs appear when you tap the Tabs icon (the two overlapping squares at the bottom-right corner of Safari). You can also customize your preferences for the behavior of the tabs themselves.

Set your preferences in the "Privacy & Security" section. To allow sites and services to track your browsing anywhere on the web, slide the "Prevent Cross-Site Tracking" switch to the Off (gray) position. To retain your privacy, you can leave this switch in the On (green) position. Cookies are used by websites to keep track of your visits, preferences, and login information (for sites that require username/password access).The "Block All Cookies" switch is Off (gray) by default, but you can enable it by toggling it to the On (green) position. Safari will display a warning message if a website you visit is deemed fraudulent in some way. If you don't want to see these messages, you can toggle the "Fraudulent Website Warning" switch to the Off (gray) position. Adjust the "Check for Apple Pay" switch to reflect your desired Apple Pay behavior on all websites.
Tap Advanced for advanced and experimental features. If you want to choose your preferences for running JavaScript, use the Web Inspector to evaluate code, or check out experimental features for developers, tap this link on the bottom of the menu to view your options.


Comments
0 comment