
- Drill 5 to 8 holes in a suspension platform. Thread a sail and a striker, then attach it to the center of the platform.
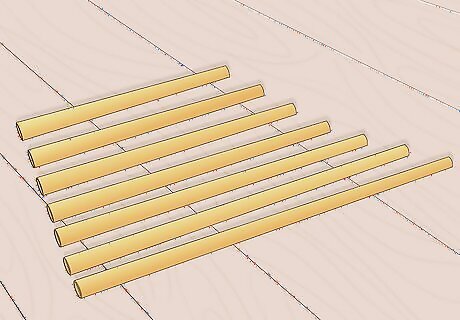
- Cut your chimes to different lengths to create multiple notes. Drill holes in the top of the chimes so you can thread them.
- Use cord to tie the chimes to the suspension platform.
Materials

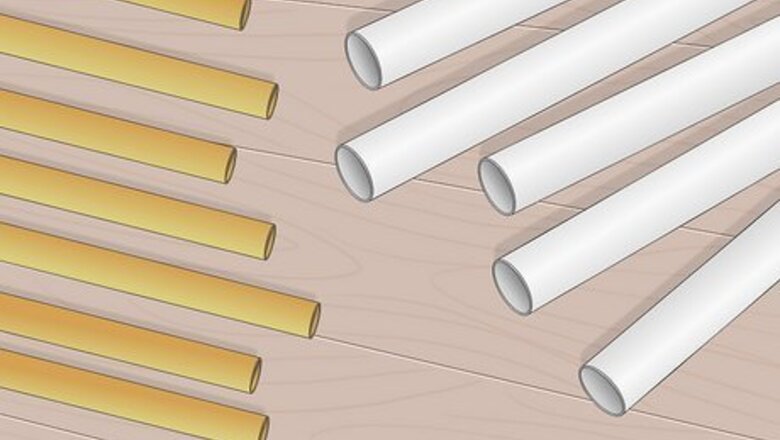
Choose metal tubes or pipes to produce vibrations. The sound the chimes will make depends on many factors, such as what the chimes are made of, how long they are, and how thick they are. The most common substances for chimes are metal tubes, pipes, and rods, which you can find at hardware stores, craft stores, or from scrap metal. Try to choose pipes that have a uniform thickness on all sides for an even tone. Pipes and tubes are the same in wind chimes. Rods are not hollow and sustain notes longer. Hard metals such as steel and aluminum produce sharper tones. Soft metals such as copper produce softer tones. Metal objects are good at producing vibrations, so non-metal chimes such as glass sound more hollow. To test out the sounds of different metal pipes such as copper or aluminum, visit a chime store or rap on the pipes with something that creates vibration, such as a piece of wood. You’ll be creating 5 to 8 chimes out of your pipes or rods. Depending on how long you’d like your chimes to be, you may need to buy multiple pipes and rods, or just 1 very long one.
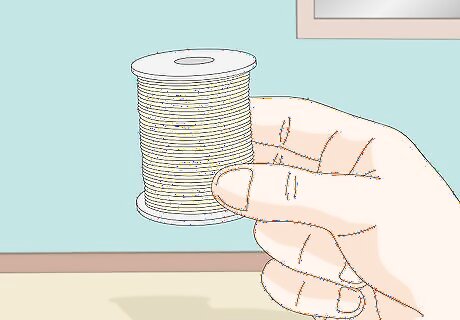
Buy synthetic cord to hold the pipes. These lines connect the base from which the chimes dangle to whatever holds the wind chime. Cords such as strong nylon are good for bearing the weight of the wind chime and can also be used when connecting the chimes and the striker. The support line material has little impact on the sound. It's how you hang the chimes that will determine sound, so choose line materials that will last. If you want to hang the chime from a hook or a tree, buy a metal ring to tie to the lines at the top of the chime.

Pick out a wooden striker. Also called a clapper, the striker is the piece that fits between the chimes and bumps into them to create the vibrations that cause sound. Possible choices for strikers include redwood or hockey pucks. Strikers are often circular so that they can hit all chimes equally. Strikers can also be star-shaped, but these hit all chimes at the same time with less force.
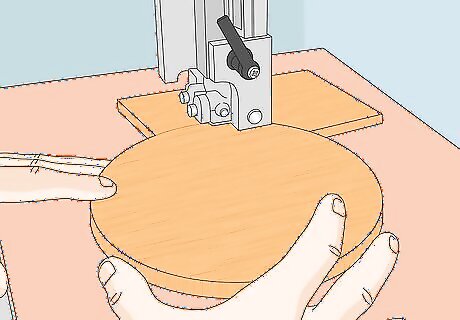
Cut a wooden suspension platform that’s bigger than the striker. The platform holds the chimes, letting them hang around the object that will strike them. Cut a circular piece of wood big enough for your design that’s 1 to 2 in (2.5 to 5.1 cm) wider than the striker. Suspension platforms are often made out of wood, metal, or plastic.
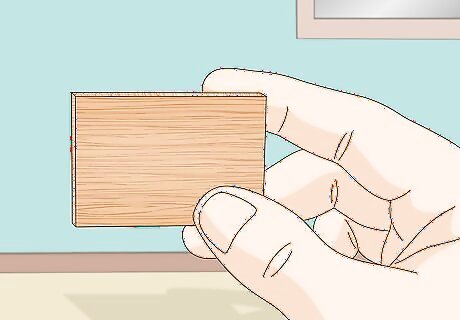
Pick out a block of wood for the sail. The sail is the part that hangs from the striker. Extending lower than the chimes, it gets caught up in the wind, forcing the striker to move into the chimes. Sails are often rectangular or rounded and made of a substance that can be moved by a decent wind, such as a block of wood. The sail can be carved from wood into many artistic forms, such as animal shapes, but you may find it easier to choose a simple block of wood that you can drill into and hang from the striker with a suspension line. A small sail will be less durable, but a bigger sail will require more wind to move.
Suspension Platform

Mark 5 to 8 points on the base. Find the center of the base and mark it. Then, measure 5 to 8 equidistant points around the edge of the base that are all equally as far away from the center. Mark those points with a pencil as well. Mark the other side of the base, too, to indicate where you plan on drilling holes to make the base hang from the wind chime's point of suspension if needed. Keep the holes at least ⁄4 in (0.64 cm) away from the edge of the base.
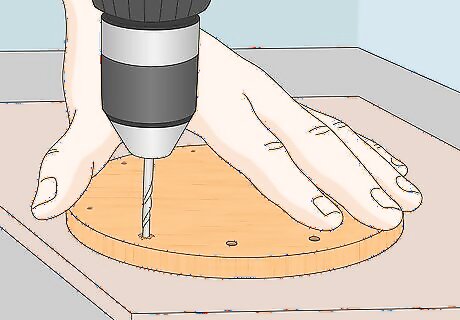
Drill the holes with a 1/8 inch drill bit. Clamp the base to a work bench or table, then use a drill with a drill bit. Drill through each marked point, and then drill through the very center of the base (to create an opening for the striker).

Thread the sail and striker with a piece of suspension line. The length of the line is up to you: it all depends on how long you’d like these pieces to hang. For a 5 ft (1.5 m) thread, for example, fold the thread in half, then pull it through the sail and knot it. Make a second large knot where the striker will hang about 16 in (41 cm) or less above, then thread it through the striker. Try to keep the sail close to the bottom of the longest chime. The longer the sail's support line, the stronger the wind has to be to move the sail and its extra weight. Remember that wind velocity is often stronger the higher you hang the wind chime, so a sail too close to the ground also won't cause the chimes to sound as much.
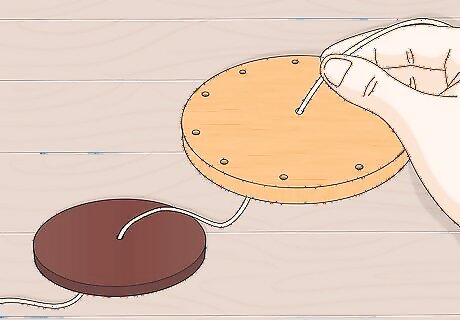
Attach the striker to the base with cord. Take the thread coming out of the top of the striker and run it through the hole you made in the center of the platform. On the top side, knot the thread securely. If you decide you don’t like the length of the striker, you can adjust it later on.
Creating Chimes
Plan the tones that you want. The length and size that you cut your pipes determines which tones your chimes will make. In general, shorter chimes produce higher-pitched tones, while longer chimes create lower-pitched tones. Many commercial chimes play a 5-note pentatonic scale. For a 1.5 in (3.8 cm) wide pipe on a C octave, for instance, you might use these measurements: C9: 6.5 in (17 cm) long pipe C8: 9.18 in (23.3 cm) long pipe C7: 13 in (33 cm) long pipe C6: 18.9 in (48 cm) long pipe C5: 26 in (66 cm) long pipe Looking for other scales? Check out this chart to find the notes and their chime measurements.
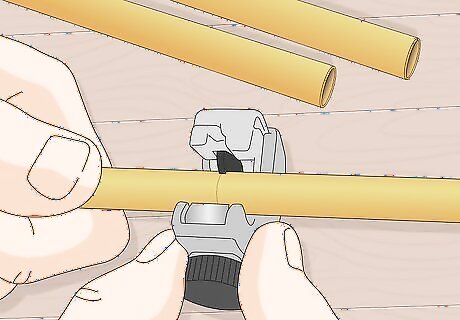
Cut the chimes using a pipe cutter, hacksaw, or hand saw. Measure the length onto your chime material and mark it with a marker. Clamp the chime onto a workbench, then use your tool of choice to cut all the way through. For hand saws, be sure to choose a blade that is made for the kind of metal you are cutting. Your local hardware store may be able to cut the pipes for you. Just be sure to have your measurements handy. If you have a piano, tune the chimes by playing a note and matching the sound they make when you rap on them. Then, cut off more of the chime as needed.
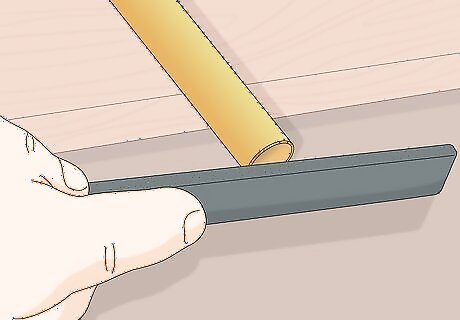
Sand the edges to get rid of sharp points. Wrap the pipes in towels to protect them. Use a file or sander to wear down the sharp edges on points and get rid of any areas that might cut your skin or catch on your clothing. If you didn't cut enough off the pipes, you can sand off the excess here. Unless you're removing significant portions of the material, which makes the pitch higher, the chime's sound won't change.
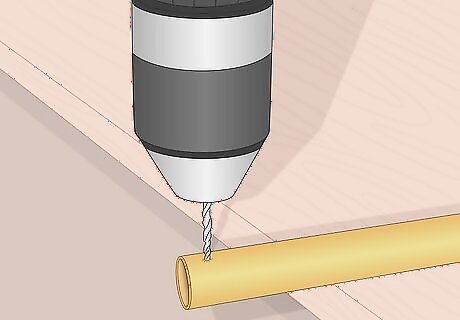
Drill holes into the top of the pipes. The top holes are how the cord threads through each pipe to attach it to the base. Clamp each chime down once again, then use a 1/8 inch drill bit to drill a hole straight through the pipe.
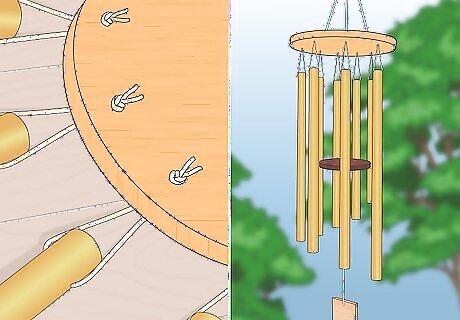
Tie each chime about ⁄4 in (1.9 cm) below the suspension platform. Cut a length of thread for each chime, then pull the thread through the holes at the top. Tie the chimes onto the base so they’re all an equal distance from it. Chimes that hang too low are more vulnerable in wind and move more, making the wind chime out of tune because the striker doesn't hit them evenly.


Comments
0 comment