
Drawing Manga Characters

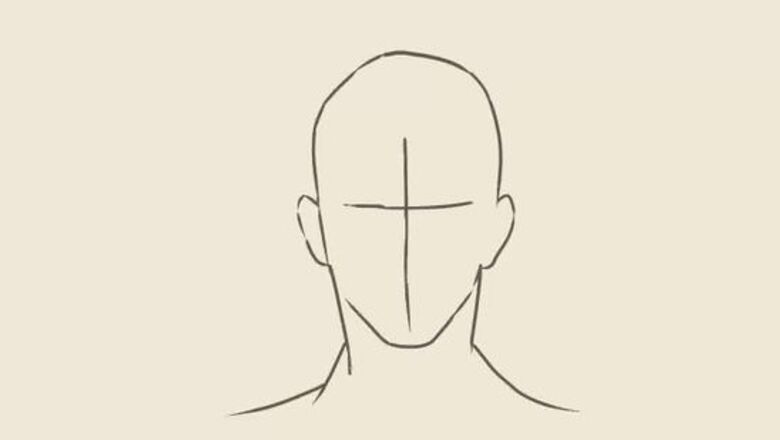
Draw a template of a manga head. Begin by sketching the outline of the head, including the ears, neck, jaw, and shoulders. Draw a “+” or “t” shape in the middle of the face to mark where the eyes and nose will sit. Use this template as a starting point to draw your manga characters. You can also draw a circle to represent the top of the head, then add the chin below. Consider using a drawing tablet and stylus to draw on a computer. This allows you to undo changes or save multiple versions of a drawing, without having to start from scratch on paper.
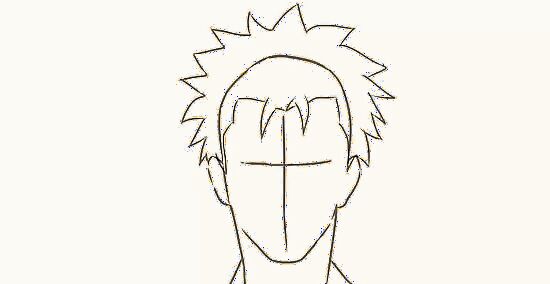
Add manga hair. Choose a basic manga hairstyle like spiky hair or messy hair. For spiky hair, begin drawing waves and spikes above the head, like a lion’s mane. Then add a hairline with small spikes to indicate bangs. If you’re drawing long hair, make sure the hair covers your character’s ears and shoulders, unless it’s pulled back or worn in a bun. Once you’re comfortable drawing a simple hairstyle, experiment with more complicated styles or add effects like shine and zigzag patterns. If you’re drawing on a computer with a tablet and stylus, save multiple versions of your character’s head, then add different hair to each one to see what looks best.
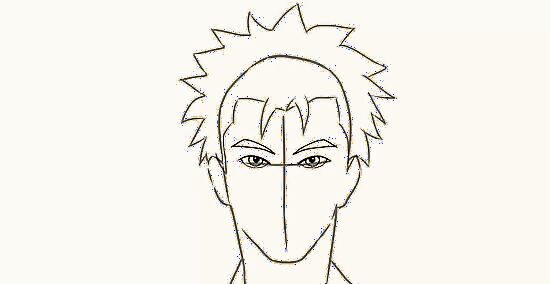
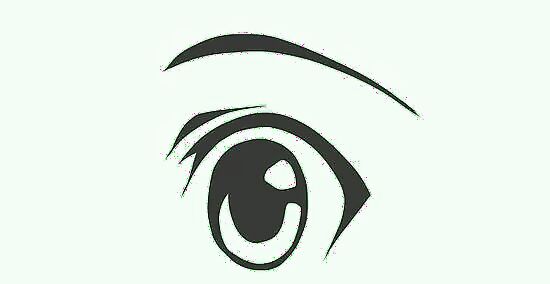
Give your character manga-style eyes. Place the eyes on the horizontal part of the “+” sign, with eyebrows above them. Make the eyes oval-shaped with sharp ends, then add a small circle for the iris and a smaller, shaded-in circle for the pupil. Make the eyebrows roughly knife-shaped, with the sharp “points” facing each other. Experiment with different eyebrow shapes to give your character a different look. For instance, make the eyebrows thin, thick, straight, or curved.
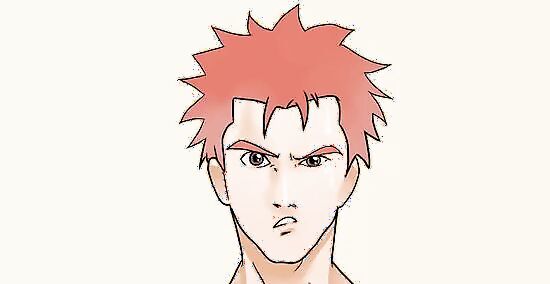
Add a nose and mouth to give your character a facial expression. Draw the mouth to convey a specific emotion. For instance, you could draw a grin to convey happiness or laughter, or draw a snarl to make your character appear angry. Adjust the eyes and eyebrows to match the emotion as well. For example, you could draw downturned eyebrows and squinted eyes to make your character seem furious, or wide eyes with raised eyebrows to convey shock.
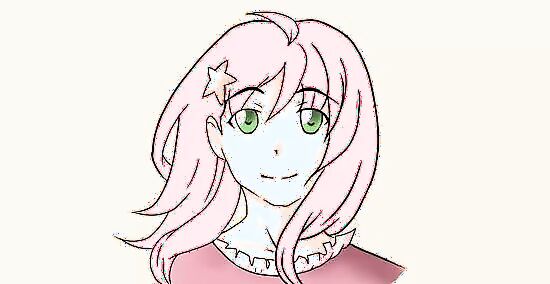
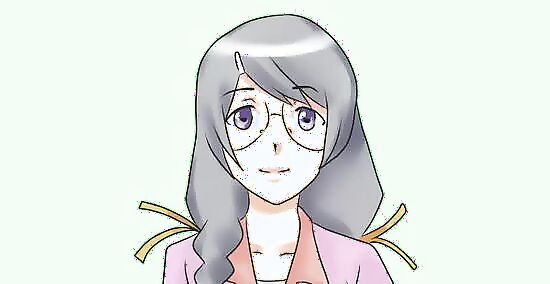
Try drawing feminine faces. Make your character’s nose petite—a small bump with a shadow will do just fine. Give them a narrow, slightly pointed chin and long hair for a more traditionally feminine look. Make the hair pink, blonde, or pastel-colored, and add hair pins, earrings, necklaces, and other jewelry, if you like.
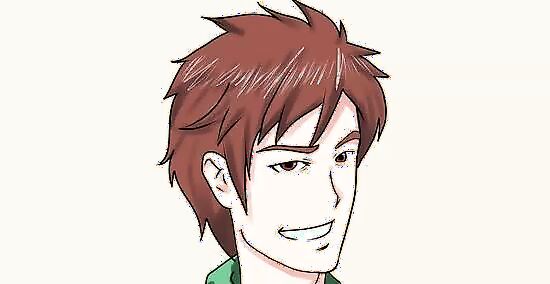
Practice drawing masculine faces. Make the jawline sharp to give your character a mature and masculine look. Give them short or messy “boy” hair. Add a small lump on the throat for an Adam’s apple. Give your character stubble, five o’clock shadow, or full facial hair, if you like.
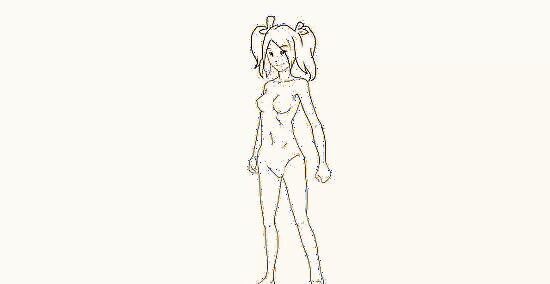
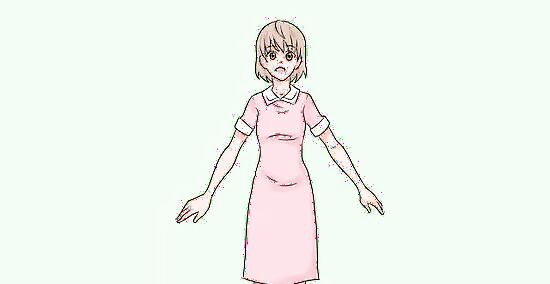
Add a body to your character. Choose a simple pose to practice, such as having your character stand with arms to their sides and feet shoulder-width apart. Don’t worry about adding detailed clothing in your first drafts. Instead, practice until the body and pose look realistic. Once you’ve experimented with a simple pose, try other poses or “action” shots where your character is running, jumping, or moving in some way.
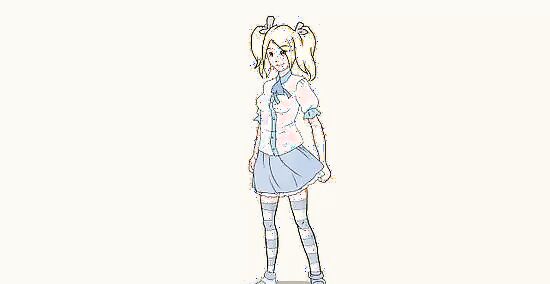
Create an outfit for your character. Start by drawing the clothing on top of a basic manga body. Then erase any unnecessary lines, such as parts of the body shape that are hidden under the clothes. Add a top (like a shirt or blouse), a bottom (pants, shorts, or a skirt), and shoes. You can also add hats, hairpins, and other items to give your character a unique style. Experiment with different outfits and costumes. For instance, you can dress your character like a superhero, warrior, or school kid, to name a few possibilities.
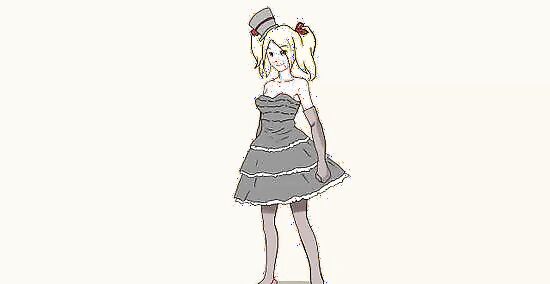
Experiment with gothic-style manga characters. Choose outfits with petticoats, top hats, and dark colors. Give your character darker hair and a sullen expression for a more sinister look. Use a happy or “sweet” facial expression for a more “kawaii” gothic aesthetic.
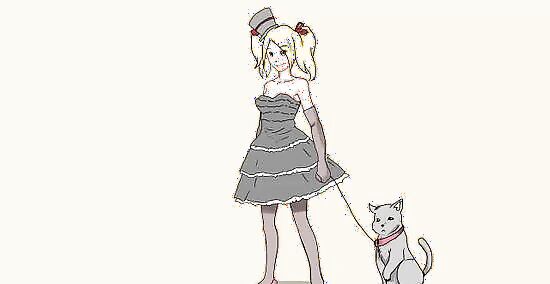
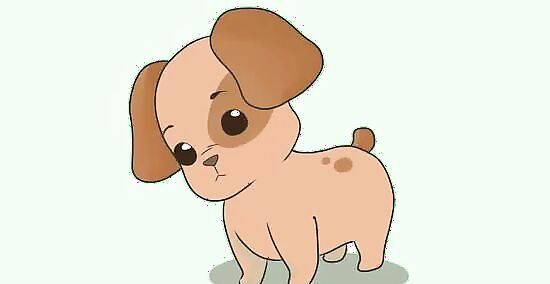
Give your character a pet dog. Experiment with different breeds, sizes, and colors. Give the dog spiky fur to match the anime hair aesthetic. Humanize them by giving them anime-style eyes, just as you would for a human character. Try drawing different poses for your dog: seated, standing, sleeping, tail-wagging, and so on.
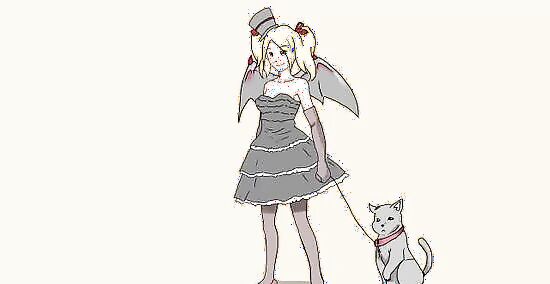
Add wings to your manga character. Draw wings to give your character a supernatural look. Opt for bat wings for a gothic vibe, or try bird, angel, or dragon wings if you prefer. Position the wings so that they protrude from the center of your character’s back, between their shoulder blades. Choose wings that match whatever personality or backstory you’d like to give your character. For instance, a vampire might have bat wings.
Drawing Anime Characters
Practice drawing anime-style eyes. Make your eyes bigger than real human eyes, with large irises and pupils. Add eyebrows and adjust the eye shape to convey different emotions. For instance, to convey emotions like fear or surprise, make your eyes wide and circular with raised eyebrows. Make the eyes slightly narrower for a more masculine look, or slightly larger and wider for a feminine look.
Draw a basic anime character from head to toe. Begin by drawing the head, hair, and facial features. Then add the neck, body, arms, and legs. Draw your character with arms to the sides, but raised slightly. Once the face and body are finished, add clothes on top of the body. Experiment by adding dresses, shirts, pants, shoes, and other basic clothing items. Practice drawing your character in simple poses, like standing with their arms at their sides. Then experiment with other poses or “action shots” where they’re running, jumping, or moving in some way. Erase any unnecessary lines as you go. For instance, if you give your character a full-length dress, you can erase lines for the hips, waist, and knees.

Practice making your characters appear masculine. Give your character a sharp jawline and larger chin for a more masculine appearance. Opt for “boyish” fashion items like baggy pants, dark shirts, sneakers, and a short haircut. Choose traditionally masculine poses, like standing with feet at shoulder-width and the hands in pockets. Make the eyes narrower for a more traditionally masculine gaze.
Try drawing feminine faces. Give your character a narrow jaw and pointed chin for a more traditionally feminine appearance. Opt for long hair, a small nose, and large, rounded eyes. Include bright, colorful, “girlish” clothing like blouses, dresses, and frilled shirts. Experiment with long hairstyles, including braids, bangs, or a ponytail.
Add anime-style pets to your drawings. Give your pet anime-style eyes, just as you would for a human character. Use a neutral or “puppy-eyed” expression for a more vulnerable look, or a wide-eyed “smiling” appearance for a happier look. Give them a soft and rounded shape to appear puppy- or kitten-like, or opt for spiky fur for a mature animal. Feel free to give your pet large ears, small paws, or other “cartoonish” features. It’s your creation, so your animals can look however you want.
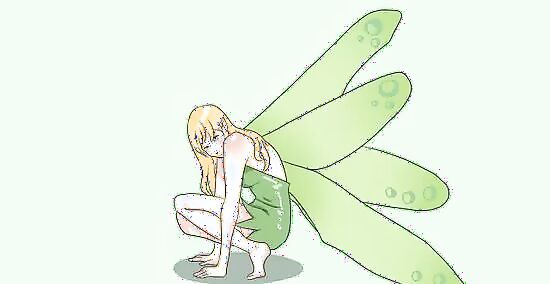
Draw wings to create an anime fairy or angel. Give your character wings to turn them into a fairy, angel, or other winged supernatural creature. Draw four fairy wings as long, feather-shaped blades, like the wings of a dragonfly. For angels, draw two bird-like wings covered with feathers. Make the wings protrude (roughly) from in between your character’s shoulder blades. Color the wings to match your character’s outfit or personality. For example, you could give them blue wings if they’re wearing blue clothes. Add wings to characters in different poses, including flying and standing positions.
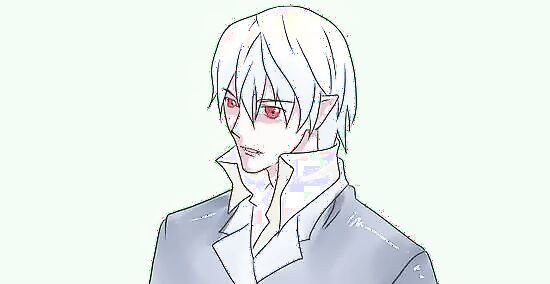
Turn your character into a vampire. Give your character vampire teeth, red eyes, and a menacing or threatening facial expression. Add gothic clothes like a dark coat and high-collared shirt for a classic vampire look. Make your character gaunt with dark circles under their eyes for a scarier appearance.
Using a Stickman Template
Copy your favorite manga drawings, but don't trace them. Use a drawing as a reference and copy it onto a separate piece of paper or computer file. Try to copy it as accurately as possible, then overlay your version over the original (or compare them side-by-side) to see where you can improve. Avoid tracing. Practice drawing freehand to help you improve as an artist. Use this technique to study your favorite manga artists and learn from their styles. Once you get enough practice, you can start drawing your own manga. Eye Styles vary greatly—not just between different manga, but also between characters in the same series. Eyes are very expressive and can tell you a lot about a character’s personality, desires, and intentions. Proportions in manga and anime can vary widely. Traditionally, your character may be anywhere from three to nine heads tall (compared to six or seven heads tall for real human bodies).
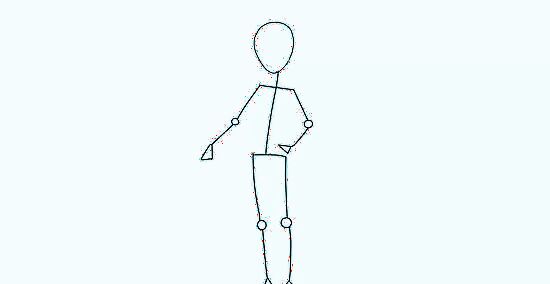
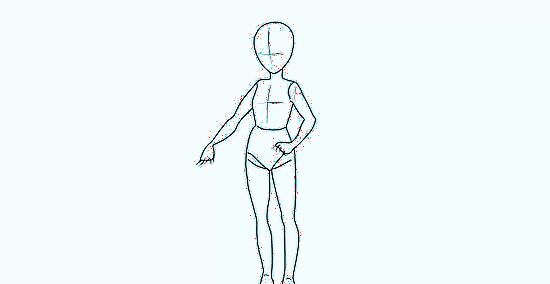
Start drawing “stick men” to learn proportions and poses. Choose a simple pose, like a standing position. Then begin by drawing lines where arms/legs will go. Draw a circle for the head, then a line for the spine, a line for the shoulders (a little below the head, so there's a neck), and a line across for the hips. Draw circles for joints. This lets you easily erase part of a limb and redraw it, without forgetting where the joint was placed. Don't worry if the proportions are not perfect. Your characters’ proportions will improve over time, with practice.
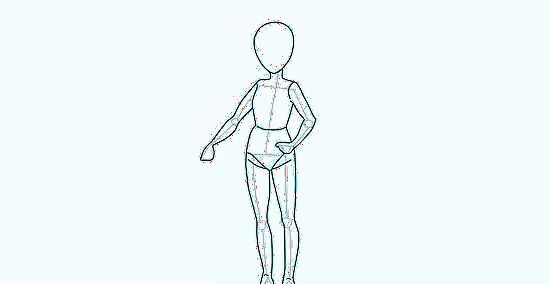
Trace a body over the stick figure. Add arms, legs, a neck, and a torso with hips and a waist. Make the legs slightly narrower at the knees and ankles. Do the same for the arms, making them slightly narrower at the elbow and wrists. This gives the limbs a realistic shape. Indicate which way the head is turned by drawing a vertical line down the length of the head. This line is where the nose and mouth will lie. To make your character look left or right, position the line slightly to the left or right. Add a horizontal line to indicate where the eyes will be. Give masculine characters rectangular torsos and slightly-widened shoulders. For feminine characters, make the hips slightly wider and the shoulders narrower. Draw a sphere or circle to mark the location of the hips, then overlay a more detailed shape. Use ovals or cylinders to mark the locations of limbs, with circles/spheres for the joints. Leave the hands and feet as circles or ovals for now. You can fill in more detail in the next step.
Include more details and erase unnecessary lines. Remove extra lines left over from the original stickman. Add lines where fingers will be. Do the same for toes if your character will be barefoot, or draw an outline for the shape of their shoes. Adjust the waist, neck , and other features as needed to make your character look the way you want. Use a kneaded eraser if you’re drawing with paper and a pencil.
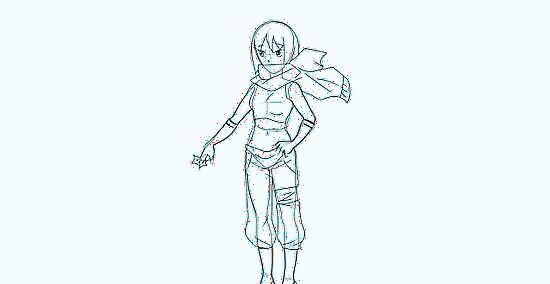
Add facial features, hair, clothes, and other elements. Give your character a facial expression by choosing appropriate eyes, eyebrows, and a mouth. For instance, use narrow eyes, raised eyebrows, and a big grin to convey laughter and happiness. Give them any hair or clothes you like. You could have them wear a superhero costume, casual clothes, or anything outfit that comes to mind. Imagine your character having a certain personality, then pick their clothes accordingly. For instance, a lazy teenager might wear baggy clothes, while a supervillain might wear a unique costume.
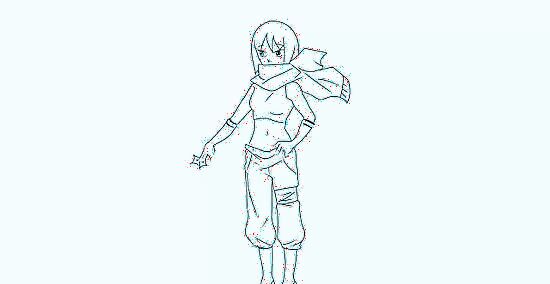
Erase extra lines to prepare your character for coloration. Remove leftover guidelines, odd shapes, or any other elements that aren’t needed for the final draft. Leave in subtle details like pockets and creases on clothing, since these will be useful during coloration. Don’t worry about shading or other textures. You’ll add these in a future step.
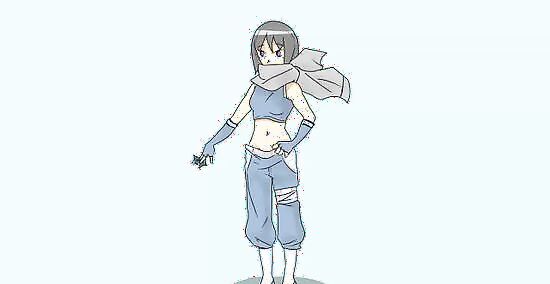
Color in your drawing to bring it to life. Fill in clothes with whatever colors you like. Choose a skin tone and apply it to any exposed skin, including the face, arms, legs, and torso. Add texture and shading to give your character a three-dimensional look. Add a shadow beneath or next to your character to make the scene more lifelike. In the art community, this process is known as “inking.” Make multiple copies of your drawing to give yourself multiple opportunities to practice.


Comments
0 comment