
With a Loom

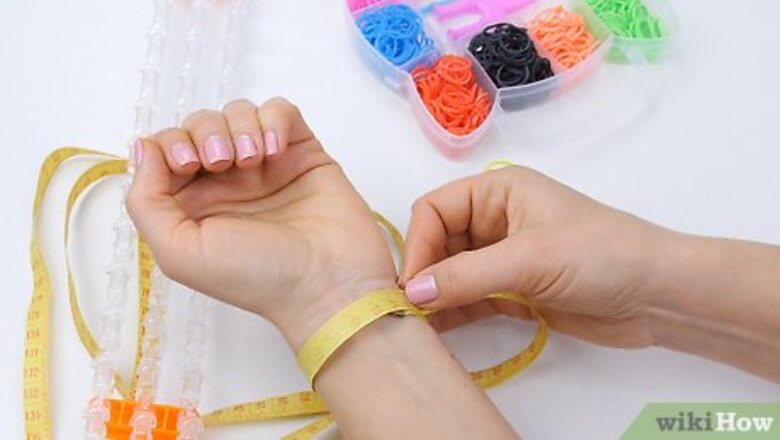
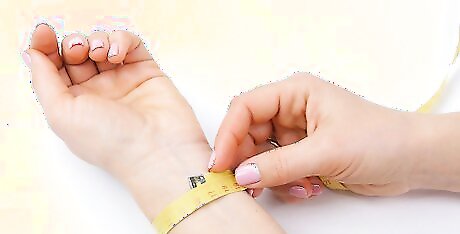
Measure around your wrist to determine how many bands you need. Wrap a measuring tape loosely around your wrist, then record the measurement. Get 8 to 9 bands for every 1 inch (2.5 cm). You can make them all the same color or you can use different colors. If you don't have a measuring tape, wrap a piece of string around your wrist, pinch where the end overlaps, then measure it against a ruler. Rainbow is a popular color scheme, but you can also use 2 colors, like black and white. If you want to make a double-strand fishtail bracelet, double the amount of bands that you need.
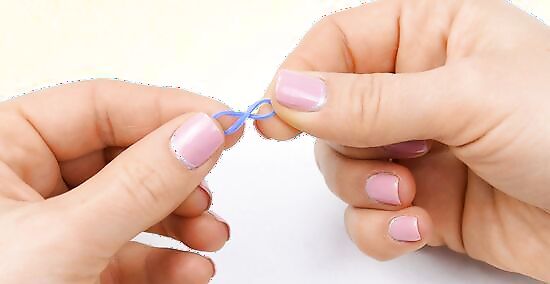
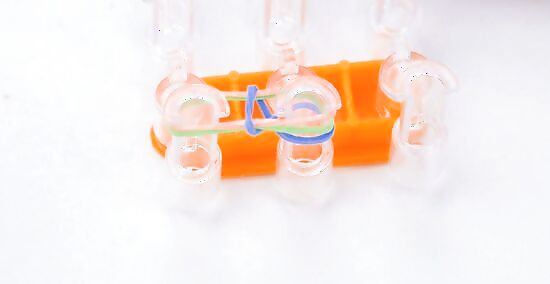
Twist 1 band into a figure-8. Take your first band and stretch it slightly between your fingers. Twist the ends in opposite directions so that it makes a figure-8. This is the only band that you will twist; you won't twist the others. To make double-fishtail, simply use 2 bands of each color. Treat them as a single band.
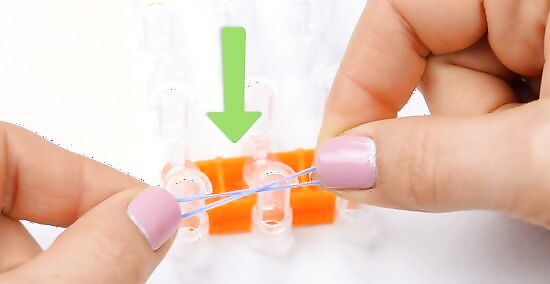
Slide the figure-8 over 2 pegs on your Rainbow Loom. Slide the left side of the figure-8 onto 1 peg, and the right sight onto the peg next to it. Push the band towards the bottom of the pegs so that you have room for 2 more bands. If you don't have a Rainbow Loom, use 2 fingers or 2 pencils instead.
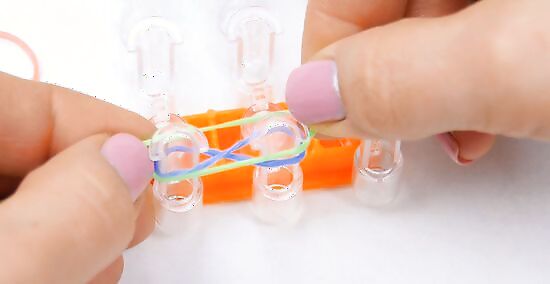
Add 2 more bands but without twisting them. Take your next color, and slide it over the 2 pegs. Take your third color, and slide it over the 2 pegs as well. Leave tiny gaps between the bands so that you can see them clearly. For example, if you started with red to make a rainbow bracelet, your next 2 bands should be orange and yellow. If you are making a double-strand fishtail bracelet, use 2 bands of each color for a total of 4 bands.
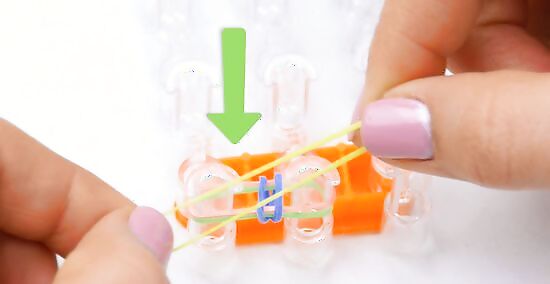
Pull the left end of the bottom band over the left peg. Use the crochet hook that came with your Rainbow Loom to catch the left side of the bottom figure-8 band. Pull it over the left peg and release it on top of the uppermost band. The band will land on top of the third band, right between the 2 pegs. If you lost or broke the hook that came with your kit, you can use a real crochet hook instead. You can find them in the yarn section of a craft store. If you are using your fingers or pencils, you may be able to do this without a crochet hook.

Pull the right end of the bottom band over the right peg. Use your crochet hook to catch the right end of the bottom band. Pull it over the right peg, and release it on top of the uppermost band. You should now have 2 elastics visible on your pegs.
Place your next color onto the pegs without twisting it. Choose the next color in your sequence, and slide the bands over the 2 pegs. You should now have 3 bands on your loom again! For example, if you are making a rainbow bracelet, you'll already have red, orange, and yellow on the bracelet. Your next color will be green.
Pull the bottom band over the left and right pegs. This is just like you pulled the figure-8 band over the pegs earlier. Use the crochet hook to pull the left end of the bottom band over the left peg, and the right end over the right band.

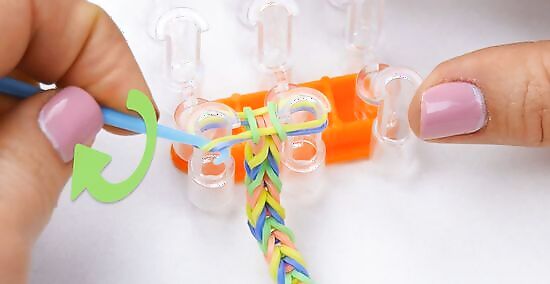
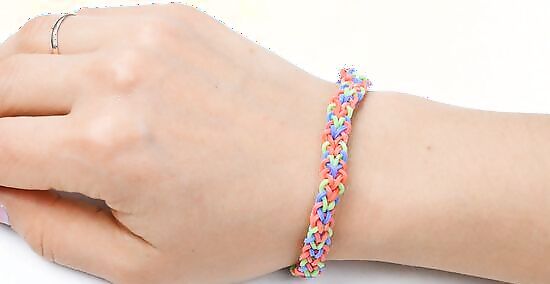
Repeat the process until your bracelet is the length you want it to be. Keep adding 1 band, then pulling the bottom band over the pegs. As you continue to add bands, the bracelet will grow longer. Once it is long enough to wrap around your wrist, stop. The bracelet should be long enough to wrap loosely around your wrist. Don't worry, it will stretch to fit over your hand. Every so often, wrap the bracelet around your wrist to test the length. Don't stretch it.
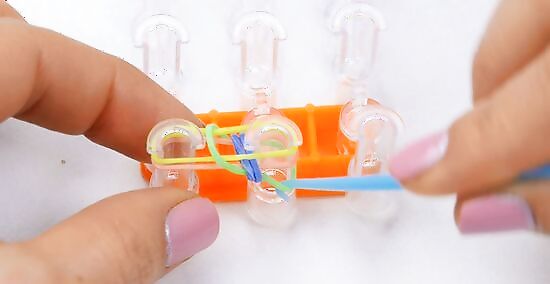
Pull the bottom 2 bands over the left and right pegs. If you have not already, add 1 final band onto the pegs so that you have a total of 3 bands. Slide the crochet hook under the bottom 2 bands on the left peg, and pull them over the peg. Use the crochet hook to pull the bottom 2 bands on the right over the right peg. This step is similar to the previous steps, but instead of pulling 1 band over the pegs, you are pulling 2. When you are done, you should have only 1 band on the Rainbow Loom. If you are doing a double-strand fishtail bracelet, then you will have 1 set of bands left on the pegs.

Use the crochet hook to remove the band from the Rainbow Loom. Use the crochet hook to pull the band off of the right peg. Keep the elastic on the hook, then slip the band off of the left peg and onto the hook as well.

Secure a C-clip to both ends of the bracelet, then remove the hook. Find 1 of the clear, plastic C-clips that came with your packet of Rainbow Loom bands. Hook it over both of the bands that are on the crochet hook, then slide the crochet hook out. Find the other end of the bracelet, and slide both of the bands on the end onto the C-clip as well.
Without a Loom
Measure your wrist to figure out how many bands you need. Wrap a measuring tape around your wrist, then note the measurement. Get 8 to 9 bands for every 1 inch (2.5 cm) of your measurement. You can make the all the same color, but it will be easier to tell which band is which if you use different ones. This method is not recommended for double-strand bracelets. If you don't have a measuring tape, wrap some string around your wrist, find where it overlaps, then measure it against a ruler.
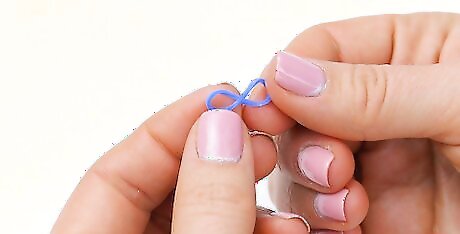
Twist your first band into a figure-8. Take 1 band and give it a gentle stretch. Twist the ends away from each other so that the band makes a figure-8.
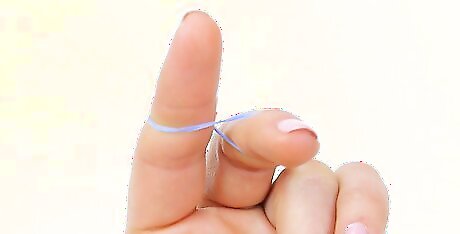
Slide the figure-8 over 2 fingers or 2 pencils. Slide 1 end of the figure-8 over your middle finger, and the other end over your index finger. You can also use 2 pencils instead, but your fingers would be better because of the friction. Use the hand that's most comfortable for you: left or right. This hand will act as the loom; the other hand will act as the hook. While you can use a Rainbow Loom for this method, it will be easier to use 2 fingers or 2 pencils. This is because you need extra-long "pegs" to see what you are doing.

Add 2 bands, but don't twist them. This is just like creating a basic fishtail bracelet. Take the next 2 bands from your color scheme, and slide them over your fingers. Again, do not twist them. For example, if you have a rainbow color scheme, and your first color was red, the next 2 bands should be orange and yellow.
Slide the left and right ends of the bottom band over the top band. Again, this is just like making a basic fishtail braid. Take the left end of the bottom band, and pull it over your left finger. Take the right end of the bottom band, and pull it over your right finger. You should have 2 bands left on your fingers after this step.
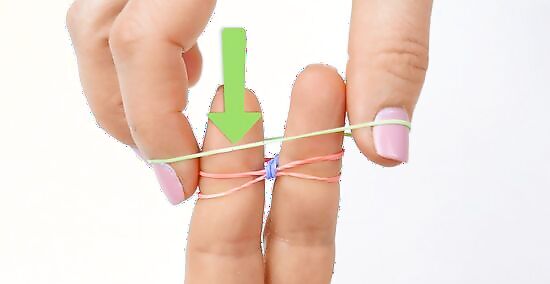
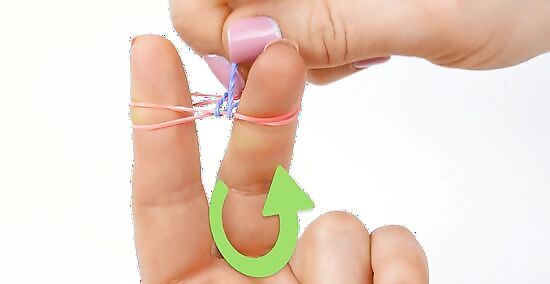
Add a third band over your fingers. This is the final step that is just like creating a basic fishtail bracelet. Pay attention to the next set of steps, because this is where things take a turn! Keep small spaces between the bands, especially the bottom 2 bands. This is important. For example, if your first 3 colors were red, orange, and yellow, your next color is green.
Pull the left side of the middle band down, over the bottom band. You should have 3 bands on your fingers: a top, middle, and bottom. Take the left side of the middle band, and pull it down, over the left side of the bottom band. Hold the band in place with your thumb so that it doesn't slide back up. It has to be on the bottom.
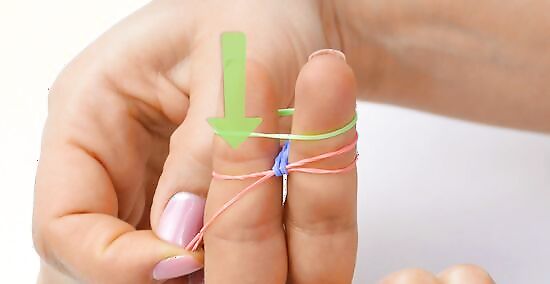
Pull the left side of the new middle band over your left finger. Keep the band that you pulled down pinned against your finger with your thumb. Take the left end of the middle band, and pull it over your left finger.

Repeat the process for the right side. Take the right side of the middle band, and pull it down over the right side of the bottom band. Take the right side of the new right middle band, and pull it over your right finger.
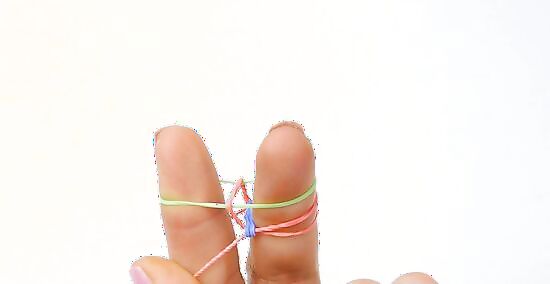
Repeat the pattern until your bracelet is the length you want it to be. Slide a band over your 2 fingers. Pull the middle left band over the bottom left band, then slide the new middle left band over your left finger. Next, pull the middle right band over the bottom right band. Slide the new middle right band over your right finger. Keep repeating this step until your bracelet is the length you want it to be.
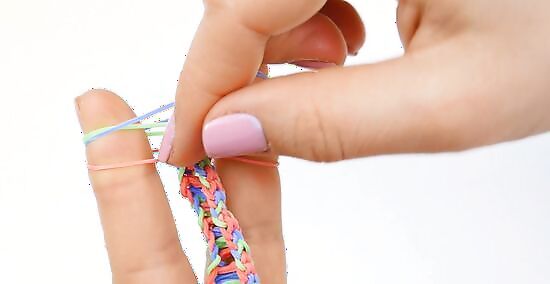
Add a final band, then slide the bottom 2 bands over it. Take the last band for your color scheme, and slide it over your 2 fingers. Take both of the bands on the bottom left side, and pull them over your left finger and onto the top band. Next, take both of the bands on the bottom right side, and pull them over your right finger and onto the top band.

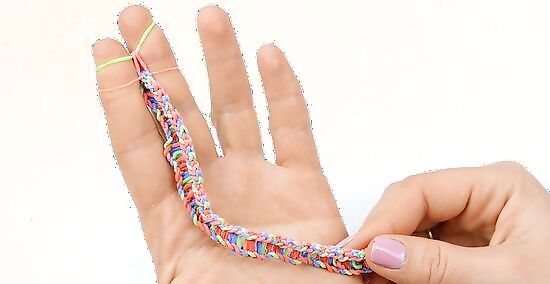
Give the bracelet a good stretch. Keeping the last band hooked onto your fingers, pull the other end of the bracelet as far as it can go. This will help loosen and reset the bands.
Add a C-clip or S-clip to both ends of your bracelet. Find 1 of the clear clips that came with your pack of Rainbow Loom bands. Hook it over the band on your left finger, then onto the band on your right finger. Slide the bands off of your fingers, then find the other end of the bracelet. Slip the clip through both bands at the other end of your bracelet.


Comments
0 comment