
Using Shrink Wrap Bags
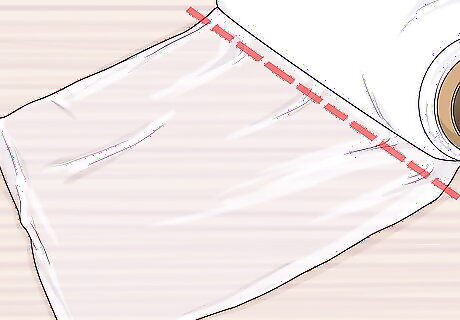
Cut off the bottom edge of a shrink wrap bag with a heat sealer. When you look at shrink wrap bags, you’ll notice that the bottom edge is already sealed. Right next to the seam is a strip of excess plastic. Use your heat sealer to cut this bottom edge off. To use a heat sealer: Plug in and turn on your heat sealer. Open the heat sealer and place the bag between the blades. Close the heat sealer, like a paper guillotine. Wait 2 to 3 seconds, then open the heat sealer.

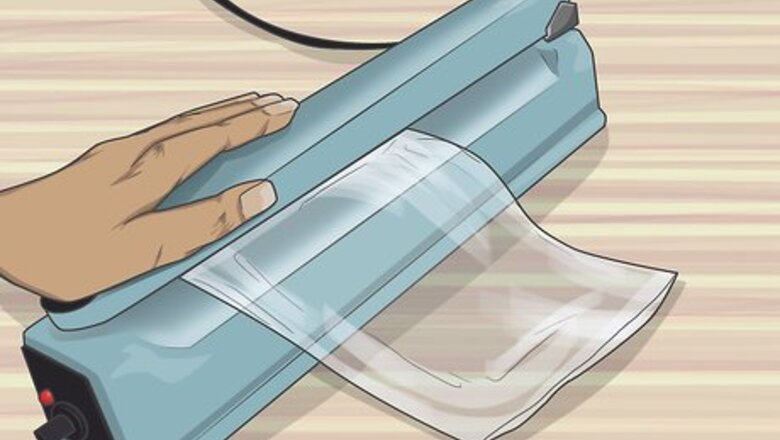
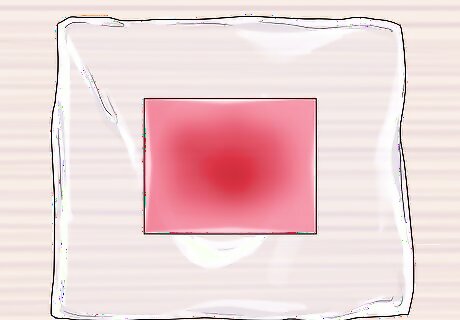
Insert your soap into the bag, making sure that it's centered. Some people find it helpful to place a business card against the back of the soap while sliding it into the bag. This will help the bag lay flat as you insert the soap. If you do this, however, be sure to take the card out of the bag. Don’t worry if the bag looks to be too big for the soap. This method will work for round, disk-shaped soaps as well. It is not recommended for other shapes, like hearts or stars.

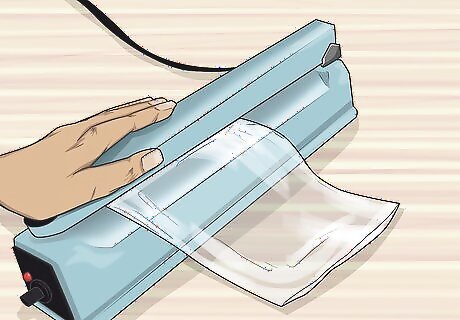
Seal the top and sides of the bag. Open up your heat sealer and place the top edge of the bag between the blades. Clamp the heat sealer, wait 2 to 3 seconds, then open it. If the bag is too wide for the soap, slide the soap towards 1 side of the bag, and heat seal the remaining side. Place the soap close enough to the heat sealer so that it bumps against the edges of the outer frame. This will bring the blades as close as possible to the soap. There will be small gaps between the edges of the soap and the seams on the bag. This is perfectly fine. Every so often, scrape the heat sealer’s blades clean with the top/blunt edge of an X-acto blade.

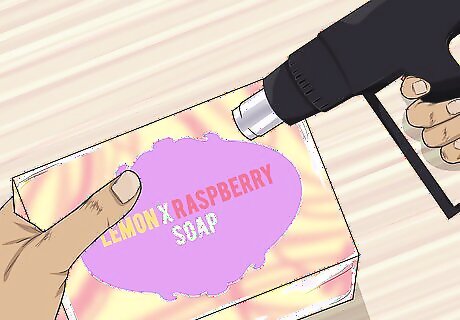
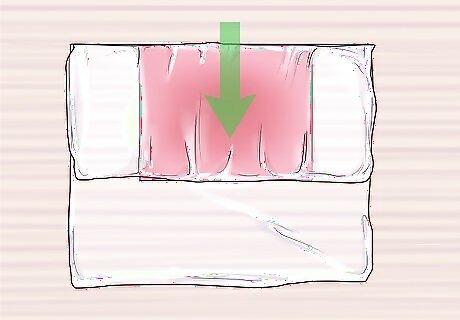
Heat the front, back, and side edges of the soap with a heat gun. Get out a craft-grade heat gun and turn it on. Aim the nozzle at the soap, and heat all sides of the soap until the plastic shrinks against it. Start with the side edges, then do the front. Don’t worry if the seams look loose and wrinkly. You’ll fix that next. Don’t use a hairdryer; it’s not strong enough. You can get heat guns from the embossing section of a craft store.

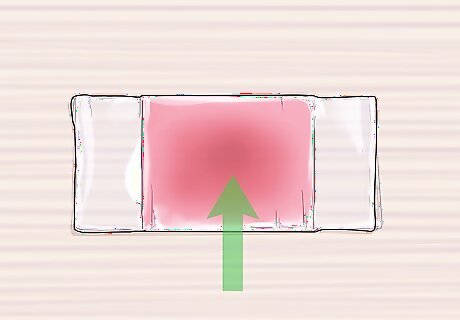
Re-heat the sides while rubbing them across a flat surface. Get out a hard, flat surface, such as a wooden cutting board. Heat one side of your soap with your heat gun, then rub that side against the flat surface. Repeat this step for each side of the soap. You only need to do this for the sides that have the seams. If your soap is disk-shaped, then work your way around the circumference of the soap, 1 to 2 inches (2.5 to 5.1 cm) at a time.
Add a label, then add a second layer of shrink wrapping, if desired. If this is for a store, then you likely have some labels. Peel off one of your labels, and press it against the front of the soap. If you’re worried about the label getting dirty or ruined, then cover the soap with a second layer of shrink wrap. Use the exact same process for the second layer of shrink wrap as you did for the first. If the second layer of shrink wrap gets air trapped inside of it, press down on it. Poke a small hole through the outer layer with a pin, if you have to.
Using Wax Paper

Create some long, skinny labels, if desired. You will be using these labels to wrap around the soap and hold the paper in place. The labels should be long enough to wrap around the length of your soap, plus an extra 2 inches (5.1 cm) for the overlap. Make the labels about 1 inch (2.5 cm) wide. Print the labels off on adhesive paper and cut them yourself, or order them online. This method works only for square or rectangular soap shapes. It won't work for disk shapes.

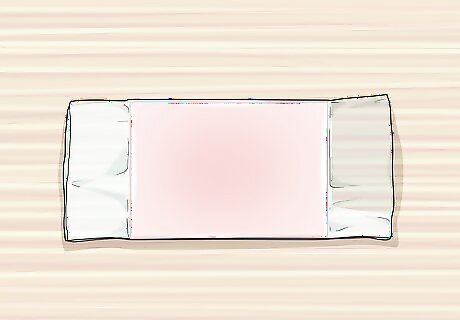
Spread out a sheet of 6 by 10 ⁄4 in (15 by 27 cm) interfolded wax paper. If you can't find any inter-folded wax paper, cut a sheet of wax paper into a 6 by 10 ⁄4 in (15 by 27 cm) rectangle, then crease it in half lengthwise. This should fit most 4 by 2 in (10.2 by 5.1 cm) bars of soap.
Set your soap down sideways on top of the crease. Your soap should be standing upright on the crease, like a wall. Make sure that the long, bottom edge of the soap is touching the crease. Make sure that the bar is centered with an equal amount of paper sticking out from under the sides.
Wrap the paper around the soap. Take one of the 6 in (15 cm) edges, and pull it across the front of the soap, over the top edge, and onto the back. Next, flip the soap over so that the back is touching the paper, and continue flipping it over until the paper is wrapped around it. Wrap the paper tightly enough so that it is nice and snug.
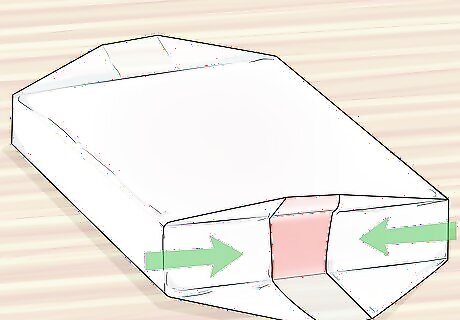
Push the sides of the paper in, like a present. Place your fingers against the top and bottom edges, then slide them over onto the side edges, folding the paper in. This will create a set of triangular flaps on the front and back of the soap. Do this just for one side of the soap; it does not matter if it is the left or right side. Hold the soap steady so that the paper doesn't unravel.

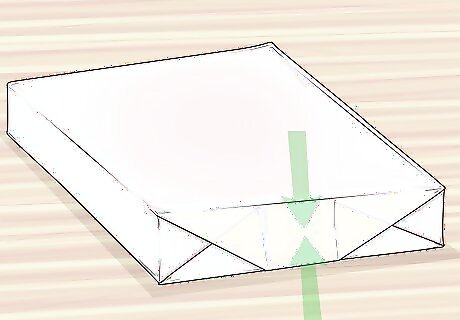
Fold the back flap down, like wrapping a gift. Your soap will have two flaps: one on the front of the soap, and one on the back, where the seam is. Take the seam-side flap, and fold it down. It should be touching the side edge of the soap and part of the front flap. Make sure that the soap does not slide around inside the wrapper. You want an equal amount of paper sticking out to either side of the bar.

Fold the front flap onto the back of the soap. Holding the back flap in place, take the front flap, and wrap it around the side edge of the soap and onto the back. Again, this is a little like wrapping a gift. If you want to, you can secure the flap with a piece of tape. You can also wrap a label around the soap later to hold everything in place.
Repeat the process for the other side. Fold the top and bottom corners down first. Next, fold the back flap down so that it covers the side of the soap. Finally, take the front flap, and wrap it onto the back of the soap. If you used a piece of tape for the other side, you should use one for this side as well. If you plan to use a label instead, just hold the first side steady while you wrap the second.
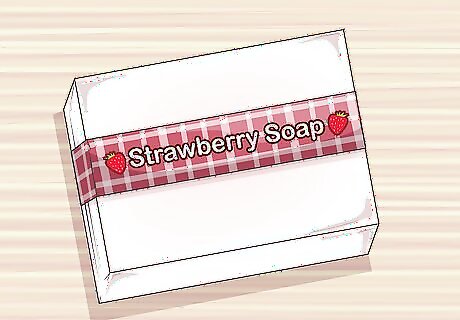
Wrap your label around the front, sides, and back of the soap. Center the label on the front of the soap, then wrap one end over onto the back. Take the other end of the label, and wrap it onto the back of the soap as well. The label needs to wrap around the side edges of the soap, not the top and bottom. Alternatively, wrap a piece of ribbon or string around the soap instead, then tie it into a bow.
Using Plastic Wrap
Cut a sheet of plastic wrap 3 times larger than your soap. Professional-grade food wrap would be ideal, but you can use basic saran wrap for this as well. Don't worry about being too precise when it comes to the size of the plastic, however; you'll be stretching and trimming it later. This method is not recommended for hot or cold process soap, as that type of soap needs to “breathe.” This method is great for melt-and-pour soap.
Set the soap on top of the plastic wrap. Place the plastic wrap on a flat surface and smooth out any ripples. Set the soap face-down on top, making sure that it is centered. If this is a rectangular bar of soap, make sure that one of the long edges is facing you.
Stretch the top edge of the plastic wrap over the top edge of the soap. This is a little like wrapping a gift. Take the top edge of the plastic wrap, and bring it over the top edge of the soap. Pull it tight enough so that it clings to the soap. The plastic wrap shouldn’t go past the bottom edge of the soap. If it does, trim it off.
Pull the bottom edge of the plastic over the bottom edge of the soap. Make sure that the top edge is smoothed down first. If it isn’t, then take a moment to smooth out any wrinkles with your fingers. Next, take the bottom edge and pull it tightly across the back of the soap, just like you did with the top edge. Again, the plastic shouldn’t go past the top edge of the soap. If it does, cut the excess off. Make sure that you smooth down the bottom edge against the plastic wrap. It should cling to it.
Bring the left and right sides of the plastic wrap over the soap. Do the left side first, then the right. Make sure that you pull them tight enough so that they stretch and stick to the plastic that’s already around the soap. Like with the top and bottom edges, the plastic shouldn’t extend past the side edges of the soap. You can trim these edges shorter so that they touch in the middle instead of overlap.

Secure the side edges with a piece of tape or a label. While not absolutely necessary, this will help cover up the seam as well as ensure that it doesn’t come undone. A piece of tape is all you really need, but a label can give your soap a professional touch. For example: If you own a store, you could print out your logo and use that as a sticker label. If you are selling your soap, consider printing out an ingredient label and using that instead of tape.
Trying Other Methods
Wrap a strip of patterned paper around the middle of the soap. Wrap a measuring tape around the middle of your bar of soap. Add 2 inches (5.1 cm), then cut out a strip of patterned paper according to this length. Wrap it around the middle of your soap, overlap the ends in the back, and secure them with tape or glue. The strip can be whatever width you want. Something between 1 and 2 inches (2.5 and 5.1 cm) would be ideal, however. Scrapbooking paper or wrapping would work great for this, but you can create your own design on the computer, print it out, and use that instead. A piece of double-sided tape or a scrapbooking glue dot will work great for this. You can also use a glue stick to secure the strip.
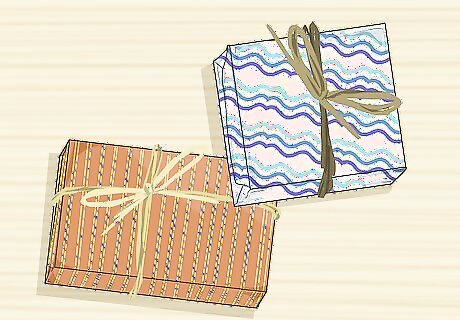
Cover the soap with paper like a present. Scrapbooking paper will work great for this, but you can also use wrapping paper or even tissue paper. If you choose to use tissue paper, however, you may want to fold it in half to make it thicker. Add a label to the back of your soap to hold the paper together. Alternatively, wrap a paper strip around the middle.
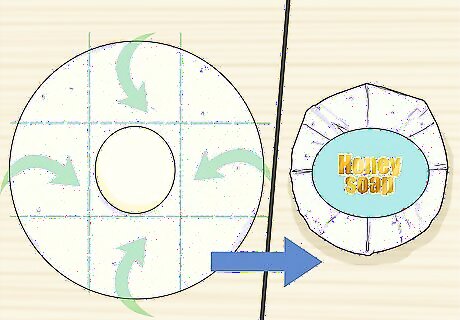
Use a round piece of tissue paper around disk-shaped soaps. Cut a circle out of tissue paper that's about 2 to 3 times the diameter of your soap. Set your soap on top of the paper, then begin to fold the edges to the middle. Slap a round label onto the middle of the packet to seal it. Start by folding the top, bottom, and side edges. Move onto the diagonal edges next, like numbers on a clock. If you don't have tissue paper, you can use a round coffee filter instead.
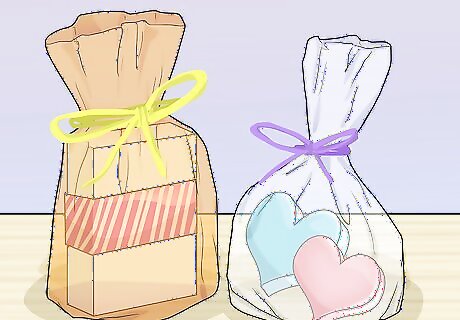
Place the soap into an organza pouch. You can put the soap into the pouch unwrapped, or you can wrap combine it with any of the above methods. For example, you can wrap your soap with a paper strip first, then tuck it into the pouch. For a rustic touch, use a burlap or linen pouch. This works great for irregular shapes, like hearts and stars.

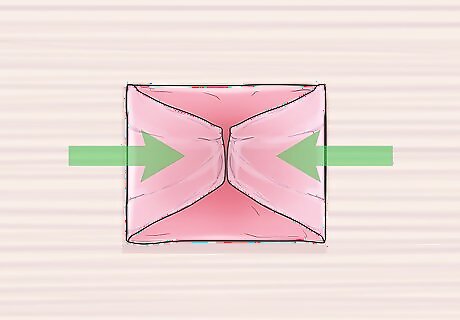
Gather fabric around the soap, then tie it off with a ribbon. Set the soap down on a piece of fabric. Gather the edges of the fabric together so that the soap is bundled up inside. Wrap a piece of ribbon or string around it, then tie it into a bow. Organza is a great option here, but you can also use tulle, chiffon, cotton, or any other lightweight fabric. The fabric should be 3 to 4 times bigger than the soap. If it is too small, then you won’t have much fabric left to tie. Add a label tag to the ribbon or string before you tie it around the fabric for a more professional touch.


Comments
0 comment