views
Insert an Auto Shape

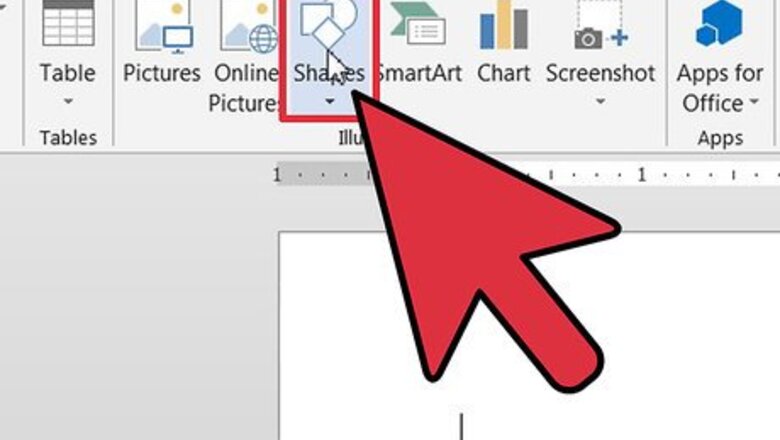
Explore the Auto Shapes menu. Click the Insert tab on the menu bar, and click on the Shapes button located in the Illustrations menu on the formatting toolbar. Take note of the different Auto Shapes now visible in the pull-down menu.
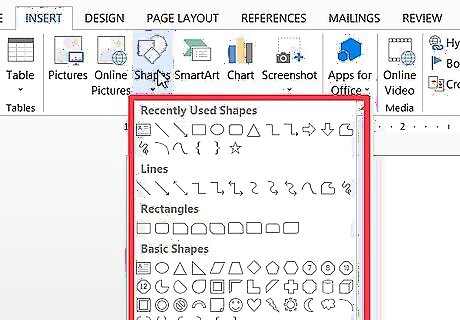
Insert an Auto Shape into the document. Select a basic shape for the purposes of this tutorial. Simply click on any shape to begin the insertion process. The Auto Shapes menu will close automatically and the mouse-pointer will be replaced by a thin cross-hair. Click and drag anywhere in the document to insert the auto shape. The chosen shape has been inserted into the document.
Adjust the Size, Shape or Location of an Auto Shape
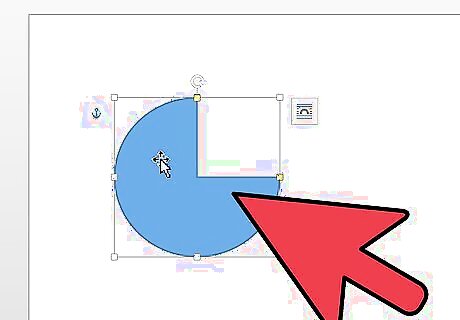
Change the size of an Auto Shape once inserted. Click and drag on any corner of an Auto Shape to make it larger or smaller. The size of the Auto Shape has been adjusted.
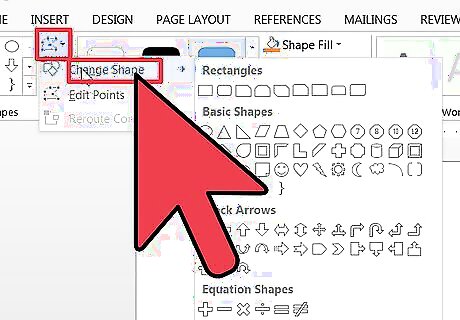
Change the shape of an Auto Shape once inserted. To switch to a different Auto Shape, select the object, click the format tab on the menu bar and click the Edit Shape button, located in the Insert Shapes menu on the formatting toolbar. Select "Change Shape" from the pull-down menu to open the Auto Shapes menu, and make an alternate choice from the menu options. A new Auto Shape has been chosen.

Move the Auto Shape to a different location in the document. Click and drag anywhere along the edge of the object to move it to a different location within the document. The Auto Shape has been a repositioned within the document.
Choose a Fill Color and Style for the Auto Shape
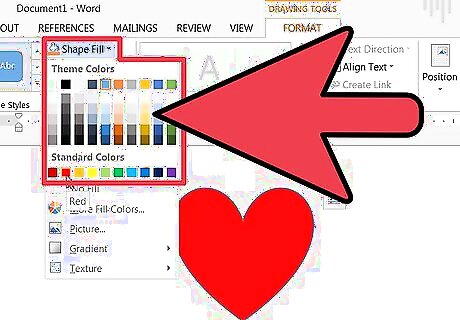
Select a fill color for the object. Click the Shape Fill button to fill the object with a solid color. The theme color palette will open. Select a color from the theme color palette or select the "More Fill Colors" option from the pull-down menu to create a custom color. The Colors dialogue box will open. Click and drag the cross hair on the right to adjust the hue of the custom color. Move the slider on the right side of the dialogue box up and down to adjust the brightness level of the custom color. Click OK to close the Color dialogue box. The fill color for the Auto Shape has been selected.
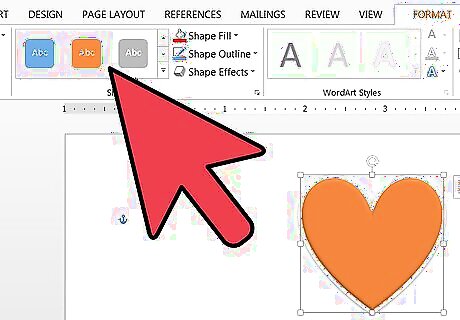
Select a style for the object. Confirm that the object is selected and click the Format tab on the menu bar. Take note of the available options provided in the Shape Styles menu, located on the formatting toolbar. Click on the down pointing arrow in the Shape Styles menu to open the Theme Fills menu. Choose a style from among the menu options. A preset style for the Auto Shape has been chosen.
Format the Outline of an Auto Shape

Adjust the style of the object's outline. Confirm that the object is selected and click the format tab on the menu bar. Click the Shape Outline button, located in the Shape Styles menu on the formatting toolbar. Select the "More lines" option from the pull-down submenu. The Format Shape dialogue box will open. Adjust the compound type, dash type, cap type or join type of the outline as desired and click OK to exit the dialogue box. The outline for the Auto Shape has been chosen.
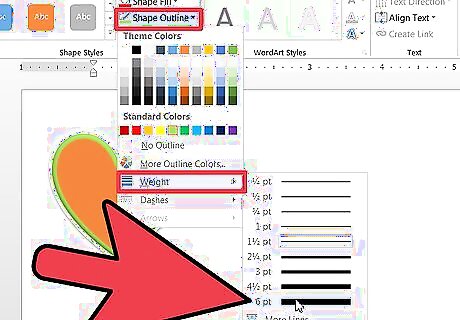
Adjust the width of the object's outline. Confirm that the object is selected and click the format tab on the menu bar. Click the Shape Outline button, located in the Shape Styles menu on the formatting toolbar. Change the thickness of the outline by selecting the "Weight" option from the Shape Outline pull-down menu. The Line Weight sub-menu will open. Choose a thickness from the options available or select the "More lines" option from the pull-down submenu. The outline's width has been selected.

Adjust the color of the object's outline. Confirm that the object is selected and click the format tab on the menu bar. Click the Shape Outline button, located in the Shape Styles menu on the formatting toolbar. Select a color from the color palette that appears in the pull-down menu, or click on the "More Colors" option to open the Colors dialogue box and create a custom color. A color has been chosen for the Auto Shape's outline.





Comments
0 comment