views
- If your iPad doesn't have a home button, press the Power button and either Volume button at the same time.
- If your iPad has a home button, press the Power button and the Home button at the same time.
- Screenshots can be found in the Photos app. Go to Albums, then Screenshots.
Without a Home Button
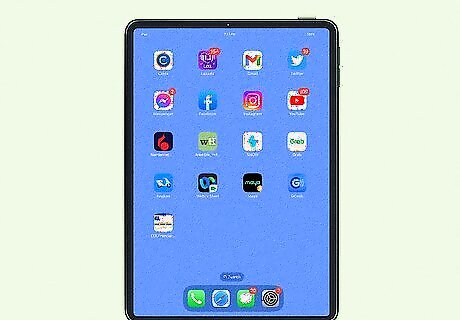
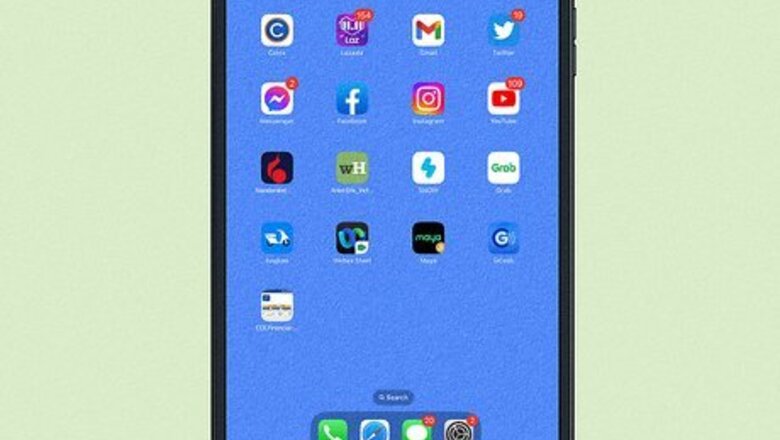
Navigate to the screen you want to capture. This can be a recipe you want to save for later, a YouTube video, an app, or a specific webpage. If you want to record your screen, you'll need to use the Screen Recording app. Many iPads lack a Home button, including the iPad Air, iPad Pro, iPad Mini, and the 10th generation base iPad models. Some videos may show up as a black screen if they are DRM protected.
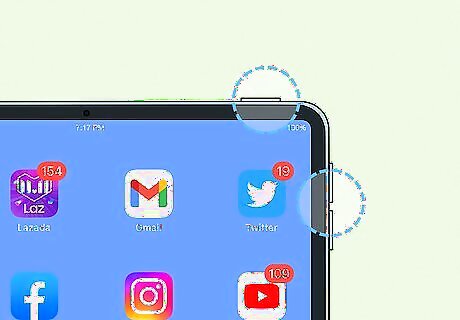
Press the Power button and either Volume button at the same time. The Power button will be on the top-right edge of your iPad. The Volume button will be on the left side of your iPad. On earlier iPad models, the Volume buttons may be located on the top-left edge of the iPad. You can use the Volume up or Volume down button. Both will work. Your screenshot will be taken.
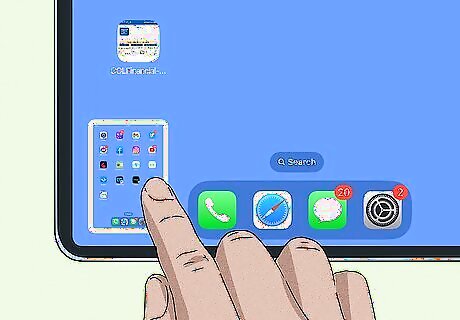
Tap the screenshot icon in the bottom-left corner. This will bring up the editing screen. To skip the editing screen, you can swipe left on the screenshot icon to quickly save it to your Camera Roll.
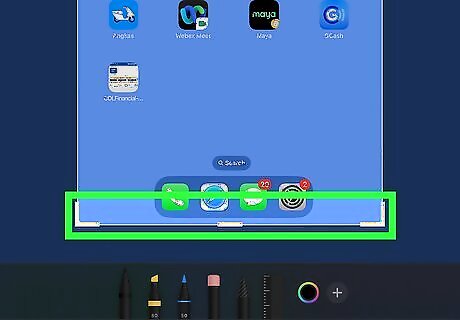
Edit your screenshot. You can crop the screenshot by dragging the lines along the corners inward. You can also choose to open Markup, which will let you draw or add text directly on your screenshot.
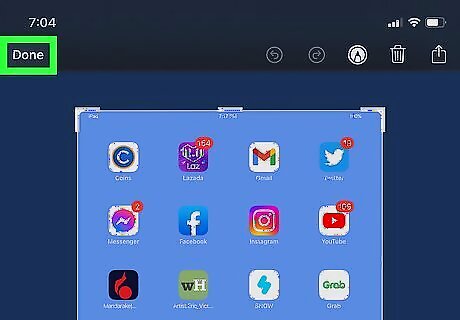
Tap Done. This will be in the top-left corner.

Tap Save to Photos. You can also select Save to Files or Delete Screenshot to try again. Your photos will be saved to your Camera Roll in the Photos app. You can send photos from your iPad by email, AirDrop, and more. You can also transfer photos to a computer.
With a Home Button

Navigate to the screen you want to capture. This can be a recipe you want to save for later, a YouTube video, an app, or a specific webpage. Use this method if your iPad has a round physical Home button at the bottom, such as the 9th generation iPad, 3rd generation iPad Air, and iPad Pro 10.5". Some videos may show up as a black screen if they are DRM protected.
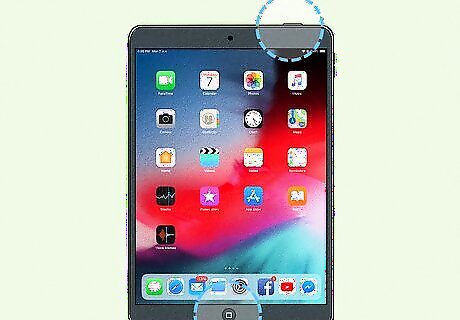
Press the Power button and the Home button at the same time. The Power button will be on the top-right edge of your iPad. The Home button is the circular button at the bottom of your iPad screen. Quickly release both buttons after pressing them. Your screenshot will be taken and saved to the Camera Roll in the Photos app.
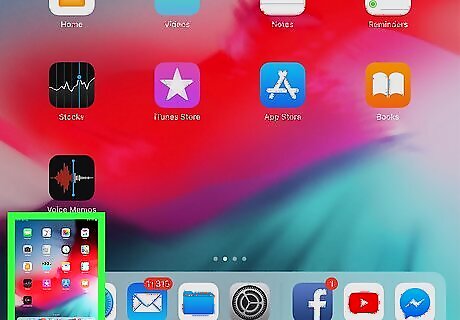
Tap the screenshot icon in the bottom-left corner. This will bring up the editing screen. To skip the editing screen, you can swipe left on the screenshot icon to quickly save it to your Camera Roll.
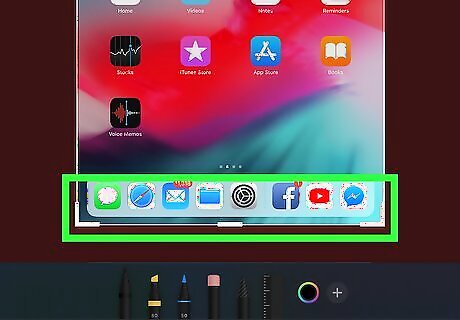
Edit your screenshot. You can crop the screenshot by dragging the lines along the corners inward. You can also choose to open Markup, which will let you draw or add text directly on your screenshot.
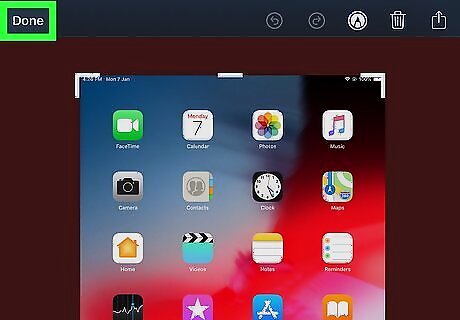
Tap Done. This will be in the top-left corner.
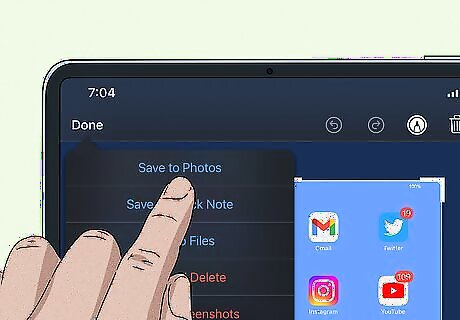
Tap Save to Photos. You can also select Save to Files or Delete Screenshot to try again. Your photos will be saved to your Camera Roll in the Photos app.
Using AssistiveTouch
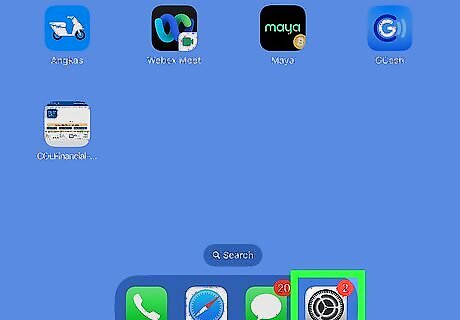
Open the Settings iPhone Settings App Icon app on your iPad. This is the grey cog icon. Use this method if your iPad's Power, Home, or Volume buttons are damaged. Be sure to update your iPad.
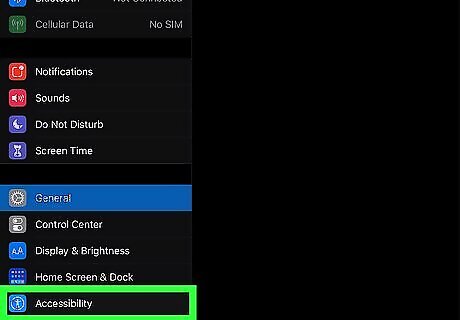
Tap Accessibility. This can be found in the middle of the page, next to the blue person icon.
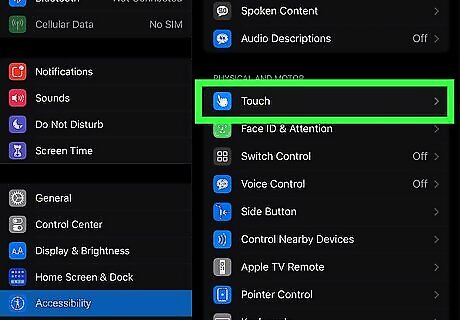
Tap Touch. This is a white pointing finger with a blue background.
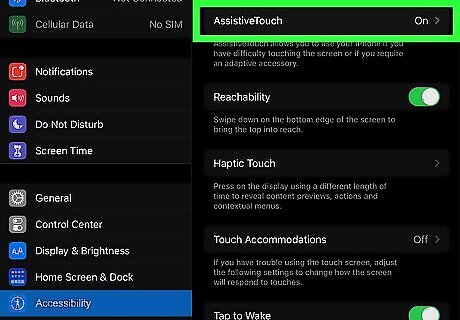
Tap AssistiveTouch and toggle it on iPhone Switch On Icon. This will make a circle-shaped menu appear in the corner of your screen.
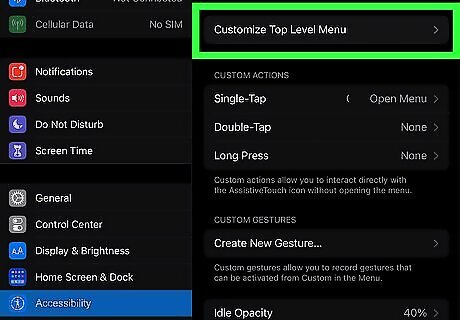
Tap Customize Top Level Menu. This will take you to AssistiveTouch's quick functions.
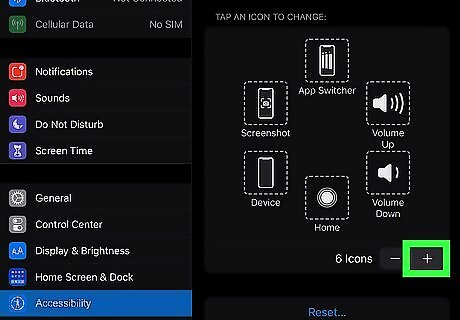
Tap +. By default, you should have six icons. Tap the + to add another action.
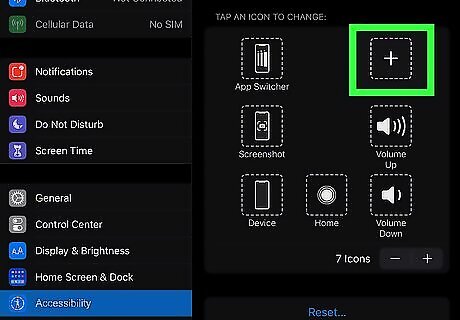
Tap the blank tile. This will open a list of features you can add to the AssistiveTouch menu.
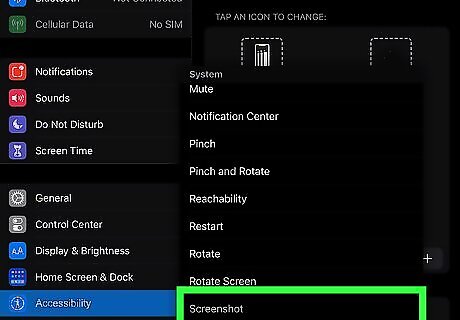
Tap Screenshot, then Done. You may need to scroll to find this feature. The features are listed in alphabetical order within their separate categories. This will add Screenshot to AssistiveTouch.
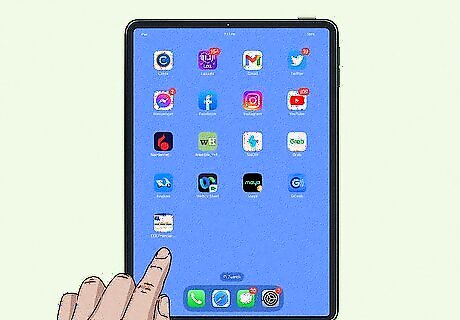
Navigate to the screen you want to capture. This can be a recipe you want to save for later, a YouTube video, an app, or a specific webpage. Some videos may show up as a black screen if they are DRM protected.
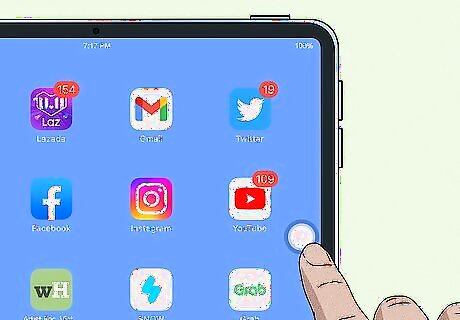
Tap the AssistiveTouch icon. This is the circle-shaped menu on your screen. You can change its position by dragging it.
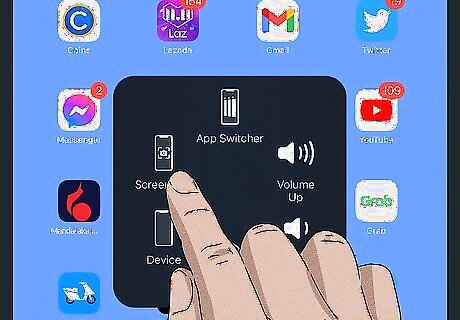
Tap Screenshot. This looks like an outline of your device with a camera icon inside. AssistiveTouch will disappear briefly to take the screenshot.
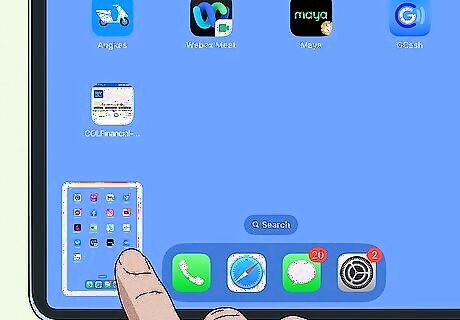
Tap the screenshot icon in the bottom-left corner. This will bring up the editing screen. To skip the editing screen, you can swipe left on the screenshot icon to quickly save it to your Camera Roll.
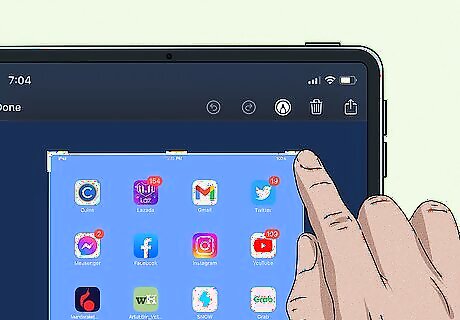
Edit your screenshot. You can crop the screenshot by dragging the lines along the corners inward. You can also choose to open Markup, which will let you draw or add text directly on your screenshot.
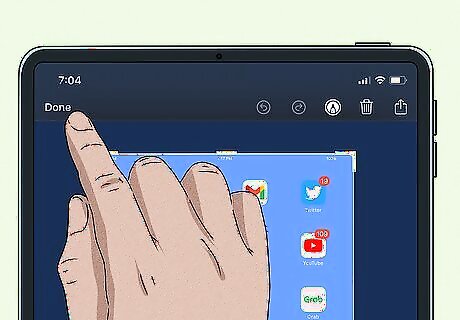
Tap Done. This will be in the top-left corner.
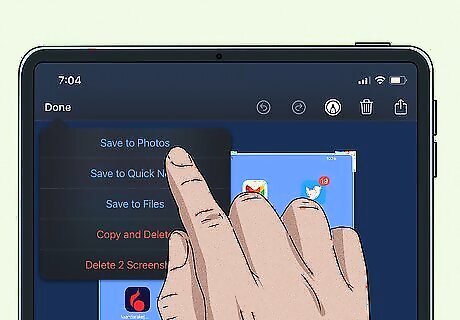
Tap Save to Photos. You can also select Save to Files or Delete Screenshot to try again. Your photos will be saved to your Camera Roll in the Photos app.


Comments
0 comment