
Managing the Cords You’re Using
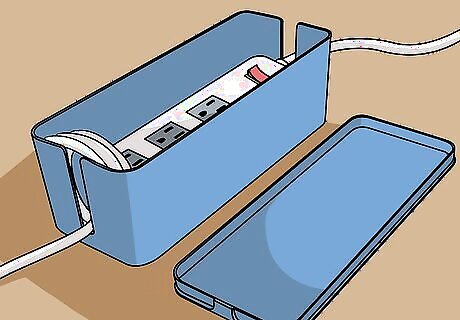
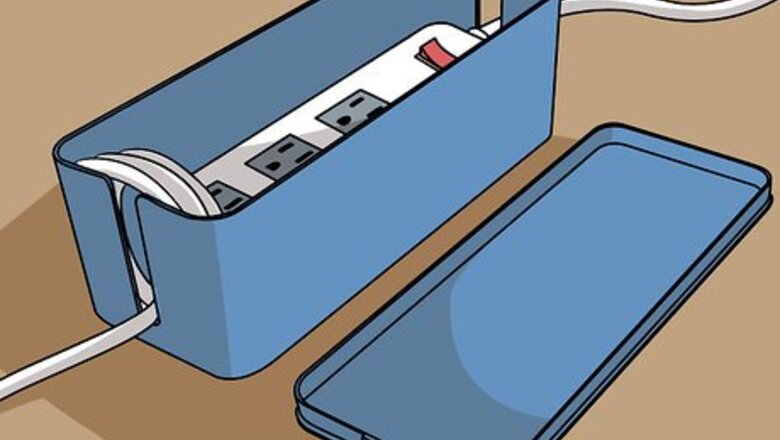
Use an organizer box to sort power strips or multiple piles. An organizer box is a small container that you run cords into. The cords are coiled in the box so that the only portion showing is the part that you’re using. To use an organizer cube, pull a wire into the box’s small opening, curl it in the box, and then pull a smaller section out of the other side to get rid of cable clutter. Repeat this process for multiple cords to hide the massive mess of wires settled behind your desk or TV.Tip: If you’re building your own organizer box, consider using a shoe box for power strips and a small moving box for larger collections of excess cords. Paint the box a solid color if you want it to blend in with the rest of your furniture or your TV.
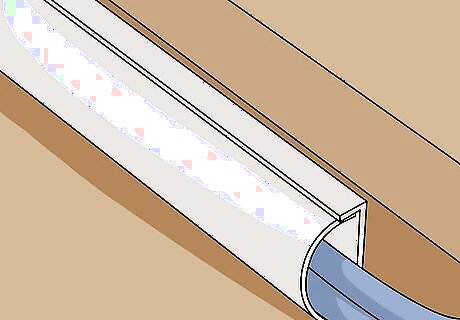
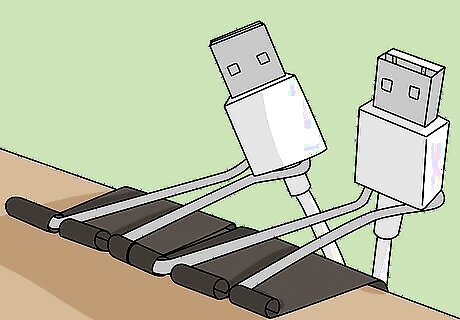
Thread cords through cord concealers to run them from one area to another. Cord concealers, also known as cord raceways or covers, are small plastic tubes that have a flat side with adhesive tape on it. They are an excellent way to organize cords that run from one area to another without leaving cables laying all over the place. Thread your cord through one opening and slide it through to the opening at the other end to hide it. To put a concealer on a wall, peel off the adhesive cover and place it along your baseboard or wall. Apply light pressure to stick it permanently to your wall. Purchase some cord concealers online or from a computer store Cord concealers are a good choice if you want to keep a child or pet from messing with loose cables.
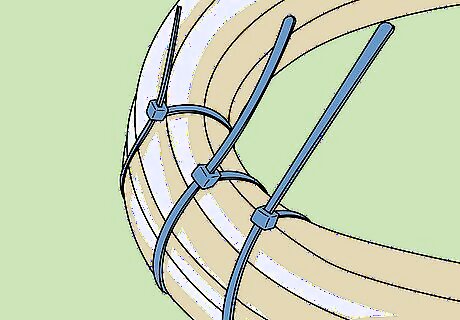
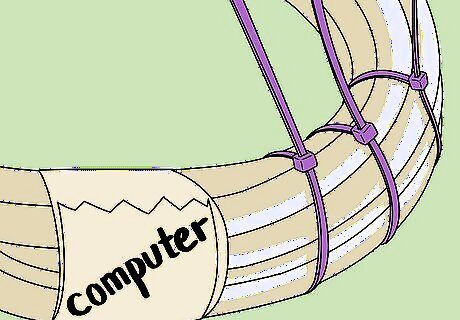
Use zip ties or Velcro strips to conjoin large masses of cords. If you have a TV with 8-9 cables running out of it or a complicated computer set up for complex gaming equipment, you may have a massive collection of cables that won’t fit in a concealer or organizer. Join a section of nearby cables by hand and wrap them together with a zip tie or Velcro strip. Repeat this process for every 6–12 inches (15–30 cm) of cord to minimize the amount of loose individual cords. This is a simple step that will keep groups of wires bundled together. It may not be as elegant as a cube or concealer, but it will keep them out of your way.
Put a large binder clip on the edge of table to hold chargers in place. Open a binder clip and stick it on the edge of your table. Lift the upper spring up and slide a cord through the opening of a spring near the bottom. Close the spring by letting it snap back away from your table and slide the cord up towards the top of the spring’s opening.The charger’s head is going to be too big for the small opening at the top of the spring so it won’t fall to the floor when it gets caught on the top of the spring if it falls out of your device or you drop it. You can purchase cord catchers that stick to a surface to hold a cord in place if you don’t mind spending a few dollars. If you ever drop your cord, it will simply slide down to the location of the binder clip!
Storing Cords You Use Regularly
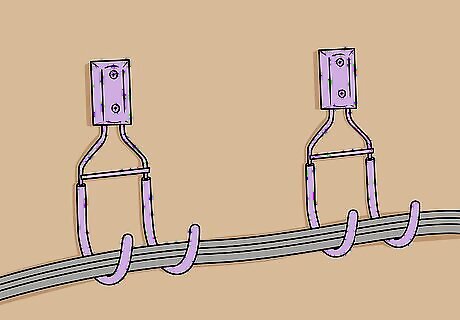
Hang larger cords on the wall with utility hooks. Utility hooks, or Command hooks, are small plastic hooks with adhesive on one side. If you have a sequence of cords that you use regularly but want to keep untangled, hang them on your wall with utility hooks.To place a utility hook, peel off the adhesive on the backside and stick it to your surface. Apply pressure to each side of the hook to set it in place. Loop the center of your cord over the hook to balance it on the wall. There are utility hooks that come in all kinds of sizes. They list the maximum weight that they can hold on the packaging.
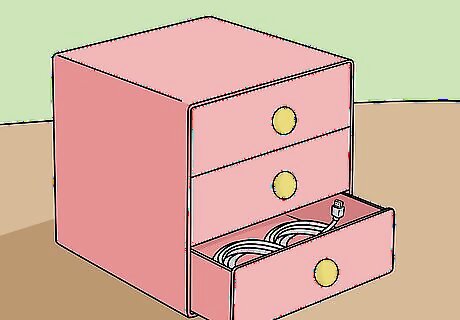
Use a small desk organizer for a bunch of smaller cords. A simple desk organizer with drawers is a good option if you regularly use a bunch of smaller cords. Get a desk organizer with smaller, enclosed drawers and label each individual drawer with the type of cable that you’re storing in it. Fold and tie your smaller cords with zip ties, twist ties, or rubber bands and store them flat in the drawers. This will make it easy to sort through a sequence of similarly-sized cords with taking up a ton of space on your table or desk. You can get desk or drawer organizers at most big box department stores. Computer stores will also have organizers designed specifically for cords.

Store cables in plastic sandwich bags to keep them separated in a drawer. If you want to keep cables out of sight but in one place, use plastic sandwich bags with a resealable top to keep cords cleanly separated. Choose clear bags to make it easy to identify which cable is inside when you’re sifting through them. Use the resealable top to keep each cord from falling out and getting tangled.Tip: Label each bag with a permanent marker if you want to store duplicates or multiple cables in the same bag. Store each bag in a drawer with each cable coiled next to one another in their respective bags.
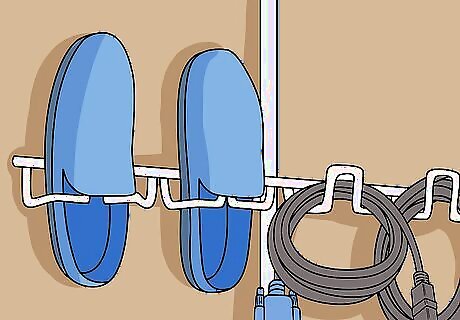
Hang cables in a vertical shoe rack to hide them behind a door. Vertical shoe racks hang off the top of a door to make storing shoes efficient. Luckily, the slots for shoes are perfect for medium-sized cables. Get a vertical shoe rack and coil or wrap your cords as you normally would. Stick a cord in a slot for shoes and use a piece of clear tape to label each slot. If you don’t want to label each slot, stick the connector for the cord over the edge so that you can easily see what the cord is for. This is a great solution for medium-sized cords, like amplifier cables, extenders, or HDMI cords.
Storing Cords for Longer Periods
Set out all of your cords and separate them on the table or floor. If you’re organizing all of your cords, they have probably been jumbled together since they’ve been in storage. Carefully untangle your wires by hand, and set each cord out so that it isn’t mixed up with any others. If you have a bunch of cords that are shorter than 3 feet (0.91 m), it will be easy to spread them out so that they’re uncurled next to one another. This way you can easily compare the connections at the end of each cable when you sort them.

Sort your cables based on the category of electronics. Phone chargers, computer cords, power strips, and audio cables should all be sorted based on the type of electronic that they go with. Bundling similar cords in the same area will make them easier to sift through when you have to go digging for a specific cable. Consider making a separate pile for miscellaneous or unidentifiable cables.
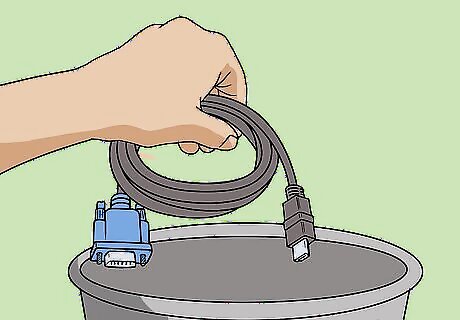
Toss redundant cables if they don’t fit multiple devices. Throw out any cables that you aren’t using and know you won’t need in the near future. Only keep a few duplicates if they’re a commonly-used cable. For example, you probably want to keep extra phone chargers, USB, and HDMI cords since they’re universal and go with a lot of different electronics. Toss outdated cords and cables that aren’t used with modern electronics. For example, even if you only own one VGA cable, there’s simply no need to hang on to it. There are no televisions or computers being manufactured today that use them! If you don’t know what a cord is for, it’s okay to hold on to it. If it has been years since you’ve last used it though, you don’t need it anymore.
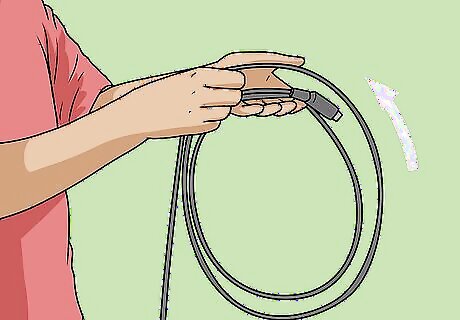
Curl larger cables for storage by creating a series of loops. Hold one end of a cable in your nondominant hand. Form a 4–12 in (10–30 cm) loop by curling the cord into a circle. Pinch the connection in your nondominant hand and pull out a new length of cable. Form another loop, but this time, turn your wrist inwards so that the cable in your hand twists as you make your second loop. For your next loop, turn your wrist outwards in the opposite direction. Alternate for each loop until the entire cord is coiled. Allow the cable to coil and fold in the direction that it wants to. This will ensure that you aren’t damaging the inside of your cord. Rotating your wrist in opposite directions after each individual coil allows the cord to naturally undo the twist that you just made. This will make it easier to keep the cord coiled together.

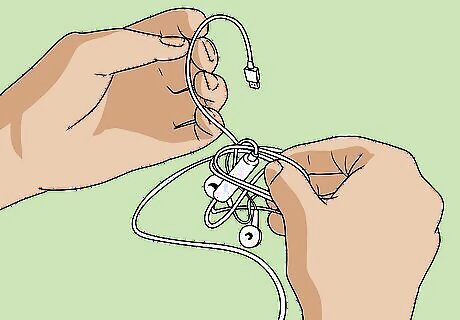
Fold smaller cords on top of one another in an accordion pattern. Cables smaller than 12 inches (30 cm) in length can’t really be coiled without damaging them. Hold a loose cord at the end and gently fold a 2–4 in (5.1–10.2 cm) section of it against itself so that the end of the cord is pressed against the length beneath it. Pinch it to hold it in place and then fold another length over these 2 pieces by folding the opposite side. Continue until you’ve folded the cord comfortably on top of itself.Tip: Keep your sorted piles separate as you’re doing this. That will make it easier to sort your cables once they’re all tied. Don’t force the cord to bend into an unnatural position. The cord should naturally fold in a way that feels comfortable. Your cord should look like a jumbled infinity symbol or 8.

Tie the coiled and folded cords with zip ties, rubber bands, or Velcro strips. If you know you won’t need to use your cables for a long time, wrap zip ties around the tightest portion of your wrapped cord and tighten them. Velcro strips are a good option for cords that you may want to use regularly since they can easily be adjusted and taken on or off.Use rubber bands if you don’t have access to individual strips of Velcro by looping it around the cord repeatedly until it is holding the coiled cord in place. Don’t overtighten your zip ties to the point that they’re pressing into the cord. This could damage it unnecessarily. For the larger coils, don’t wrap the entire thing together so that 2 opposing sides are touching. Instead, wrap a single 1–2 in (2.5–5.1 cm) length.
Label each cord using a marker and a piece of tape or cardboard tube. Wrap a piece of tape around a length of cord and stick the 2 sticky sides together to make a label. Alternatively, you can slide folded cords through the centers of cardboard tubes from toilet paper or paper towels to create a case for each cord. Label the tape or cardboard tubes by writing on them with permanent marker. Select your labels based on the type of cable, like USB or HDMI, and what it’s for, like charging a laptop, extending a phone battery, or powering a printer. The cardboard tube trick is excellent if you’re storing a bunch of similarly-sized cables because it makes the labels more readable. If your boxes are kind of small and you’re using the cardboard tubes, you can store your cords upright.
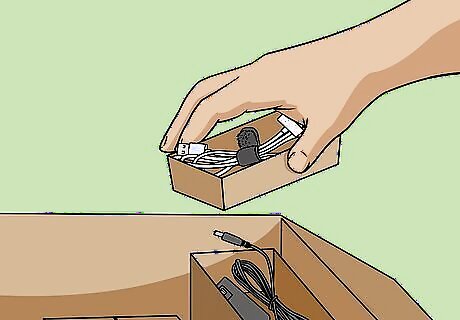
Sort each set of cords into smaller boxes before storing them together. It will likely only take 3-4 smaller cardboard boxes to separate your piles. Place computer, printer, television, and miscellaneous cords in separate boxes. Place your smaller boxes inside of a larger cardboard or plastic box to store them for a longer period of time. Do not store your wires in a metal box. If it gets hot, it could trap the heat inside of your box and damage the cords. Store your cords somewhere dry.


Comments
0 comment