
Measuring and Marking Your Brackets
Turn your boiler’s gas and electricity off if necessary. If your pipes are already installed, turn the gas and electric supply off before working around them in the event that you accidentally damage one of them. Go to your heating unit and look for an electrical switch on the face of the boiler. Flip this switch to the off position to cut the power. Shut the valve on the supply line for the gas if you have a gas boiler by twisting the valve on the pipe leading into the wall. Open the drain valve on your radiator to empty the water out. If you’re replacing a radiator, keep in mind that there is going to be sludge coming out of the valves at the bottom when you remove it. This process can get pretty messy, so put a drop cloth down and set up some buckets if you’re taking your old radiator off. If you’re hanging a radiator before the pipes are installed, you can keep the boiler on. You cannot install the piping for a radiator yourself. You must hire a licensed contractor to do that for you. Contact a contractor before installing a new radiator to ensure that the hot water pipes can be diverted to your new location. Panel radiators should only be installed on drywall. You can try to install them in tile or concrete walls if you’d like, but you may end up shattering the tiles or ripping out a chunk of concrete. It’s better to let a professional handle radiators on these walls.
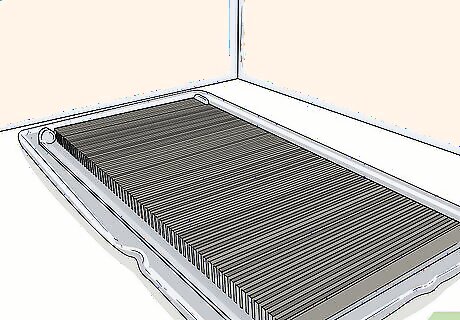
Set your radiator flat on the ground with the back facing up. To measure out and place your wall brackets, refer to the back of your radiator. Set a drop cloth down and place your radiator on the floor with the attached brackets facing up. Make sure that your radiator is oriented correctly by checking for the pipe valves, which should always be at the bottom on both sides of the unit. Most radiators have 2 brackets on the bottom left and bottom right of the radiator. These brackets are preinstalled on the back, and you hang the brackets on 2 separate brackets that you install directly into the wall. Some radiators have 4 brackets that slide on top of a length of metal. These radiators are quite common in Europe. Some smaller radiators have 2 brackets placed vertically in the middle.
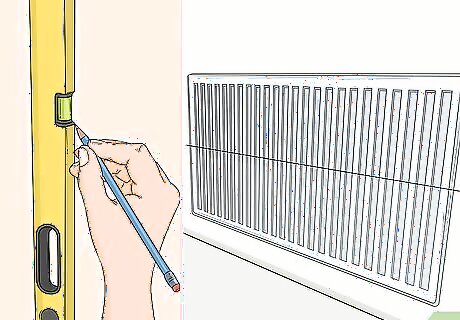
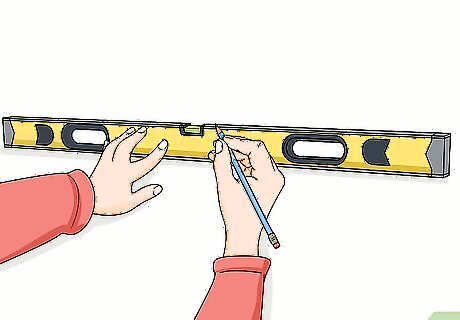
Draw the center line of your radiator on the wall. If your pipes are preinstalled and your radiator is symmetrical, measure the distance between the pipes to find your center line. If you’re installing a new unit and there are no pipes, you can place your radiator anywhere. Use a spirit level as a straight edge and check the bubble in the tube to make sure that your line is straight before using a carpentry pencil to make your center line.Tip: To make things easier, try to locate your radiator brackets over studs in the wall. Use a stud finder to locate the position of the joists in your wall. While it isn’t mandatory for radiators that weigh less than 30 pounds (14 kg), your radiator will hang a lot more reliably if you hang it on studs. The center line indicates the horizontal center of the radiator. This is important because it will provide a reference point when you measure the distance between each bracket from the center.
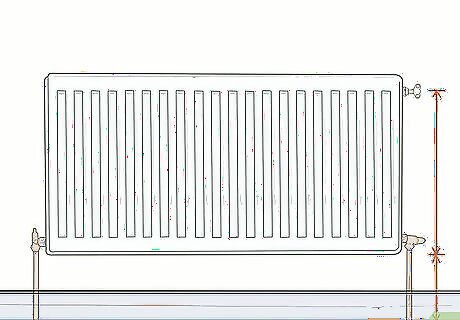
Calculate the base line of the radiator by measuring the pipes. If your pipes are preinstalled, measure the distance from the floor to the bottom of each pipe. Next, measure the distance between the bottom of each valve on your radiator and the base of the unit. Subtract the difference between the base and the valves from the base of the pipes in your floor to find your base line. Use a measuring tape to mark the height and a spirit level to draw a base line perpendicular to the center line. This should be roughly 6–12 inches (15–30 cm) off of the floor. The base line is the bottom of your radiator. Using the center line and the base line, you’ll be able to ensure that your brackets are equidistant on both sides from the center and the bottom of the radiator. For example, if the pipes in your floor raise to 12 inches (30 cm) and the distance between the valves and the base of your unit is 2 inches (5.1 cm), place your base line 10 inches (25 cm) off of the ground to line up your pipes to the valves. If you’re installing a radiator on a wall without any pipes, you can place your bottom anywhere. Ideally, there is at least 6–12 inches (15–30 cm) of breathing room between the floor and the base of your radiator.
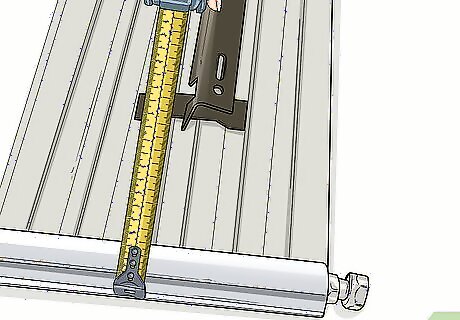
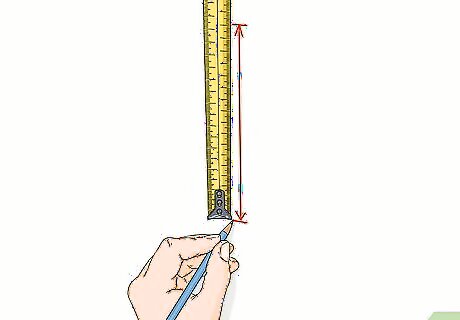
Measure the height from the base of the radiator to the attached bracket. Next, measure the distance from the base of your bracket to the bottom of your radiator unit. Check this number on each side to ensure that the distances are identical. If they aren’t, note the difference on a piece of paper to keep track of which bracket belongs on the left and which bracket belongs on the right. It is rare that the distances between the base and each bracket are different. This measurement must be extremely accurate if you’re going to hang your radiator level on the wall. If you’re off by more than ⁄4 in (0.64 cm), you’re going to notice a tilt in your radiator and it may not fit evenly on your pipes.
Draw the height of your wall brackets on the wall with a single line. Transfer your measurements for the bottom of the brackets on to your wall using a measuring tape and a carpentry pencil. Make a hash mark on each end of the wall using the base line as the bottom of your radiator. Connect these 2 lines using a spirit level to create a guide line for the bottom of each bracket. Drawing the height of the brackets on the wall will keep the distance between the brackets equidistant on each side. In addition, it will make it easier to confirm that your brackets are parallel with the floor. For example, if the distance between the bottom of each bracket and the bottom of the unit is 6 inches (15 cm), place your hash marks 6 inches (15 cm) above the base line on each end of the wall. Connect both of these dots using a spirit level. If the brackets on the radiator are equidistant, the guide line should be completely level. Check the bubble in your spirit level to ensure that your guide line is accurate and even.
Measure the distance between the attached brackets to mark the location on the wall. Next, measure the distance from the outer edge of each bracket to the bracket on the opposite end. Cut this number in half so that each bracket is equally far away from the center line. Transfer the measurement to the wall. Measure half of the distance out from your center line to make a hash mark on each end where your brackets will go. Once you’ve made a hash mark, make a vertical mark using your spirit level and pencil to create a vertical guide line for each bracket. These vertical marks will make it easy to line your bracket up vertically in the right location. For example, if the distance from bracket to bracket is 64 inches (160 cm), measure out 32 inches (81 cm) from the center on each side.
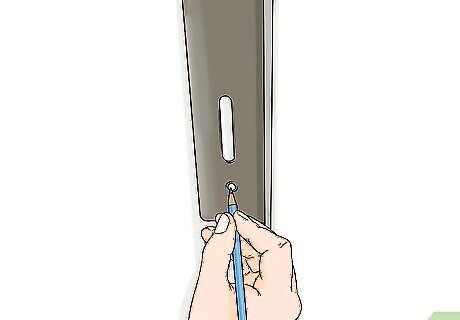
Hold your wall brackets against the wall and mark the drill holes. With the guidelines drawn on your wall, take each bracket and hold it up against your wall. Hold the exterior edge of each bracket against the corresponding guide lines on the wall. Keep each bracket in place and use your pencil to outline the openings for each screw in the bracket. If the openings for your screws are really small, use a black permanent marker to put dark dots on the wall.
Installing the Wall Brackets
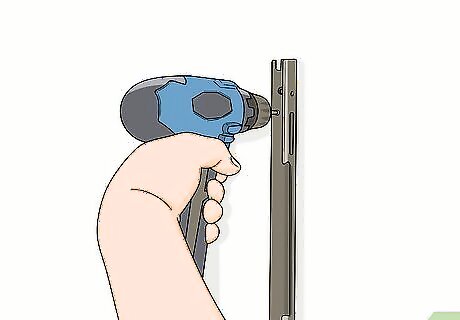
Drill pilot holes into each screw slot using a drill. Take the screws that came with your bracket and hold them up against drill bits until you find a bit that is a little smaller than your screw. Use the smaller drill bit to drill 1–1.5 in (2.5–3.8 cm) into your wall at each screw slot to make your pilot holes. Drill slowly and keep your drill bit perpendicular to the wall to ensure that the openings for each screw are even and consistent. A pilot hole is a small hole designed to create threading for a screw or wall plug. If your bracket didn’t come with screws, get screws that fit the holes in your brackets and measure at least 2 inches (5.1 cm) in length.
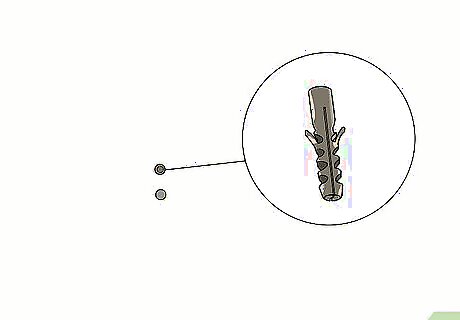
Install wall plugs in each opening for your screws. Get wall plugs that fit the threading and length of your screws. Screw wall plugs into each opening for each pilot hole that you drilled to ensure that your brackets don’t rip your wall out when you hang the radiator. Use a screwdriver or set your drill to the lowest setting to carefully insert your plugs. Continue screwing or drilling the plugs in until the openings for your screws are flush with the wall.Tip: In most cases, the wall plugs come with your radiator. If they don’t, take one of your screws to the construction supply or hardware store and test wall plugs until you find one that fits. Some wall plugs are designed to be pushed into the wall instead of screwed in.
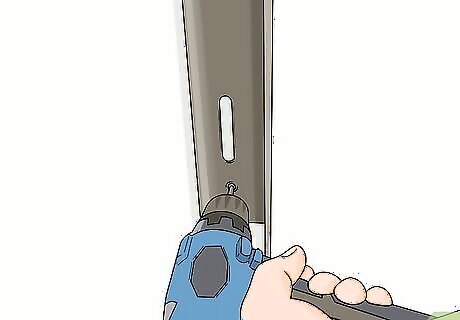
Hold your wall brackets over the wall plugs and screw them into place. Take your first bracket and place it over the plugs for your screws. Use a drill or screwdriver to insert the screws and install the bracket. Check the guide lines on the base and side of the bracket to ensure that the bracket lines up with the markings you made on the wall. Repeat this process with the brackets on the other side to make sure that they’re even. Use a level and measuring tape to check each bracket and make sure that it matches your original sketches for the wall.
Hanging Your Radiator
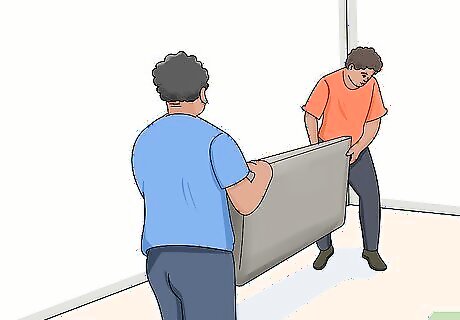
Enlist a friend to help you if the radiator is larger. Larger radiators tend to be quite heavy. If you find the radiator kind of hard to hold on your own, enlist a friend to help you hang it. This process isn’t particularly difficult, but you may require help to keep the radiator from banging into the wall or ripping out your brackets as you lower it. The radiator brackets will slide together on the wall, but the brackets may break or rip part of your wall out if your radiator isn’t even as you lower it or you drop it too quickly.

Lift the radiator up by both sides and place it on the wall. Carefully raise the radiator so that the brackets on the radiator are higher than the brackets on the wall. Line the brackets up with one another and slide the radiator against the wall to line it up.
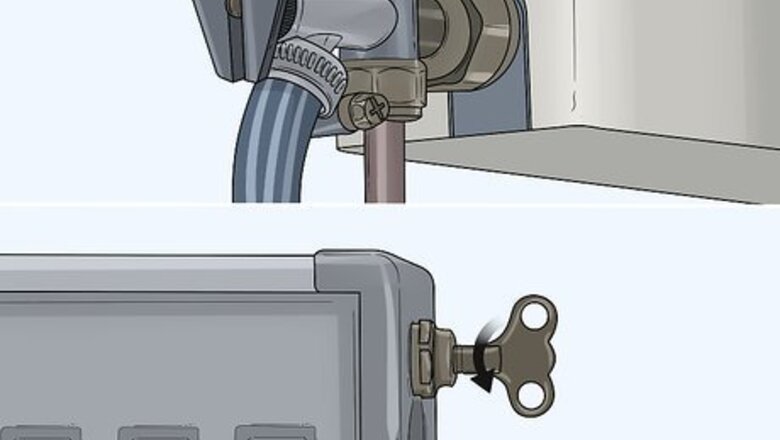
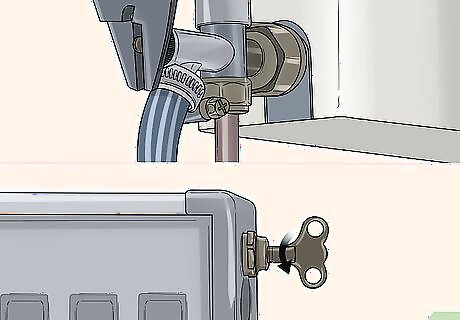
Lower the radiator into each of the wall brackets to fit it on the wall. Carefully lower the radiator while bracing it from both sides to ensure that the brackets slide into one another at the same time. Insert the radiator’s brackets into the opening between the wall brackets and the drywall. As the brackets connect, lower the radiator slowly while bracing it from the bottom. As you feel the brackets lock into place, slowly release each hand to ensure that you don’t load too much weight on to your wall at once.Warning: It is highly recommended that you enlist the help of a licensed professional to hook up your pipes. If the pipes are installed incorrectly, you will end up with hot steam shooting out of your radiator. If the pipes in your floor are blocking the radiator from getting as low as it should, push each pipe at a slight angle away from the radiator to get them out of the way. Normally there is an additional valve that you screw into each side to connect the radiator to your pipes though, so this won’t normally be a major issue.


Comments
0 comment