

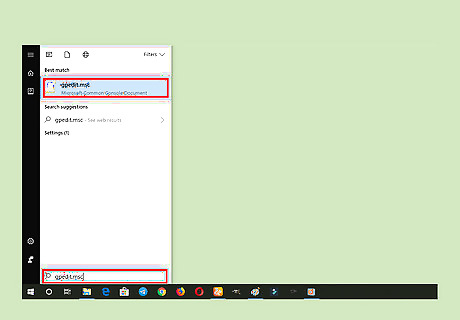
Open Windows Group Policy Editor. Click on the Start menu, at the bottom-left corner of the screen (or hit the Windows button in your keyboard) and search for “gpedit.msc” or “Group Policy Editor”. Select gpedit.msc or Edit group policy from the results. Alternatively, open the RUN feature by pressing ⊞ Win+R and type “gpedit.msc” into the box; hit ↵ Enter to continue.
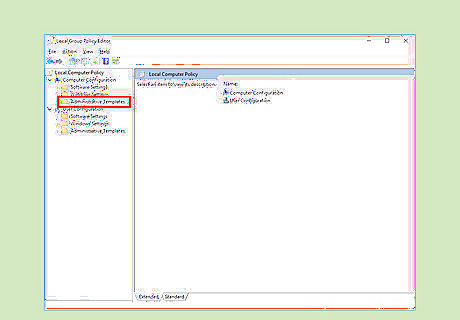
Navigate to the “Computer Configuration” section and select Administrative Templates from the list. It will be the third option in there.
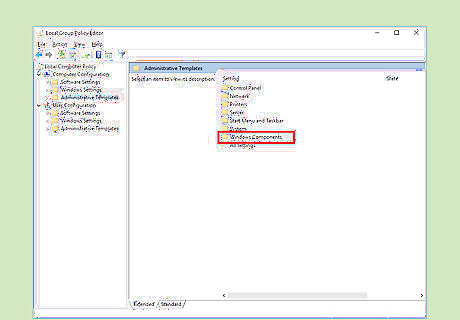
Double-click on the Windows Components option. This will open a list of options.
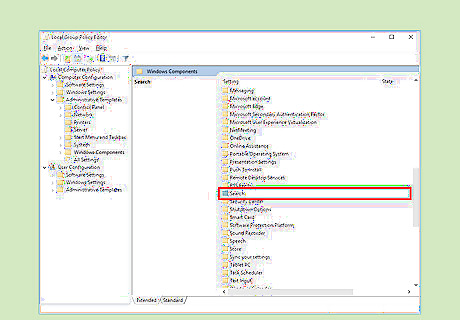
Select Search on the right side. Hit the S button quickly find this option and double-click on it.
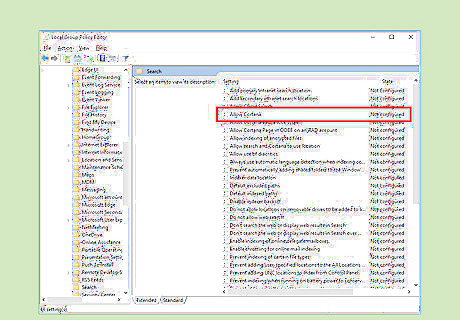
Locate Allow Cortana from there. It will be the fourth option on the context menu. Double click it. This will open a new window.
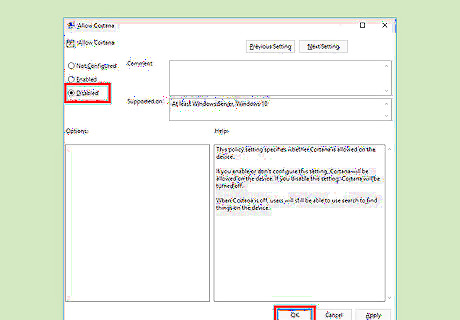
Select Disabled from the window. Click on the OK button to save your changes. Also, restart your PC to remove the Cortana icon or search box from your taskbar. The Cortana icon will be replaced by a search icon in the taskbar. You're done!


Comments
0 comment