views
Using a Windows PC
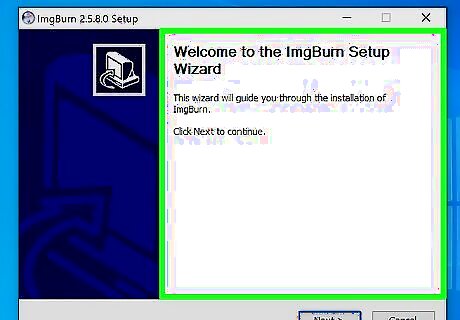
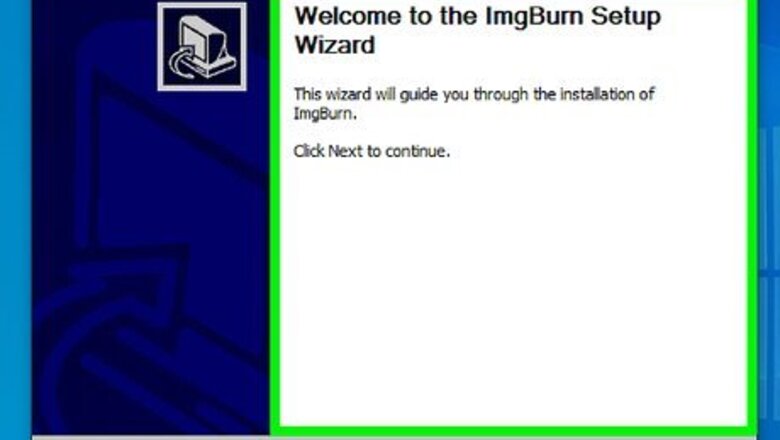
Download and install IMGBurn. IMGBurn is a free disc imaging application that can copy the contents (disc image) of a CD, DVD, or Blu-ray to your hard drive. Other popular disc imaging programs include Magic ISO and Power ISO. Use the following steps to download and install IMGBurn: Go to https://www.imgburn.com/ in a web browser. Scroll down to the latest version of IMGBurn. Click "Click here' in "Click here to download." Click one of the mirror download links (Warning: Some download sites may contain malware. Be careful what you click on and make sure your antivirus software is up to date.) Click the option to download the IMGBurn Setup file. Click the SetupImgBurn.X.X.X.X.exe file in your web browser or Downloads folder. Click Yes to allow the setup file to make changes to your system. Click Next on the setup wizard title screen. Click the checkbox next to "I accept the terms of the License Agreement" and click Next. Click the checkbox next to the components you want to install (or leave the default options selected) and click Next. Click Browse to select an install location and click Next to continue.. Type a name for the starting folder (or leave it as "ImgBurn") and click Next. Click Yes to allow IMGBurn to check for newer versions in the future. Click Finish.
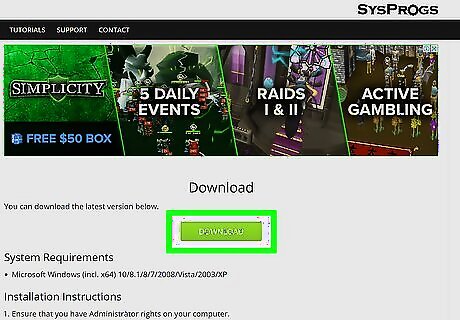
Download and install WinCDEmu (Windows 7 and below only). Windows 8 and 10 have the ability to mount a disc image without the need of a third-party application. However, if you are using Windows 7 or earlier, you need a third-party disc image reading application. WinCDEmu is a free disc image reader that allows you to read disc images that have been copied to your computer. Another popular paid disc image reader is Alcohol 120%. Use the following steps to download and install WinCDEmu: Go to https://wincdemu.sysprogs.org/download/ in a web browser. Click Download Now. Open the WinCDEmu-X.X.exe file in your web browser or Downloads folder. Click Yes to allow the setup file to make changes to your system. Click Install to begin the installation. Click Install to confirm the installation. Click Finish to complete the installation.
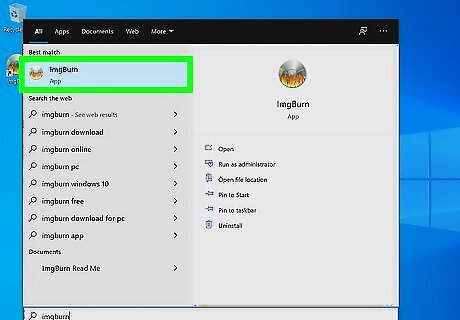
Insert the game disc and launch IMGBurn. IMGBurn has an icon that resembles a disc with flames in front of it. Place the game disc in your CD/DVD/Blu-ray Rom drive. Then open the Windows Start menu and click the IMGBurn icon to launch IMGBurn.
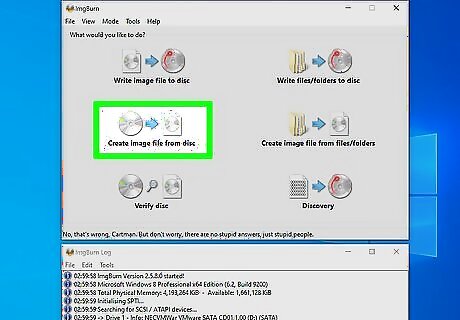
Click Create Image File from Disk It's the second option on the left. This displays the disc image preferences menu. If the disc has copy protection, a pop-up will warn you. Click Ok to continue. You can still try to create a disc image, but it may not work properly.
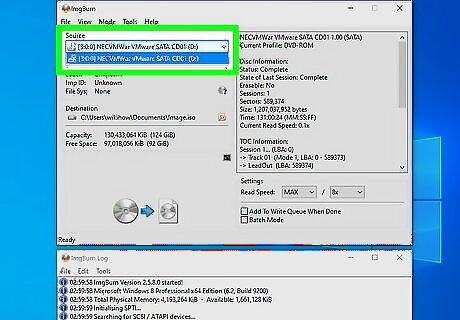
Select a source drive (if necessary). IMGBurn should detect which CD/DVD/Blu-ray Rom drive you are using automatically. If it does not, use the drop-down menu below "Source" to select the proper source drive.
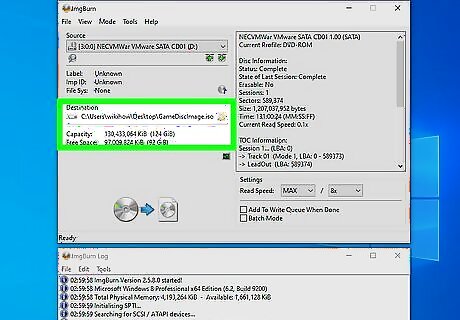
Select a destination folder for the image file. This is the location on your hard drive the image file will be saved to. By default, it will download to your Documents folder. To select a different location, click the icon that resembles a folder with a magnifying glass. It's below "Destination." Select a folder to save the image file to and click Save. Make sure you have sufficient disc space to store a disc image. They will typically be as large as the data contained on the disc. This could be up to 700MB for a CD, up to 4.7GB for a DVD, and up to 200 GB for a Blu-ray disc.
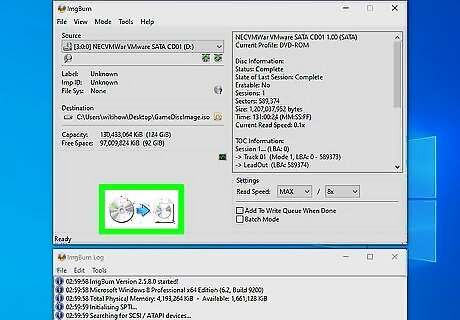
Click the icon with two CDs to begin. It's the icon that resembles an arrow in between a CD and a CD on a sheet of paper. Click this icon to start creating a disc image. This may take a while to complete depending on how large the disc is and how fast your computer and CD/DVD/Blu-ray Rom drive. Once the disc image is created you can remove the disc from the drive. If the game has multiple discs, you will need to create a separate disc image file for each disc.
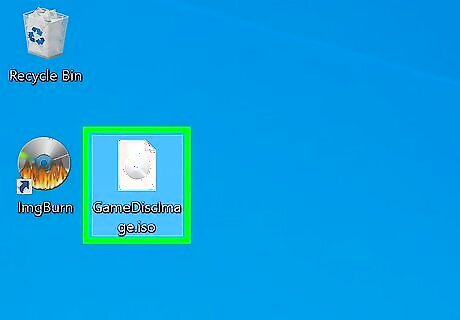
Double-click the disc image file to mount it. Once IMGBurn is finished creating the disc image file, all you need to do is double-click it. Windows 8 and 10 will automatically assign the image file a drive letter and mount the disc image as a drive. If you are using Windows 7 and below, this will open WinCDEmu. It will ask you if you want to mount the disc drive. Confirm that you want to mount the disc image to continue.
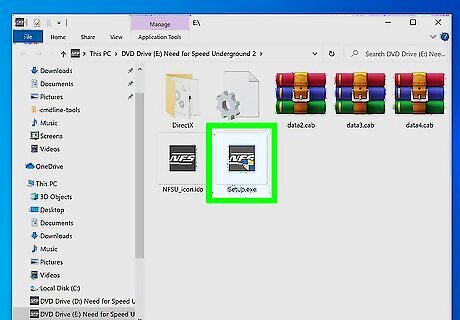
Run the game. Once the disc image is mounted, you can run the game the same as you would if it were a CD inserted in a disc drive. Either click the game's executable icon or click the option to launch the game in the startup menu. If the game has multiple discs, make sure you have a disc image for all discs. Mount the disc image for the next disc when prompted to change discs.
Using Mac
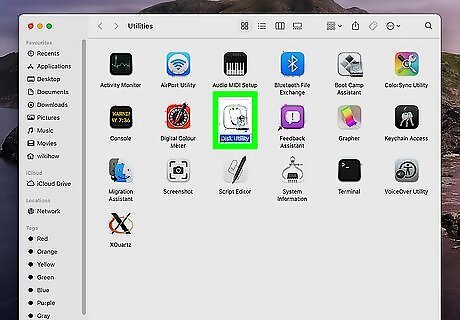
Insert the disc and open Disk Utility. MacOS is able to create disc images natively using the Disk Utility. Macs native disc image format is ".dmg" files. Third-party disc image creation software, like Roxio Toast or Nero can be used as well. Use the following steps to open Disk Utility. Click the magnifying glass (Spotlight) icon in the upper-right corner. Type "Disk Utility". Click the Disk Utility icon in the search results.
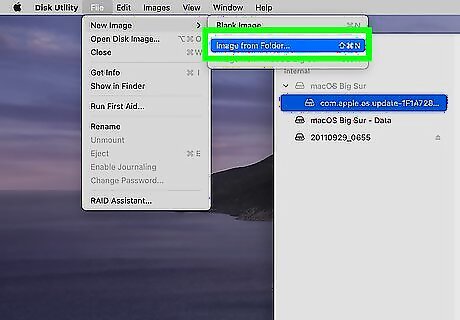
Select the CD/DVD/Blu-ray Rom drive for image creation. Use the following steps to select the source drive for image creation: Click the disc name in the panel to the left to select it. Click File in the menu bar at the top. Hover over New Image. Click Image from [disc name].
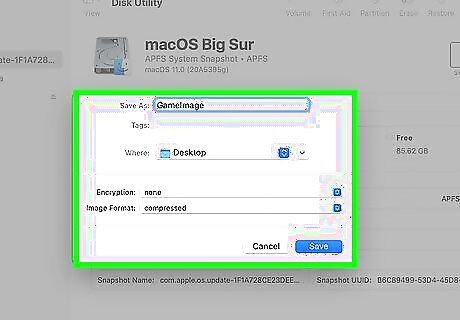
Create the disc image. Both "Read-Only" and "Compressed" format types will create a ".dmg" file type. This is the native disc image format for macOS. "Read-Only" formats are larger but faster. For the purposes of mounting a disc to play a game, either Read Only" or "Compressed" will work. It may take a while to finish creating the image file depending on the size of the disc. Once it is done, you can remove the disc from the disk drive. If the game you are saving has multiple discs, you will need to create an image file for each disc. Use the following steps to create a disc image: Type a name for the image file next to "Save As: Select a destination to save the file to next to "Where." Select the format type next to "Format." Click Save to start creating the image file.
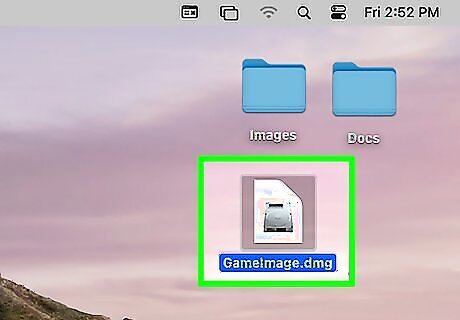
Mount the image file. Navigate to the disc image location in Finder and double-click the disc image file to open it. You can also mount a disc image using Disk Utility by clicking File followed by Open Disc Image. The computer will now function as though the disc were inserted into the optical drive.
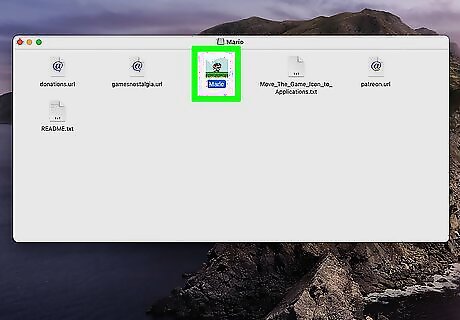
Run the game. Once the disc image is mounted, you can run the game the same as you would if the disc was installed in the disc drive. Simply click the game's icon in the Dock or Applications folder to launch it, or click the option to launch the game in the startup menu. If the game has multiple discs, you will need to mount the image file for the next disc when asked to change discs. To unmount a disc image, simply click the "Eject" icon next to the disc image name in the Finder, or drag the disc image drive to the Trash on the desktop.
Using Linux
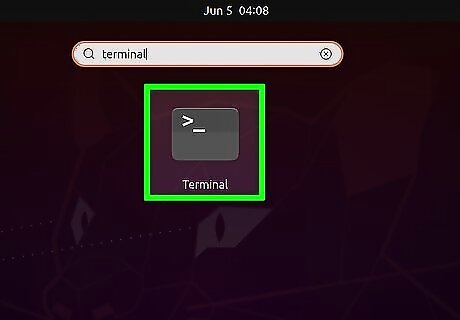
Press Ctrl+Alt+T to open the Terminal. You can also click the Terminal icon in the Apps menu. It has an icon that resembles a black computer screen with a white text cursor.
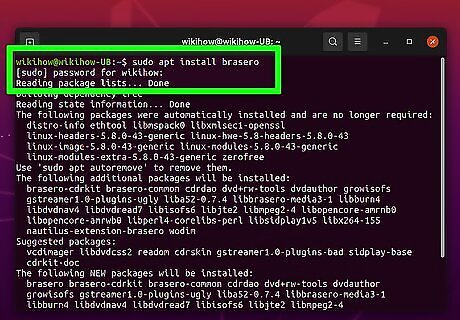
Type sudo apt install brasero and press ↵ Enter. This is the command to install Brasero. This is a Linux app used to burn CDs and DVDs. It can also be used to write disc image files. If asked to enter a password, enter the password you use to log in to your Linux computer. If asked if you want to continue, press Y on the keyboard and press Enter.
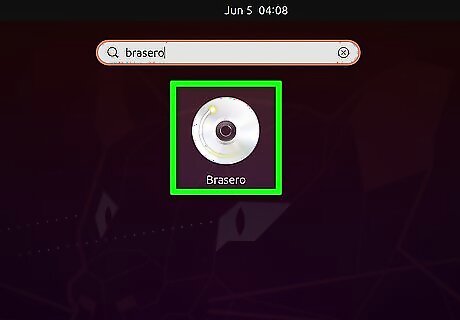
Insert the disc and open Brasero. Brasero has an icon that resembles a CD. Insert a CD in your CD/DVD Rom and click the Brasero icon in your Apps menu. If you're not sure which icon to click to open the Apps menu, press the Super key (Windows key) and type Brasero in the search bar.
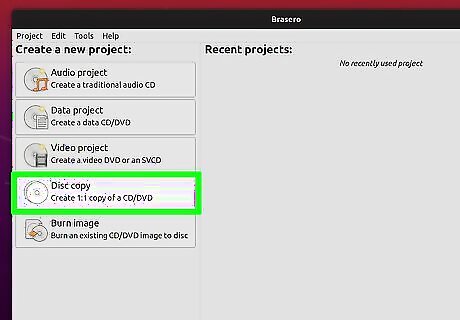
Click Disk Copy. It's the fourth option in the menu. This option allows you to create an image copy of a CD or DVD.
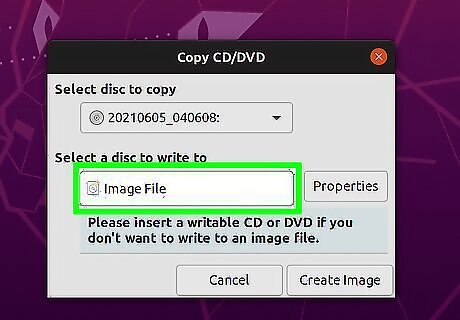
Ensure "Image File" is selected. Unless you have two or more disc drives, this should be the default option. If it is not, use the drop-down menu below "Select a disk to write to" and select "Disk Image."
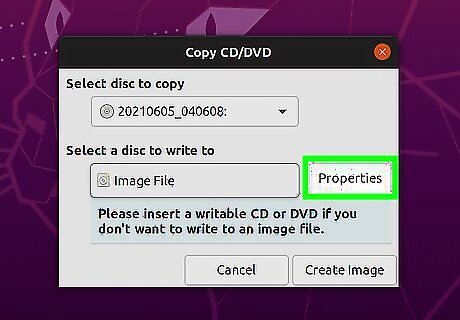
Click Properties. It's the button next to the drop-down menu with "Disk Image."
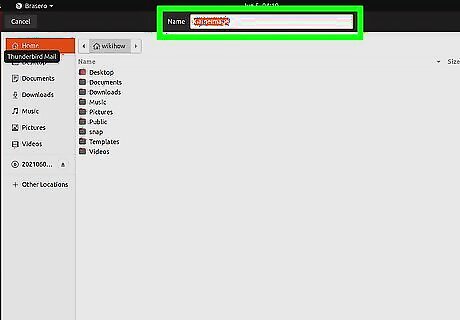
Type a file name for the disc image next to "Name." It's the text bar at the top of the Properties window.
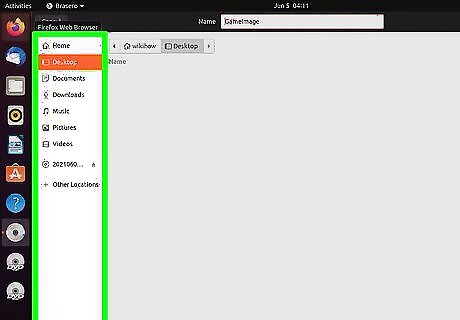
Select where to save the image file to. Click any of the folders in the properties menu to select where to save the image file.
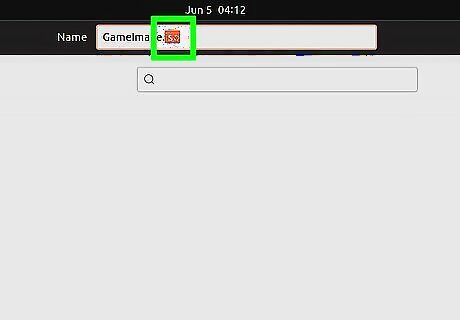
Select "ISO9960" as the image file format. Use the drop-down menu next to "Disk image type" at the bottom to select "ISO9660." This writes the image format in ISO format, which is the standard for both Linux and Windows computers.
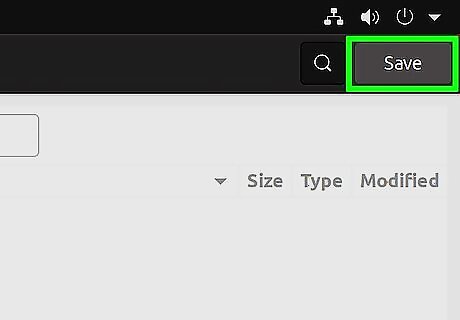
Click Save. It's next to the "Name" bar at the top. This saves your image properties.
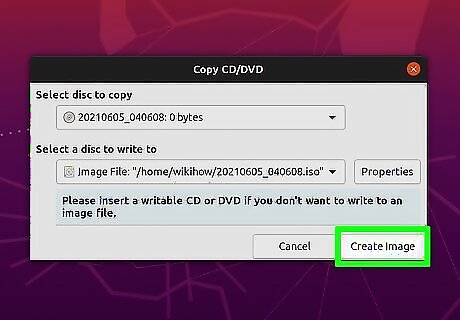
Click Create Image. This starts creating a disc image from the CD. This may take a while depending on how large the disc is and how fast your CD/DVD ROM is. If the game has multiple discs, be sure to create an image file for each disc.
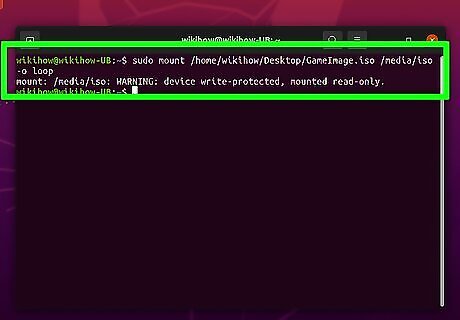
Mount the disc image file. You must have root user access to mount an ISO file in Linux. If you're are using a Gnome or KDE-based version of Linux (such as Ubuntu or Fedora), you can right-click an ISO file and click Open With Disk Image Mounter to mount an ISO file. If this option is not available for your Linux distribution, find the exact path of the ISO file and use the following commands in the Terminal to mount a disc image: Type sudo mkdir /media/iso and press "Enter'. This creates a new directory to use as a mount point. It can be any location in your hard drive you want. Type sudo mount /path/to/iso/filename.iso /media/iso -o loop and press Enter. Replace "path/to/iso:" with the actual path the ISO file is located in (i.g. "/home/username/Downloads/") and replace "filename.iso with the actual filename of the ISO file. If you created a different mount point other than "media/iso", be sure to enter the correct mount point location.
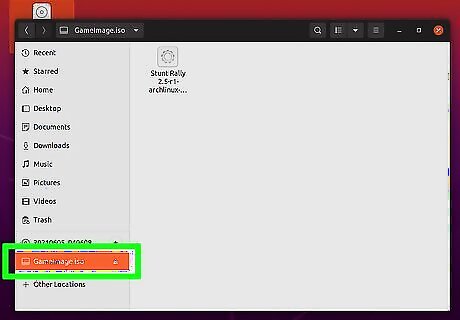
Start the game. Once the disc image is mount, you can run the game the same as you would if the disc was inserted in the disc drive. Either click the game icon in the Apps menu, or click the option to launch the game from the startup menu. If the game has multiple discs, you will need to unmount the disc image and mount the next disc image when asked to switch discs.
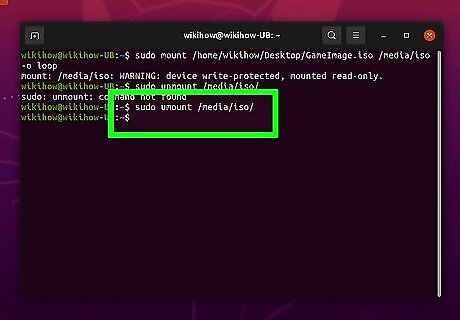
Unmount a disc image. When you are done using a disc image, go ahead and unmount it. If you have a Gnome or KDE-based version of Linux, simply open the File Manager and click the Eject icon next to the disc image in the panel to the left. For other Linux distributions, use the following Terminal command to unmount a disc image: Type sudo umount /media/iso/ and press Enter. If you have a different mount point other than "/media/iso/" be sure to enter the correct mount point. This unmounts the disc image.



Comments
0 comment