views
Changing the Name of Your Personal Hotspot
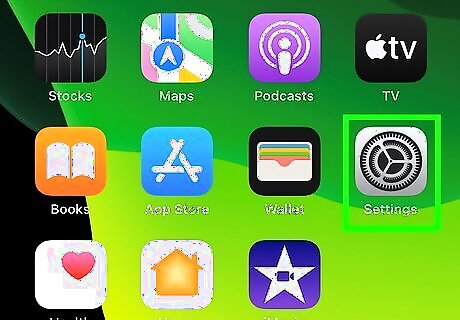
Open the Settings app on your phone. To change the name of your phone’s personal WiFi hotspot, you’ll need to change the name of your phone. To get started, tap the iPhone Settings App Icon Settings icon on your home screen.
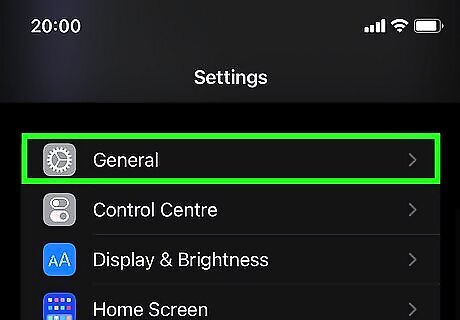
Tap on General. Once you’ve opened the Settings app, scroll down in the menu until you find iPhone Settings General Icon General. When you tap it, a new menu screen will open.
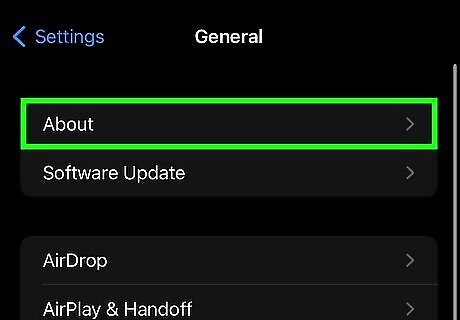
Select About from the menu. You should see it at the top of the list of options. Tap it to open a screen listing various data about your phone, including its name.
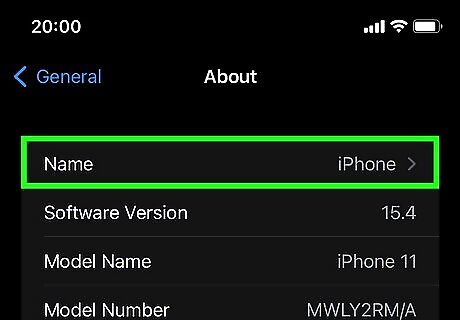
Tap Name at the top of the list. This will open up a new screen displaying your iPhone’s current name, which is also the name that shows up in your list of WiFi networks on other devices.
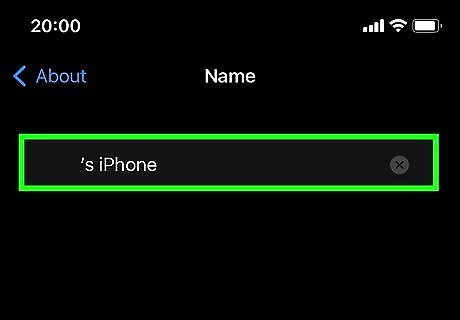
Enter a new name and hit done. To clear your phone’s current name, hit the grey x next to the name. Then, type in the new name using the keyboard at the bottom of the screen. Tap the blue done button in the lower right corner of the keyboard when you’re finished. When you initially set up your phone, it will usually have a generic name such as “Mary’s iPhone” or just “iPhone.” Choose something distinctive that you can easily recognize, such as “Wacky WiFi” or “Awesome sauce Hotspot.” It may take a moment for the new name to show up in the list of WiFi networks on your other devices. You might also see the old name temporarily, but you won’t be able to connect to it.
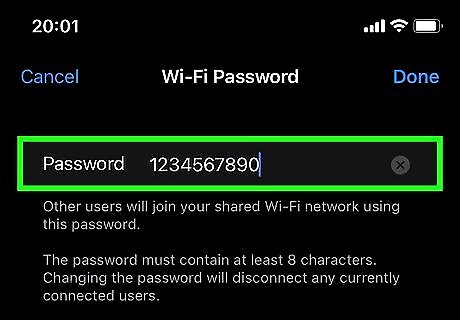
Secure your Hotspot with a password. If you don’t want just anyone to be able to hop on your iPhone’s Personal Hotspot, you can set a password for it. To do this, open the iPhone Settings App Icon Settings app, then tap iPhone Settings General Icon General. From there, select Cellular, then Personal Hotspot, then Wi-Fi Password. Enter the new password of your choice. Your password must be at least 8 characters long and use standard ASCII characters. These include any of the letters or numbers on the English keyboard, plus some punctuation. If you’d rather not make your hotspot visible to others who aren’t signed into your iCloud account, switch off Allow Others to Join in your cellular settings. You can locate this setting just above Wi-Fi Password when you open the Personal Hotspot menu.
Updating Your WiFi Router’s Name from Your Phone
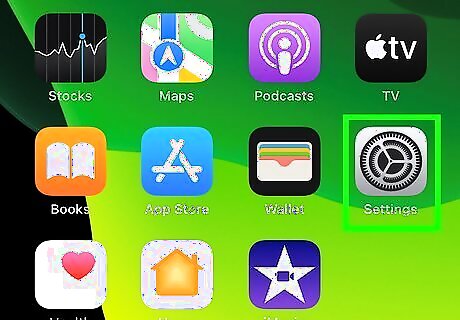
Open Settings on your iPhone. Tap the iPhone Settings App Icon Settings icon on your home screen. You won’t be able to directly rename your WiFi network from there, but you can usually find your router’s IP address in your phone’s settings. You’ll need the IP address to log into your router.
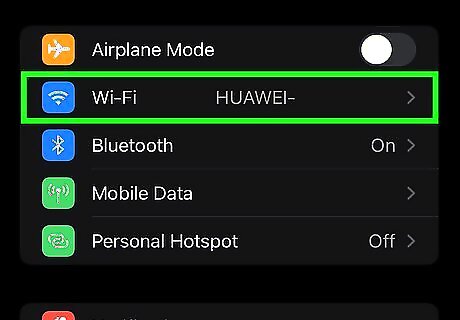
Tap on Wi-Fi. This is located close to the top of the Settings menu. Tap on the Wi-Fi icon Mac Wifi to view information about your current WiFi network. If you currently have access to more than one WiFi network, make sure you’re logged into the correct one on your phone. Tap the name of the network you want to join in the list of available networks, and log in with the current network password if you’re prompted to do so.
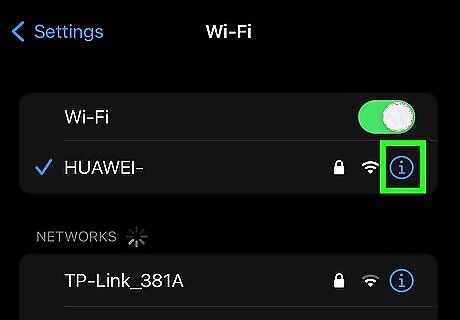
Select the Info button next to the network name. Tap the blue Info button Android 7 Info to the right of the network name once you’re connected. This will open a new menu with detailed information about the WiFi network and router.
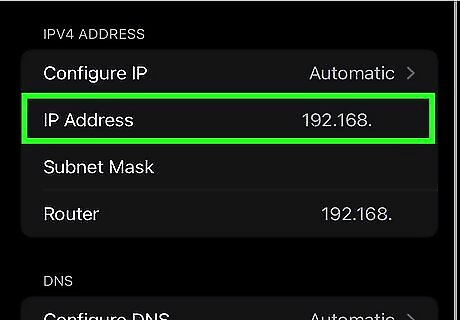
Copy your router’s IP address. Scroll down until you find the IP address for your router. You may see several IP addresses listed, so look for the one next to the word Router under the section called IPV4 Address. Once you spot it, tap and hold it until a Copy button appears. Tap the button to copy the address. Your router’s IP address will typically look like a series of 4 numbers, 1-3 digits each, separated by periods. For instance, you may see a number like 123.456.1.1.
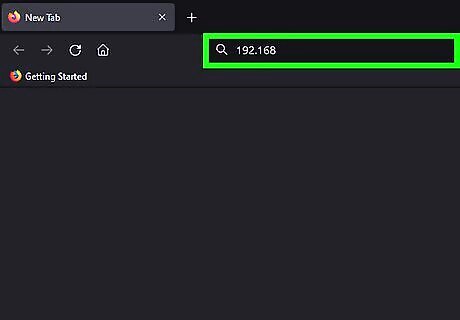
Open a web browser and paste in the IP address. Any browser on your phone should work for this. Paste or type the IP address directly into the address bar, without adding http:// or any other additional characters in front of it.
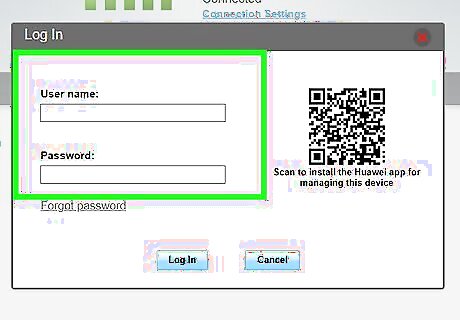
Enter the router ID and password printed on the router. Once you open your router’s page, you may be prompted to enter your login information. If you don’t know the user ID and password for your router, you can usually find it printed on a sticker on the side of the router. In many cases, the default username for the router will be “Admin”. However, look at the label on your router to be sure.
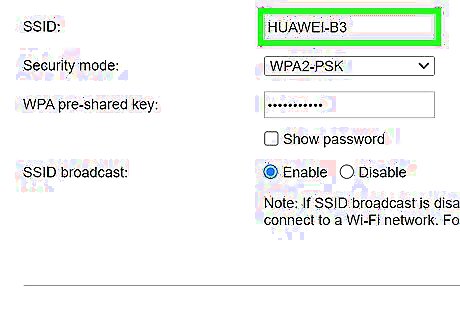
Follow the prompts on the router page to change your network name. Depending on your internet service provider and the manufacturer of your router, you might see a variety of different things once you log in. If you don’t immediately see an option to change your WiFi network name, look for a link or tab called Wireless, Modify your Wi-Fi settings, or something similar. Click the link and follow the instructions to give your network a new name. While you’re at it, you might want to update your Wi-Fi password. It’s much easier for hackers to get into your network if you keep the default password settings for your network. Try to choose a network name that’s unique and doesn’t reveal any personal information. For instance, pick a combination of words that’s meaningful to you, the name of a favorite book or movie, or a silly pun (like “Tell my wifi love her” or “The promised land”).
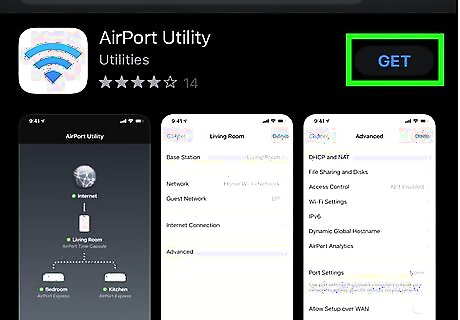
Use the AirPort Utility app if you have an AirPort router. If you use one of Apple’s AirPort Base Station routers, you can easily manage the name of your WiFi network using the AirPort Utility on your iPhone. Download the utility from the App Store, then open it up to view your Base Station and any other devices connected to it. To change the name of your network: Select your router (or base station) and tap Edit. Enter a new name for the network in the Wireless Network Name field. Tap Update to save your changes.


Comments
0 comment