
Accessing the Appearance Settings

Launch Safari. Open a new browser window by clicking on the Safari icon that’s either on your desktop, the Start menu, or on the taskbar. The icon is a tiny blue-and-white compass.
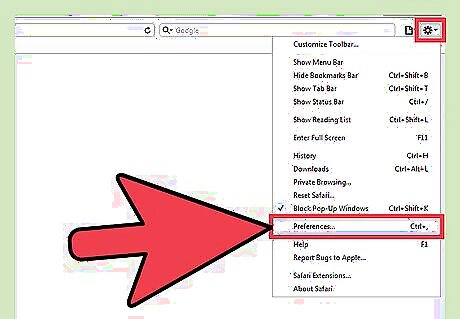
Open Settings. Once you have a Safari window up, click on the icon that looks like a small gear box at the top-right side of the screen. This will bring up a drop-down menu, and from the options displayed, select “Preferences” to open your Safari Preferences.
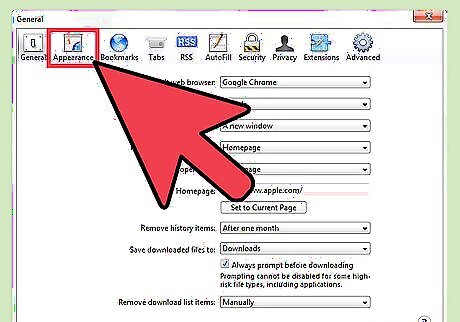
Look for the Appearance pane of Safari Preferences. A window of all the different preferences and settings on your browser will open. Running across the top of the screen is a list of submenus. Click on the pane that says “Appearance” to display the options under it.
Changing Your Safari Browser’s Appearance
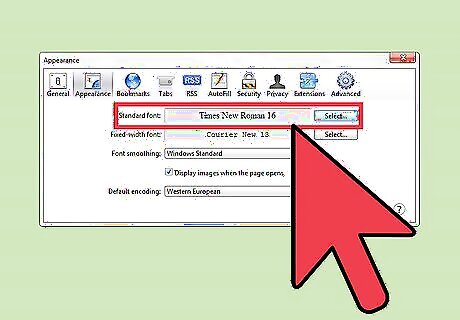
Change the browser’s font. The first item under Appearance is for the font used on your browser. To change it, click on the Select box next to the default font to display a list of the different kinds of fonts you can use. Have a go, pick the font that calls out to you, and click on it!
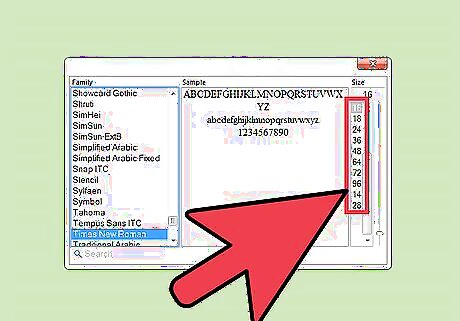
Change the font size. After you selecting your font, you can change the size of the text, which is directly next to the list of fonts. Once you’ve set it to your liking, click on the red “X” in the corner to close the font box. Your selected font and size will be saved automatically.
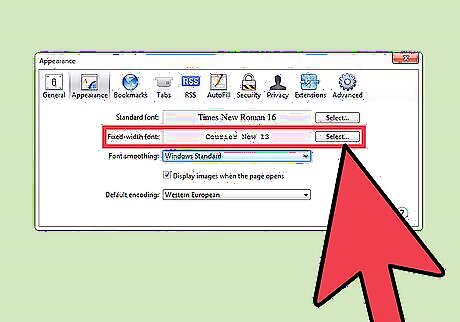
Change the font for fixed-width text. This is the same as changing the browser’s font, the only difference is that this font is used for text that has a fixed width. Click on the gray Select box, pick your font and its size, and close the window.
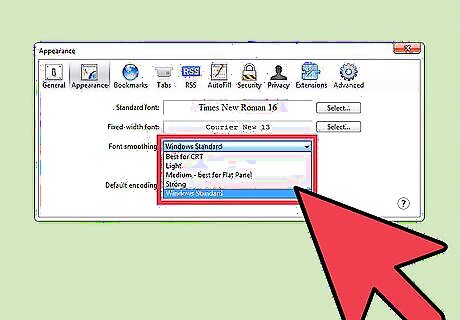
Edit the font smoothing. Font smoothing determines how text looks on your screen. The default is set to Windows Standard. You can make changes by clicking on the drop-down menu where there will be a list of the different ways to edit the font smoothing. Click the setting that works for you. If you want a smoothed-out look, you can pick something that blends with the backdrop. If you have trouble reading, you can adjust the font smoothing to make the font stand out from the background.
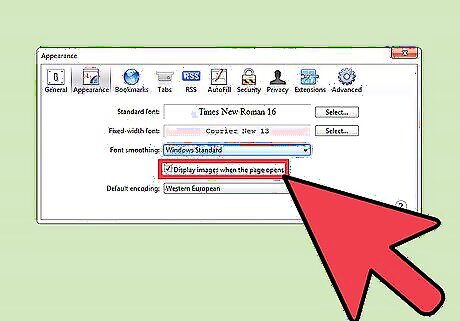
Decide whether you want images to be displayed automatically. How do you want Safari to handle the display of images when a page opens up? It’s a simple on–off check box. If you want to turn images on, just click on the check box. If you’re worried about going to a site and getting a virus, turn the images off. This will ensure that your computer stays safe from unwanted content or spyware.
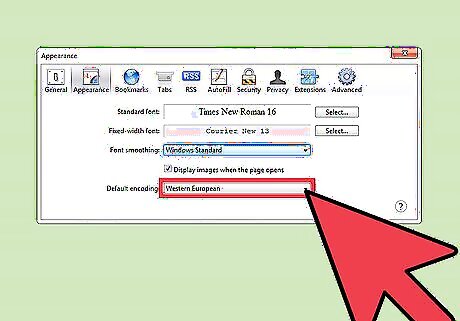
Set your default encoding. The final setting, default encoding, is for the area you are from, and determines how the text reads on the screen. Click on the drop-down menu to select your area from the list.
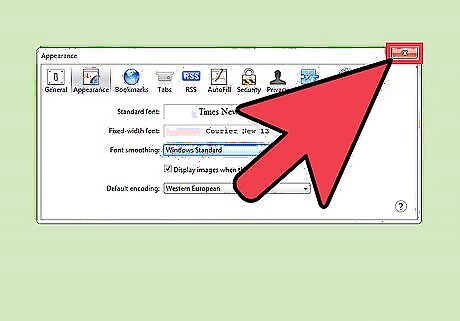
Close the Preferences menu. When you are done, just close out the Preferences menu, and your new settings will be saved automatically.


Comments
0 comment