
- Try ChatGPT Plus plugins to bring in training data from the web, your CMS, PDFs, & other sources.
- Use Custom Instructions to teach ChatGPT about you and your data using prompts.
- To train a custom chatbot for your website or app, try a builder like BotSonic or SocialIntents.
- You can use the ChatGPT API and Python to create an AI chatbot trained on files from your computer.
Using ChatGPT Plus Plugins
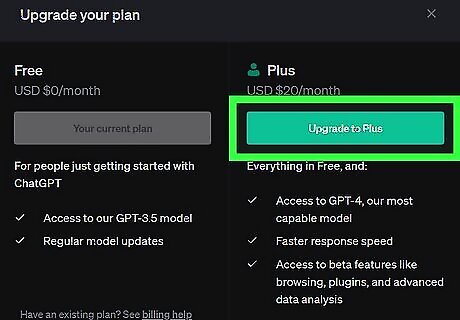
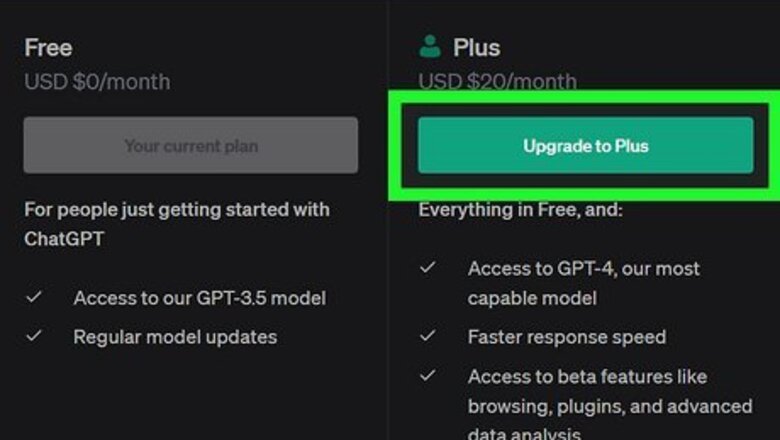
Subscribe to ChatGPT Plus. With a ChatGPT Plus subscription, you can use plugins to connect your own data to ChatGPT. For example, if you want ChatGPT to perform calculations or work with your data in Google Sheets, on a specific website, or using peer-reviewed articles, you can use plugins to give ChatGPT access to the data it needs to process your requests. ChatGPT Plus also gives you access to GPT-4, the most advanced version of ChatGPT.

Enable plugins. Once you have ChatGPT Plus, you can enable plugins easily: Click the three dots on your name at the bottom-left corner of ChatGPT. Click Beta Features. Toggle on the Plugins feature.
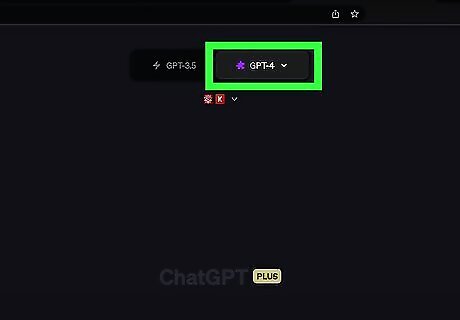
Create a new chat using GPT-4. Make sure to click the GPT-4 model at the top to gain access to the plugin list.
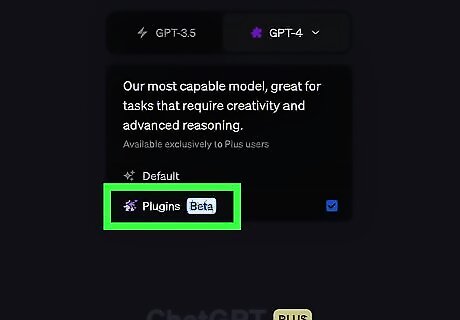
Click Plugins. You'll see it below "Default."
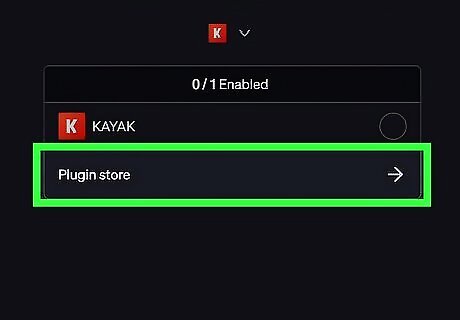
Click Plugin Store. This launches the Plugin Store, which is only visible to subscribers.
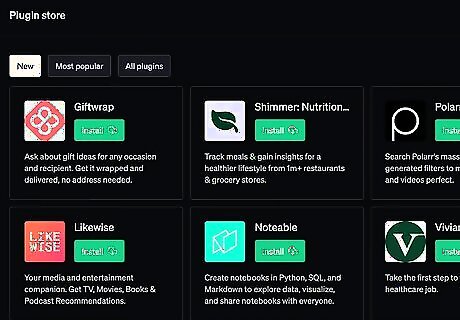
Search for a plugin that supports your training data. Search or browse for a plugin that supports your training data type, then click Install to get the plugin. If the plugin requires you to log in to a data source, you'll be prompted to do so during installation. Some plugin ideas for training ChatGPT with your data: If you have a Zapier account, you can use the Zapier plugin to train ChatGPT with data from Salesforce, HubSpot, Google Sheets, Google Docs, your email account, your CMS, databases, and many other sources. For web-based data, try the Link Reader, Web Requests, Web Search, or Scraper plugins. If your training data is in one or more PDF files or Google documents, you can install one of the PDF plug-ins, such as ChatWithPDF or AiPDF. You'll also find plugins that can interact with many different data sources, including Chat With Workspace (for Notion), Sembot (for Semrush), and AI2SQL (for SQL databases). To use a video as training data, try the Video Insights plugin.
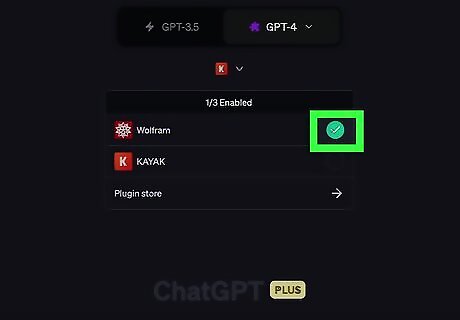
Enable the plugin you want to use. At the top of your GPT-4 conversation, click the menu, then check the boxes next to the plugins that pertain to your training data. If the plugin requires you to log in to a data source, you'll be prompted to do so during installation.
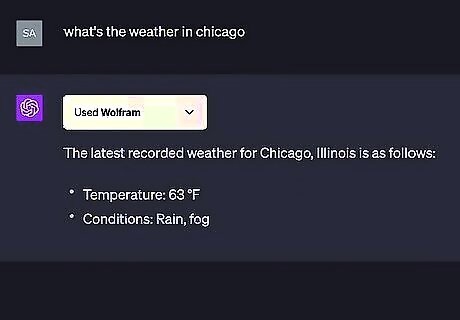
Interact with your data. Once you've enabled the plugin, you can use it to train ChatGPT on the data it needs to provide you with answers. Provide ChatGPT with a link to the data source, and explain what you want it to do with your data. If you've enabled a plugin that can read websites, Sheets, or PDF files, paste a public link to the file into the chat and provide ChatGPT with a prompt. For example, "Use the data in this spreadsheet to tell me which of my sales agents needs uptraining."
Using Custom Instructions

Enable Custom Instructions for ChatGPT. If you don't have ChatGPT Plus, you can train the free version of ChatGPT by giving it custom instructions. You can use this method to tell ChatGPT more about you, your projects, your business, or any other details to help the chatbot generate more applicable responses. To enable Custom Instructions: In the mobile app, go to Settings > Account > Custom Instructions, and toggle the feature on. On the web, sign in to ChatGPT, click your name at the bottom-left, click Custom Instructions, and then click OK.
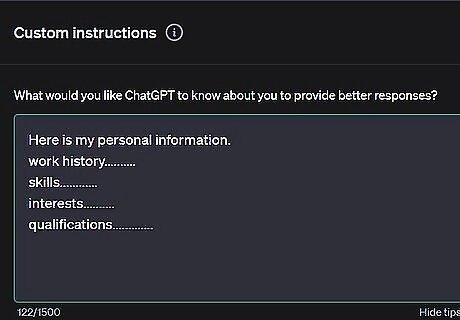
Enter your custom instructions in the top box. Now you can tell ChatGPT anything it needs to know to help you better. For example, if you're using ChatGPT to write cover letters for multiple jobs, you can explain your work history, your skills, interests, qualifications, and other details that you want the chatbot to remember for future cover letters. You may also use this field to provide specific training data for ChatGPT to better field your questions about certain data, such as your sales figures for the year, customer feedback, and more. Include anything that you don't want to repeat in your prompts. For example, if you're using ChatGPT to develop catchy titles for your blog posts, you can specify your writing style and give examples of your favorite titles here instead of repeating yourself in each prompt.
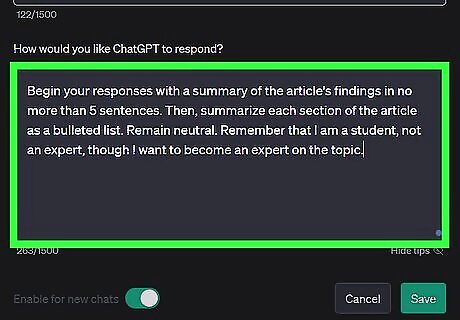
Detail how you want ChatGPT to respond. In the second field, you can describe the tone, format, and other preferences for ChatGPT's responses. For example, if you're a student using ChatGPT to summarize scientific articles, you can type something like "Begin your responses with a summary of the article's findings in no more than 5 sentences. Then, summarize each section of the article as a bulleted list. Remain neutral. Remember that I am a student, not an expert, though I want to become an expert on the topic."
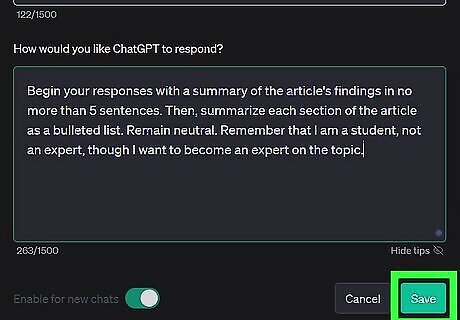
Save your settings. Now that you've provided ChatGPT with some training data, it will use it to better answer your questions in all future conversations. If you don't want ChatGPT to use your data in other conversations, you can turn off Custom Instructions once you start a new chat.
Creating Custom Chatbots for Your App

Sign up for a third-party custom ChatGPT chatbot builder. If your goal is to create your own version of ChatGPT for your website or app, the easiest way to get started is to use a ChatGPT training tool. These tools create custom chatbots using the ChatGPT API, giving your site or app a version of ChatGPT that's actually trained on your data. These tools are not free, but they are simple to use and are the best way to train ChatGPT on your data if you don't know how to code. Some tools to check out: https://www.socialintents.com https://www.chatbase.co/ https://writesonic.com/botsonic https://customgpt.ai https://activechat.ai/ https://aista.com/

Generate an API key. Depending on the product you're using, you may not need to use your own API key. But if you're on a plan that requires using your own API key, you can create one easily: Go to https://platform.openai.com/account/api-keys. If you're not signed in, you'll need to do so now. Click Create new secret key. Name the key. Click Create secret key. Copy your key to a text file and save it, as you won't be able to view it again once you close this tab.
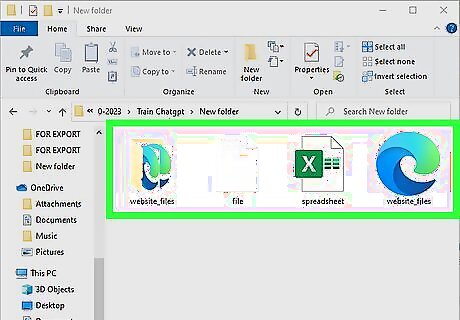
Prepare your training data. Most custom chatbot creators support multiple types of training data, including text files, documents, Excel, websites, SQL, and more. To keep things simple, add your training data to a single folder so you can easily upload it to your provider.
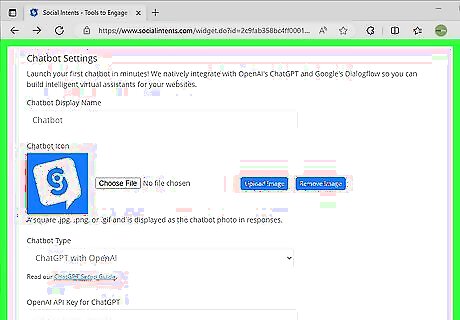
Upload your data to the ChatGPT creator. Follow your tool's instructions to add the training data to your custom chatbot. You can usually type some training data in manually, such as your bot's name, company name, address, common responses to frequently asked questions, and more. Once the training is complete, you can integrate your custom ChatGPT-based chatbot into your website or app.
Creating Custom Chatbots in Python
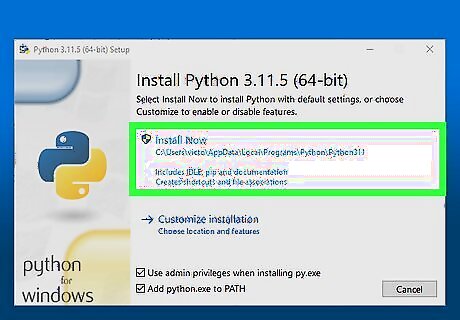
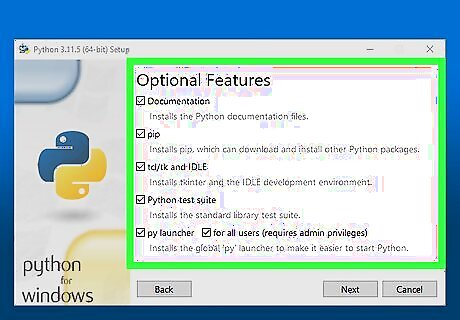
Install Python (if you haven't already). If you know Python, you can easily train ChatGPT on your own data by creating a script. This can be helpful if you or someone you know wants to interact with a version of ChatGPT that can access and work with specific data that's not necessarily on the web. You'll need Python 3 to use the tools in this method. If you haven't already installed it, see How to Install Python. You'll also want to make sure you've upgraded pip if you haven't done so in a while. You can do so using the command python3 -m pip install --upgrade pip (Mac & Linux) or py -m pip install --upgrade pip (Windows). You won't be able to integrate this chatbot into an existing website, but your custom chatbot will be available on the web.
Install the required Python libraries. You'll need to install four different libraries to train ChatGPT with your own data: Install the OpenAI library so you can interact with the ChatGPT API: pip3 install openai Install LlamaIndex so you can connect ChatGPT with your data: pip3 install llama-index If you want to use PDFs to train ChatGPT, install PyPDF2: pip3 install PyPDF2. Install Gradio, which allows you to use a web-based user interface to interact with the chatbot: pip3 install gradio.

Generate an API key. If you haven't already generated an API key for this project, you will need to create one using your OpenAI account. Here's how: Go to https://platform.openai.com/account/api-keys. Click Create new secret key. Name the key. Click Create secret key. Copy your key to a text file and save it, as you won't be able to view it again once you close this window.
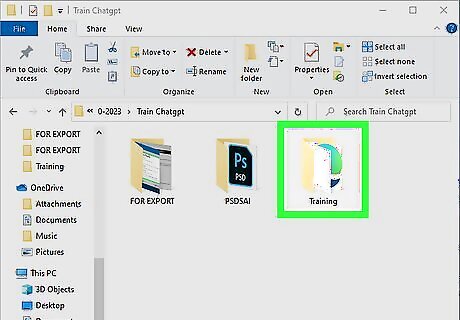
Place all of your training data in a single folder. Create a folder on your computer called training. Create a new subfolder called docs inside that folder. Then, copy your training data to the docs folder inside the training folder. You can use text files, PDFs (if you installed the PyPDF2 library with pip), CSV files, and more to train your model. If you want to use Excel data to train your model, you will need to convert it to CSV first. Because OpenAI charges you for using the API, start with smaller files when training. The larger the files (and the more files you're using to train the model), the more expensive the process will be.

Write your Python script. You can use any text editor, including Notepad for Windows or TextEdit for Mac. We'll provide an example script below, but replace 'Your API Key' with your actual API key. from llama_index import SimpleDirectoryReader, GPTVectorStoreIndex, GPTListIndex, LLMPredictor, PromptHelper import gradio as gr import sys import os os.environ["OPENAI_API_KEY"] = 'Your API Key' def construct_index(directory_path): max_input_size = 4096 num_outputs = 512 max_chunk_overlap = 20 chunk_size_limit = 600 prompt_helper = PromptHelper(max_input_size, num_outputs, max_chunk_overlap, chunk_size_limit=chunk_size_limit) llm_predictor = LLMPredictor(llm=ChatOpenAI(temperature=0.7, model_name="gpt-3.5-turbo", max_tokens=num_outputs)) documents = SimpleDirectoryReader(directory_path).load_data() index = GPTVectorStoreIndex (documents, llm_predictor=llm_predictor, prompt_helper=prompt_helper) index.save_to_disk('index.json') return index def chatbot(input_text): index = GPTVectorStoreIndex.load_from_disk('index.json') response = index.query(input_text, response_mode="compact") return response.response iface = gr.Interface(fn=chatbot, inputs=gr.components.Textbox(lines=7, label="Enter your text"), outputs="text", title="Custom AI Chatbot") index = construct_index("docs") iface.launch(share=True)
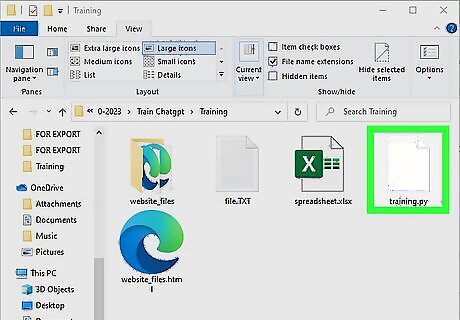
Save the script to your training folder. Make sure you're not saving it to the docs folder—it needs to be in the training folder (the same folder that contains the docs folder). You can call this script something like training.py.
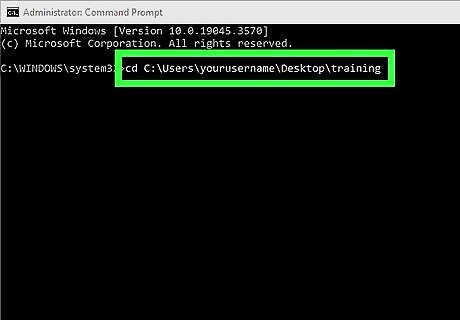
Run the script to train your chatbot. You can do so in a Terminal or Command Prompt window. Here's how: At the prompt, use cd to enter your training folder. For example, if you created the training folder on your Windows desktop, you might use cd C:\Users\yourusername\Desktop\training. Type python3 training.py and press Enter or Return. If you gave your script a different name, use that instead. The process may take several minutes, especially if you've added a lot of training data to your docs folder. Once the process is complete, you'll see two URLs (one local, and the other on the web) to access your custom-trained chatbot.
Access your trained chatbot. Copy the local URL from the terminal or command prompt window and paste it into a web browser. Or, if you want someone else to be able to access your chatbot, you can send them the public URL—the link will stay active for 72 hours, but make sure you don't turn your computer off in that time. To restart the chatbot after 72 hours, just run python3 training.app again to generate a new URL. To add new training data, copy new files into the docs folder, then run python3 training.app.


Comments
0 comment