
Quick Keyboard Shortcuts

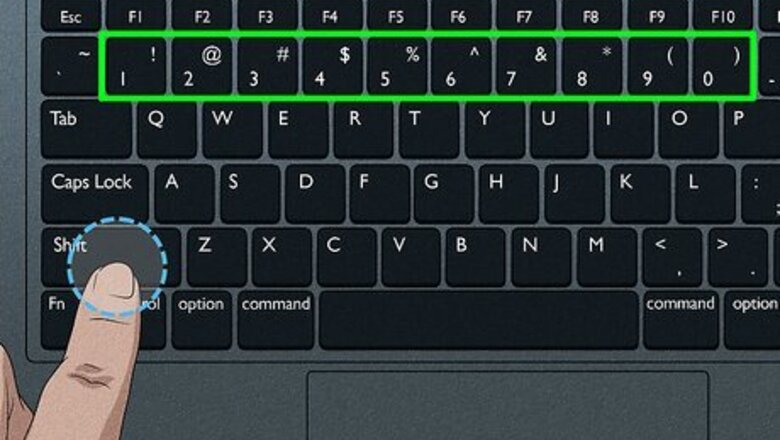
Use ⇧ Shift + number keys for @, #, and other common symbols. You’ve probably noticed that the number keys at the top of your Mac’s keyboard have extra symbols on them, including !, @, #, $, and %. To type any of those symbols, hold down Shift while pressing the number key with the symbol you want on it. For example, the combination ⇧ Shift+2 will give you the @ symbol. You can also hold down shift in combination with the different punctuation keys on the right side of your keyboard to get alternative symbols. For instance, ⇧ Shift+; makes :. Hold down Shift plus any letter key to make a capital letter.
Hold down certain letter keys to see related symbols. In text documents and some online text fields, holding down a letter will open a popup listing similar symbols with accent marks and other diacriticals. While holding down the key, click on the symbol you want, or press the number key corresponding to the number under the symbol. Here are a few examples: Hold down a to type à á â ä æ ã å ā. Other vowels have similar options. Hold down c to type ç ć č. Hold down n to type ñ ń. Note that many letters do not have a popup menu. The only characters that have this option are the vowels (A, E, I, O, U, Y), as well as C, L, N, S, and Z. This popup menu will not appear if you have the Key repeat rate slider set to Off in Mac Apple Apple menu > System Settings > Keyboard.

Hold down the ⌥ Option key. While holding down ⌥ Option (or Alt on some keyboards), pressing another key will result in a special symbol. This allows you to type dozens of symbols, mostly used in mathematics or currency. For example: ⌥ Option + p = π ⌥ Option + 3 = £ ⌥ Option + g = © ⌥ Option + 6 = § ⌥ Option + 7 = ¶ ⌥ Option + 0 = ° ⌥ Option + / = ÷ Check the end of this article for a full list of these keyboard shortcuts. Alternatively, follow the keyboard input instructions below to view an onscreen keyboard that displays these symbols.
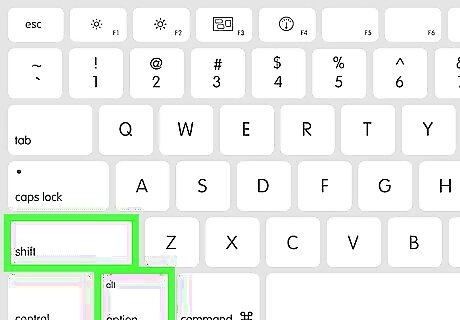
Hold down ⌥ Option and ⇧ Shift. For even more symbols, hold down both these keys while pressing any other key on the keyboard. You can refer to the list at the end of this article for all options, but here are a few examples: ⌥ Option + ⇧ Shift + 2 = € ⌥ Option + ⇧ Shift + / = ¿ ⌥ Option + ⇧ Shift + = ±
Emojis and Miscellaneous Symbols
Type a keyword and press Fn+E. For a quick and easy way to add emojis or other special symbols while you type, type a common keyword (such as “heart,” “smile,” or “money”) followed by fn + E. A menu will display a selection of emojis that match your keyword. Select one to replace the word you typed. If you don’t see an option you like, click the down arrow on the emoji menu to open the full Character Viewer window. The Character Viewer will open automatically if your Mac can’t find a good match for your keyword.
Press Fn+E to open the Character Viewer. Pressing the Fn key (or the key with the wireframe globe symbol) + E without typing anything else will open the Character Viewer menu. You can also enable your keyboard to open the Character Viewer when you press the Fn key by itself. To do this, go to Mac Apple Apple menu > System Settings > Keyboard and make sure Show Emoji & Symbols is selected next to the header that says Press [globe symbol] key to.
Open the Character Viewer from the Edit menu. As an alternative to using a keyboard shortcut, click the text field where you would like to enter an emoji, then click Edit in the menu bar at the top of the screen. Select Emoji & Symbols. This should work in most text fields, such as emails and text documents. If you want to make sure it works, try it in TextEdit. Depending on your macOS version, this menu option may be called Emoji & Symbols or Special Characters.... You can also open this menu in some apps with the keyboard shortcut ⌘ Command + Control + Space.
Browse your options in the Character Viewer. The special characters popup has several categories. Click the tabs at the left to switch between them. Click the arrows tab to scroll to more categories. If you're having trouble finding something, type a keyword into the search bar at the top right side of the Character Viewer. You can switch between this small view and a large view using the … button in the top right corner. You may need to scroll up before this button appears. You can also click the … button, then select Customize List to change which symbol categories are displayed in the navigation panel on the left side of the Character Viewer. You’ll find a lengthy list of options in addition to the emojis and other basic symbols that are available by default.
Choose your symbol. Double-click on a symbol to insert it into your text field. You can also drag-and-drop it into the field, or right-click (or control-click), select Copy Character Info, then paste it into your text field. On some older macOS versions, use the "Insert" button instead. The next time you use this menu, recently used symbols will appear in the first tab for easy access. If you use the Copy Character Info option, you will end up pasting not only the symbol itself, but a description and Unicode character codes.
Using the Keyboard Viewer
Open System Settings. You can access this from the top menu through the Mac Apple Apple symbol, or in your Applications folder. It may be in your Dock as well.

Select Keyboard. This is in the navigation menu on the left side of the System Settings window. You might have to scroll down to find it.
Click Edit next to “Input Sources”. Locate the Text Input header in the Keyboard menu, then click Edit next to “Input Sources.”
Toggle on Show Input menu in menu bar. If the toggle switch next to this option is grey, click it to turn it on. A new icon will appear in the menu bar at the top of your screen. The Input menu icon may look like a tiny Finder window with two symbols inside, a tiny keyboard, or an icon with one or more characters representing a particular language (such as “US” for U.S. English).
Click the Input menu button to expand the menu. When you click the new icon in your toolbar, you’ll see a couple different options in the popup menu. One is the Character Viewer, which allows you to browse through different emojis and other special symbols and insert them into a document. The other is the Keyboard Viewer, which opens a digital keyboard.
Select Show Keyboard Viewer. When you select this option, an image of a keyboard will appear on your screen. This is useful for tracking down symbols that aren't printed on your physical keyboard. For example, try holding down ⌥ Option and/or ⇧ Shift and seeing how your onscreen keyboard changes. You can drag the keyboard window anywhere on the screen. Resize it by click-and-dragging any of its corners. You can also insert symbols into a document by clicking them on the Keyboard Viewer.
Enable other keyboards (optional). If you type in multiple languages, go to System Settings > Keyboard and select Edit next to Input Sources. Click the + button in the bottom left corner of the window and add any additional layouts you want. Even if you don't type in other languages, some of these layouts could come in handy. For example, the English section may have a "U.S. Extended" keyboard. This unlocks even more symbols with the ⌥ Option trick described above. Some languages have an option to mimic a PC keyboard layout. This typically only changes the position of a few symbol keys. If you type on a non-English keyboard, a temporary switch to the standard English "U.S." keyboard allows you to use our list of symbol shortcuts below.
Switch between keyboards. You can have many keyboards enabled at one time. To switch between them, use the same top menu option where you found the character and keyboard viewers. Select the keyboard you want to use from the drop-down list. You can also create a hotkey to cycle through keyboards: Go to Apple menu > System Settings > Keyboard and click Keyboard Shortcuts. Select Input Sources from the menu pane on the left. There may already be default keyboard shortcuts set for the options Select the previous input source and Select next source in Input menu. If so, you can double-click the key combination and enter a new one to change it.


Comments
0 comment