views
Creating a New Image
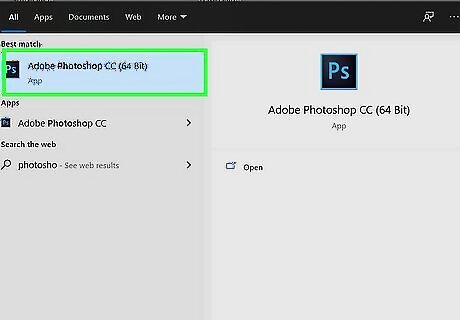
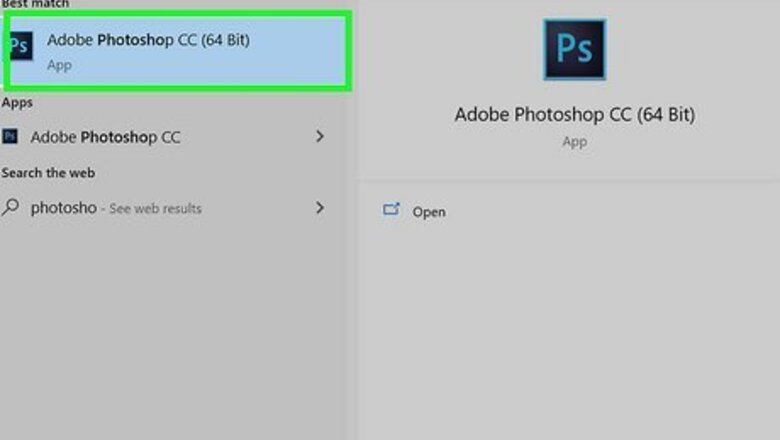
Open Photoshop on your computer. It'll be in your Windows Start menu or your Mac's Applications folder. Photoshop will open to the Welcome screen.
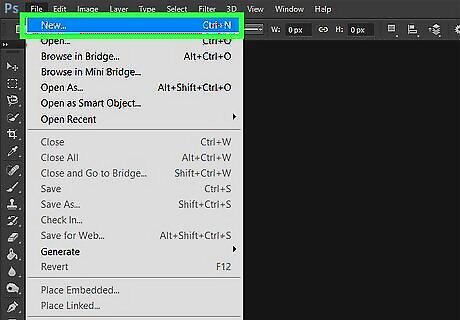
Click Create new. It's in the left panel. This opens the New Document window, which allows you to customize your starting canvas. If you're using an older version of Adobe Photoshop that doesn't open to a Welcome screen, click the File menu and select New to create a new image. If you want to open an existing image from your computer, select Open instead to browse for the file.
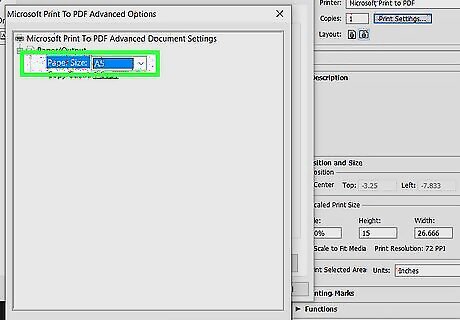
Choose your canvas dimensions. The canvas is your working area, and you can make it any size you'd like. It can be helpful to start with a blank document preset, which you can browse using tabs at the top of the window. These presets are organized by image type, and contain options for the most common sizes and resolutions for different types of projects. For example, if you're creating an A5-sized image to print, click the Print tab and select A5. You can also manually adjust the dimensions and resolution using the "Preset Details" panel on the right side.
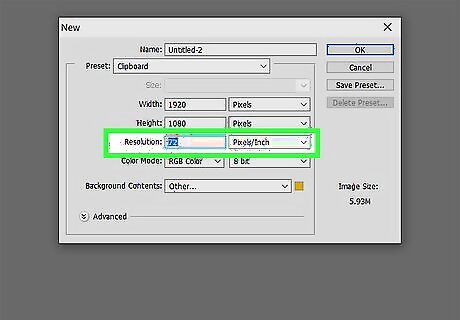
Change the resolution. Resolution determines how many pixels will be in one square inch of the image. The more pixels in an inch, the more detailed the image will be. If you chose a blank document preset, just keep the resolution the same unless you know you need to specify it exactly. If you plan to print your image and didn't choose one of the Print presets, you'll want to increase the resolution to at least 220 ppi (or 300 ppi for best results). 300 ppi is Adobe's default print resolution. A higher number of pixels per inch (ppi) will also result in a larger file. Larger files require more processing power from your computer and take longer to download, so avoid 300 ppi unless you'll just be printing the image. Standard web resolution is 72 ppi. When creating for the web, focus on dimensions (height and width) rather than ppi—increasing the ppi beyond 72 for a web-based image will not make it look any different in a web browser. Choose a resolution you'll want to keep—you can't increase the resolution later without degrading the image's quality.
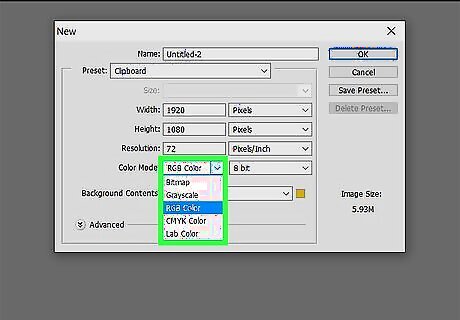
Choose your color mode. The color mode determines how the colors will be calculated and displayed. Choosing a preset also automatically selects your color mode, but you may need to change it depending on what you're creating. This is one setting which can be changed after the image has been created without too much consequence. RGB Color is the standard color mode. This is appropriate for images which will be viewed on a computer, as well as most printed documents. CMYK Color is another common color mode, but usually only used for printing. It will probably be best to create your image in RGB first and then convert it to CMYK before printing, since your computer will automatically display RGB colors. Grayscale is another common option and is pretty much exactly what it sounds like—instead of working with colors, you'll be working with shades of gray. With any color mode, the higher the number of bits, the more colors will be able to be displayed. Increasing the bits will also increase the file size, so only use a higher number if absolutely necessary.
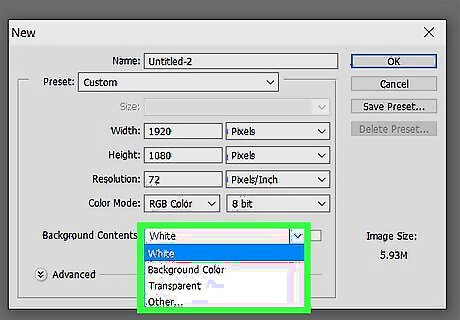
Select your background. This will mainly determine if your starting canvas is a solid color or transparent. A white canvas, which is the default for most projects, will make it easier to see what you are doing. A transparent canvas can make it easier to apply effects and produce backgroundless web images. You may want to start with a transparent background, which you can then color white. You can then create every other image element on their own separate layers above the background—when you erase the white background later, you'll have a transparent background, and the best of both worlds.
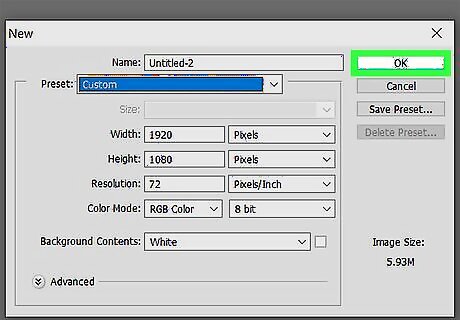
Click Create to create your image. This takes you to the Photoshop workspace, where you'll see the canvas you created.
Working with Layers
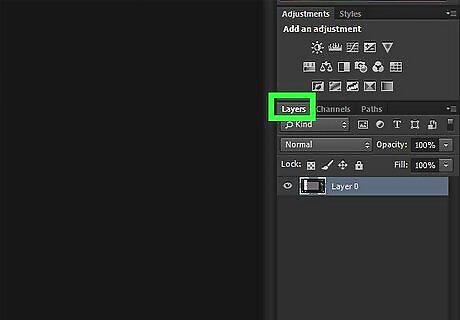
Discover the Layers panel. If you don’t see a panel called Layers in the bottom-right area of Photoshop, press F7 on your keyboard to open it. Layers allows you to separate aspects of your image, including filters and color changes, into pieces that can be edited separately. Edits on one layer will only affect that layer (though layer modes can affect how the layers interact). Layers are stacked on top of each other to form the final image, and you can rearrange, combine, and adjust the layers as needed. When you create or open a new image, you start with one layer—the Background layer. Note the layer called "Background" in the Layers panel.
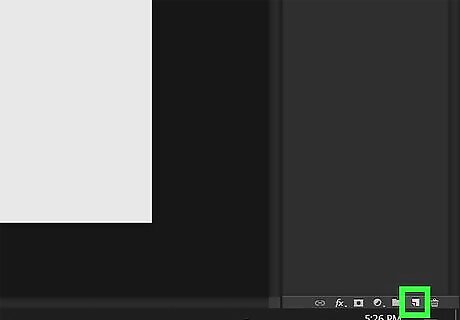
Click the New Layer button to create a new layer. It's the small square with a plus sign inside at the bottom of the Layers panel. Now you'll see a new layer above the Background layer called Layer 1. Another way to create a new layer is to click the Layer menu, select New, and then choose Layer. When you create a layer this way, you'll be asked to name the layer and choose some parameters, which will be helpful once you learn more about Photoshop. A third way to create a new layer is to press Shift + Command + N on a Mac, or Shift + Control + N on a PC. You can make a layer visible or invisible by click the box next to the layer where an eye appears.
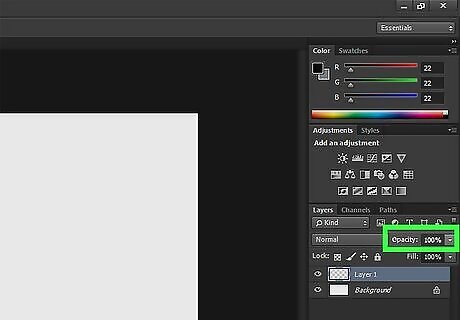
Adjust the layer's opacity and fill. You can adjust the layer opacity (how transparent everything on that layer is) using the “Opacity” and “Fill” drop-down menus on the Layers panel. These two options will achieve the same effect unless you have text (or another object) and a layer style (such as stroke, shadows, or glow) on the same layer. In this case, Fill would control the opacity of the text/objecvt, while Opacity would adjust the opacity of the style.
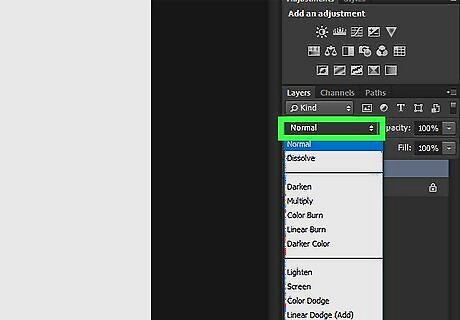
Adjust the layer modes. The mode is set to "Normal" by default, but you can choose different options from this menu to achieve different results. There are a variety of mode options that each apply different effects to individual layers, which controls how each layer interacts with the layers below. Experiment with the layer modes to learn about what they do. More detailed tutorials can also be found online.
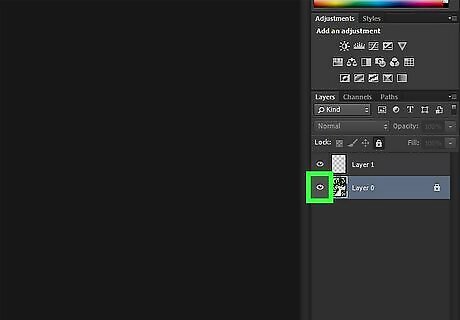
Show or hide layers. You'll see that each of your layers has an eyeball left of its name. Clicking the eyeball will hide the layer so you can only see the visible layers in your image.
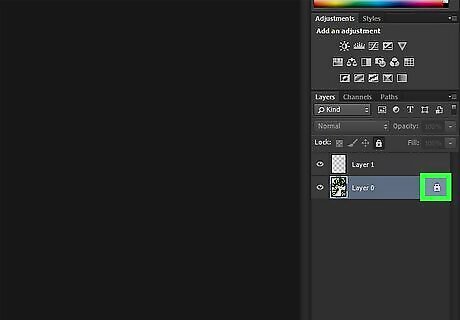
Lock a layer. When you are done with a layer, you may want to completely or partially lock it. This will keep it from accidentally being altered. To lock a layer, click a layer in the panel and then click the padlock icon.
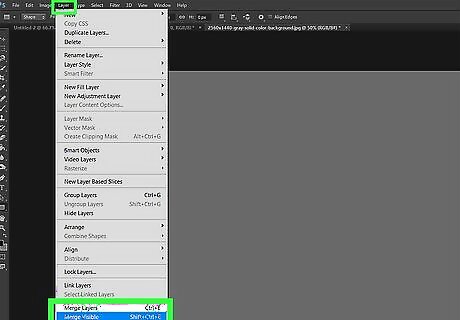
Merge two or more layers. As you work (and especially when you finish your image), you may want to merge multiple layers into one. Merging cannot be undone, so make sure you merge layers that you know you will not need to merge separately later. To merge multiple layers into one, hide the layers that you don't want to merge by clicking their corresponding eye icons. Then, click the Merge menu and select Merge Visible. You can then unhide your other layers by toggling the eyeball icon back into place. To merge all layers into one layer, click the Layer menu and select Flatten Image. If you want to save your image in a web-compatible format (such as JPG or GIF), you'll need to flatten the image before you can.
Using Selection Tools
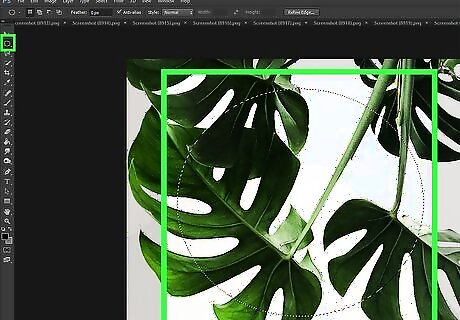
Use the marquee tool to select with a rectangle or circle. The toolbar, which is the bar that runs along the left side of the workspace, is home to the tools you'll use in Photoshop. Near the top of the toolbar you'll see a square made of a dotted line—if you click and hold this square, you'll see all of your Marquee tools. These tools allow you to select parts or all of your image. Once you've selected something, you can copy, edit, or remove it as needed. You can see when something is selected largely by the “marching ants” which enclose it. To deselect and get rid of the marching ants, press Control + D (PC) or Command + D (Mac). Be aware that the selection is dependent on the active layer. The marquee tools allow you to make selections with a set shape. Rectangular marquee is the default, but you can also choose Elliptical marquee for a round selection. This tool is used in much the same way that you select files on your computer, by clicking and dragging. To constrain the proportions of the selection, hold down the Shift key as you make the selection.
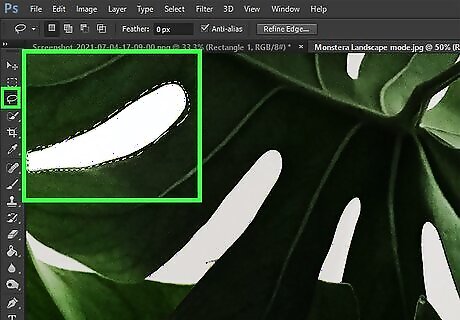
Use the lasso tool to make a freehand selection. The shape-based selection tools are great for some things, but what if you need to select an odd-shaped area? Click and hold the lasso icon in the toolbar to see your lasso options, which allow “freehand” selection. The main lasso lets you click and drag around the object you want to select. You'll need try to stay as close to the border of the object as possible, as everything you trace around will become part of the selection. The polygon lasso is similar but requires you to click to create anchor points rather than clicking and dragging. The third option is the magnetic lasso, which helps you follow the edge of an object. Click and drag around the object you want to select like using the regular (main) lasso tool—when you're finished, double-click the starting point to make the selection magically cling to the edges of the object. All three lasso tools require you to close the selection after tracing around it. Do this by clicking at the starting point (you will see a little circle appear next to your cursor). If you make a mistake, delete an anchor point by pressing the backspace button.
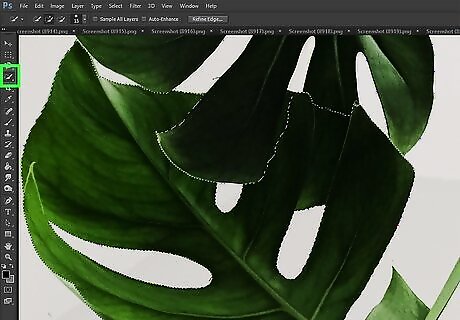
Use the object selection tools to make quick selections. Click and hold the icon right below the lasso to view your object selection tools. These tools make it simple to select particular objects using a variety of parameters: Magic Wand: This lets you select a consistently-colored area of the image without having to trace it by hand. Clicking the tool on the selection will select like-pixels (pixels which are similar in color). You can change how picky it is about the color by increasing or decreasing the tolerance. This will allow you to select only particular areas or entire objects. Object Selection: Choose this selection tool to easily select an object. You can then click the rectangular marquee or lasso in the toolbar that runs along the top of the screen to choose a selection shape, and then trace around the object using that shape. When you lift your finger from the mouse, Photoshop will automatically select the object inside. Quick Selection: The quick selection is probably the most common and most useful selection tool for editing areas of an image. It is a combination of the magic wand and magnetic lasso tools. Click and drag to select the contiguous areas of an image you would like to select.
Drawing and Painting
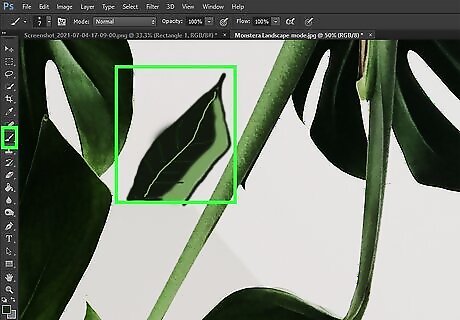
Click the paintbrush icon to select a brush. It's in the left toolbar panel. Brushes are used to add pixels to an image (in other words, to paint or draw). You can use this to make additions to a photograph, or you can use it to paint an entire image from scratch. Brushes are highly adjustable through the brush menu and come in a variety of preset shapes. You can download more brush presets for free or at a cost from a variety of sources on the web. Adjust the size, hardness, and opacity of your brush using the tools at the top of the workspace. A bigger brush will fill a larger area, a harder brush will give cleaner lines, and lowering the opacity will allow you to layer colors to gain more control. Click the Color panel on the right side of Photoshop to view your color palette, and then select a color to paint with.
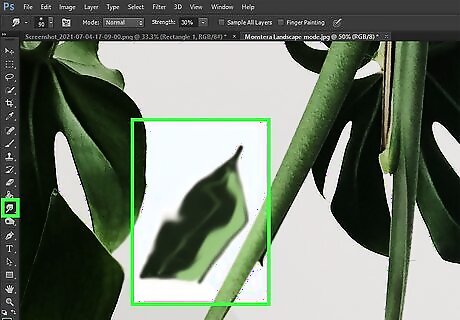
Try blur, sharpen, and smudge. The tool that has an icon of a finger pointing down is where you'll find these tools. Click and hold that icon to see all options. These tools all affect the pixels which you touch with the tool and can be used to achieve a few different effects. Blur: This loosens and diffuses pixels, making everything you touch with the tool more blurry. How much more blurry will depend on the strength that you have chosen in the menu at the top. Sharpen: This does the opposite of blur, tightening and consolidating pixels. Use sparingly, as it can be a rather crude tool. Smudge: This will takes the color you've selected and smudges it onto the areas where you drag the cursor.
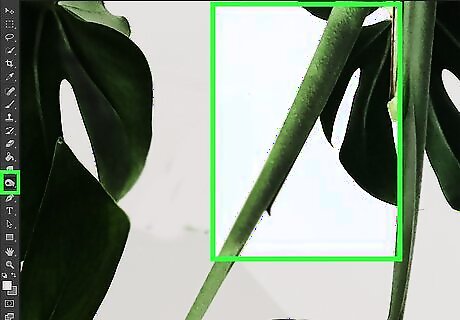
Try dodge, burn, and sponge. These tools lighten and darken an image, respectively, where the sponge tool adds or decreases saturation. The tool's icon looks like a lollipop or a magnifying glass, depending on who you ask—click and hold it to see all of the options. With these, you will brighten highlights and darken lowlights directly on the image. Since this affects the actual pixels of the image, try duplicating the layer and locking the original layer. This makes it so you avoid damaging the original image. To duplicate a layer, right-click it and select Duplicate Layer. You can change which type of tones your dodge or burn tools are changing, as well as what your sponge tool does, using the options on the top menu. Try to select highlights for dodge and lowlights for burn, as these will protect your mid tones (unless you want to change your midtones, of course). Don’t forget that you can also increase your brush size as well as the intensity of the tool, using the options at the top.
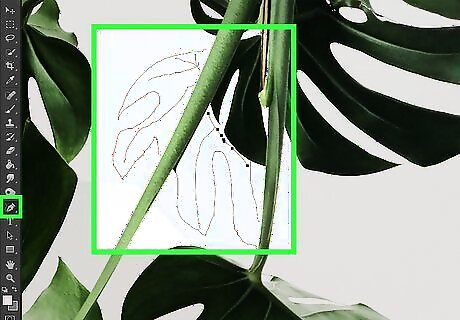
Use the pen tool for more precise drawing. The pen tool is a more advanced Photoshop tool, as it's used to create paths rather than for painting. Click and hold the fountain pen icon in the toolbar to see all of the pen tools, and then click the one you want. To use the pen tool, click the mouse at each point in your desired line to create segments. This creates anchor points everywhere you click. When you're finished, click the first anchor point to close the path. You can then drag any of the anchors to reshape the line and create curves. For more control over curves, use the Curvature pen tool. To draw a path without manually placing your anchor points, try the Freehand pen tool.
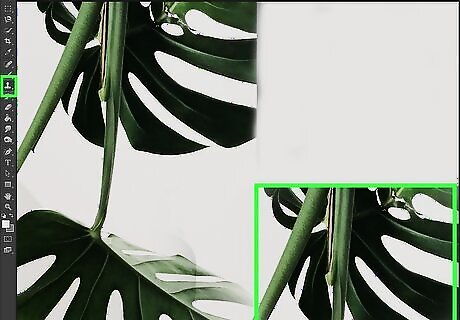
Experiment with the clone stamp tool. It's the icon that looks like a stamp in the left panel, is used to take a piece of an image and copy it somewhere else. You can use it to fix issues like blemishes on skin, delete stray strands of hair, etc. Simply select the tool, press Alt as you click the area you want to copy, and then click the area you want to cover. Pay attention, as the area being copied will move proportionally with the movements of the cursor as you cover the areas you are altering. Another way to fix imperfections is to use the healing brush tool, which looks like a bandaid.
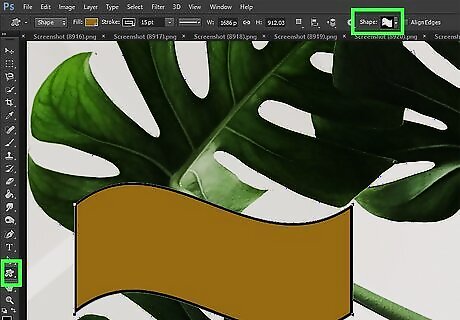
Click and hold the rectangle tool to draw with shapes. It's at the bottom of the toolbar. This displays all shapes you can draw. You can use the color panel to select colors before drawing, or fill the shapes with color or gradients after. To draw with a shape, select the shape from the tool and then click and drag on the canvas. To draw a perfect square, circle, or other shape, hold down the Shift key as you draw.
Selecting Colors
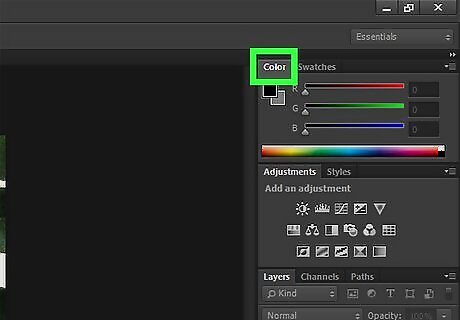
Click the color selection window to choose a color from the palette. You can click the Color tab in the upper-right corner of the workspace to open it. To change your color selection, just click the color you want to change. To fine-tune the color, double-click it on the overlapping squares above the left corner of the palette. The overlapping squares above the palette show you which color is selected for the foreground and which is the background. To change the color in the background, double-click the background color.
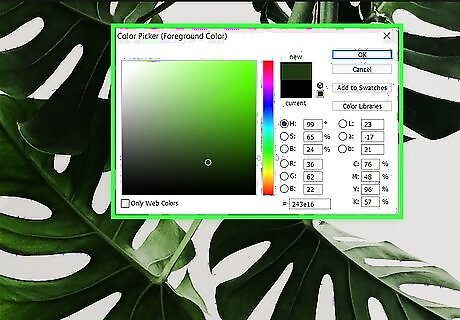
Double-click the selected color to fine-tune it. If you want to use a specific color, you can start with an existing color and adjust its parameters until it looks right to you. If you know the color you need's hex code, you can enter it into the provided fields.
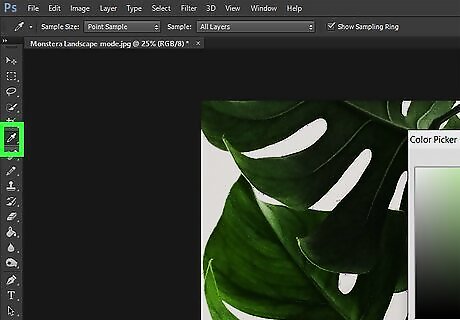
Use the eyedropper tool to select a color from the existing image. If you want to paint or draw with a color that's already in your image, click the eyedropper tool in the toolbar, and then click the color. This automatically selects the color as your foreground color. This can be imprecise, however, so zoom in to your image for more control over the pixel color you are selecting.
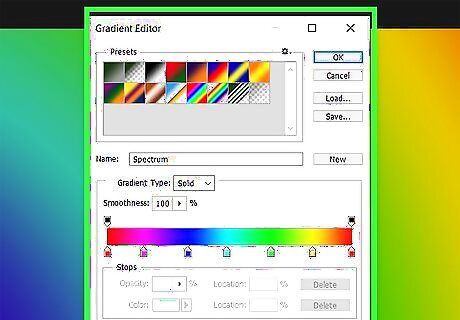
Click the gradient tool use gradient patterns. It's the fading gray square in the toolbar. This tool will let you fill in a gradient or fade on a layer or inside of an object. To use the tool, choose your options at the top of the screen, and then click a starting and ending point. How the gradient works will be determined by where you draw the line, as well as the length you give it. A shorter line will make the transition shorter, for example. Experiment to find how to get the gradient you need.
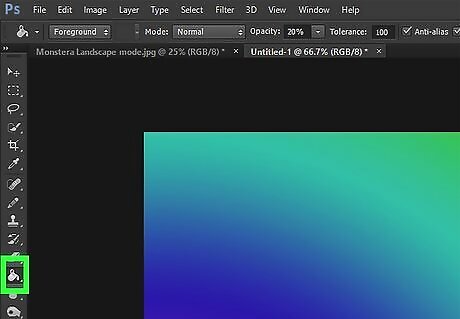
Use the Paint Bucket tool to fill objects and layers with color. To get to this tool, click and hold the gradient tool and select Paint Bucket tool. Then, click the object or layer you want to fill to add the selected color. This tool, like other tools, only works on the selected layer. If you want to change the background color, make sure to select the background layer before trying to fill.
Adding Text
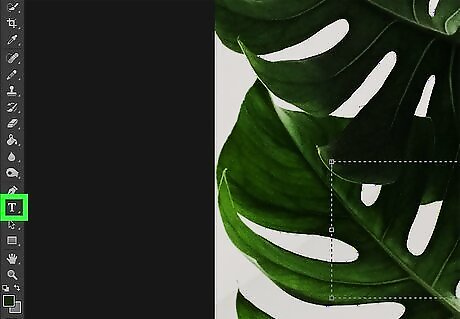
Click the T to use the text tool. It's in the toolbar on the left. The text tool will create text on a new layer, so you won't have to create your own first. After selecting the text tool, click and drag to draw a text box in much the same way you used the marquee or shape tools. Create a new text box/text layer for each line of text you intend to use, as this will allow you better control over the alignment and space between lines.
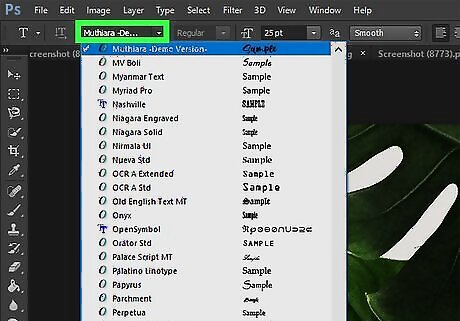
Select a font. The text options are at the top of Photoshop. You can choose a font face, size, weight, and alignment here, as well as select a text color.
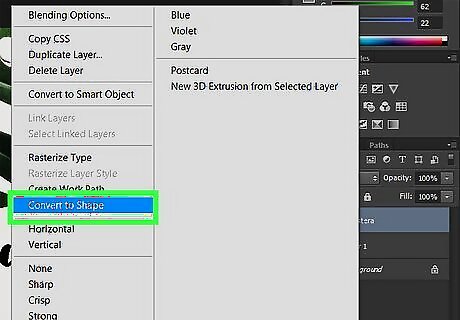
Convert the text to paths. You can convert the text to a path, if you wish to further distort the shape and size of the text. This will make each individual letter into a contained shape. *To convert the text to a path, right-click the layer on which it appears and select Convert to shape.
Making Image Adjustments
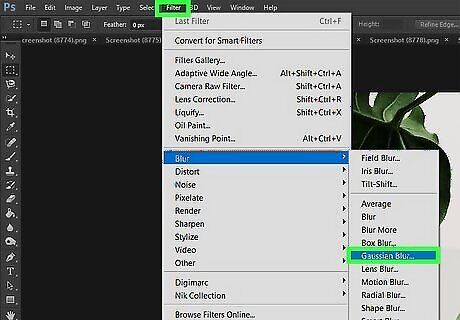
Click the Filters menu to view and select filters. You can use filters on the visible layer or selection to achieve a variety of effects. When you select a filter, you'll see a menu with parameters that lets you control how it works. Filters are only applied to the active layer or selection, so make sure to choose a layer or selection before applying a filter. You can use the Gaussian blur filter to significantly diffuse the pixels on a layer. The Add noise, Clouds, and Texture filters can give texture to your image. Other filters can be used to give dimension or distort images. You will have to experiment to find which is right for your project.
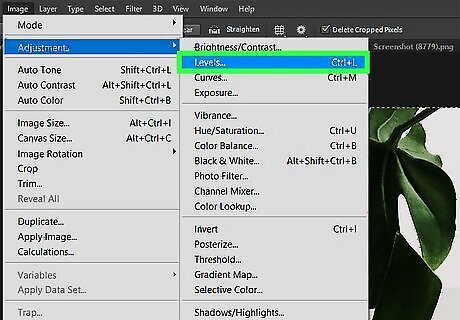
Adjust the overall color levels with the Levels panel. Levels allows you control of an image’s brightness, color balance and contrast by specifically defining absolute white and absolute black for a given image. To open the Levels settings, click the Image menu, select Adjustments, and choose Levels. The Levels panel has presets you can try, and they make good starting points. For example, selecting an Increase Contrast will boost the contrast. You can also adjust the contrast, color balance, saturation, brightness, and other aspects individually in Image > Adjustments.
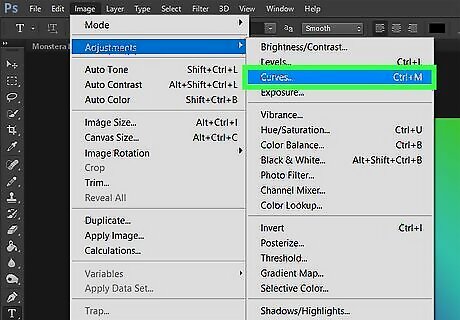
Use the Curves panel to adjust tones within the image. To open this panel, click the Image menu, select Adjustments, and choose Curves. You will see a line going diagonally across a box. The horizontal scale represents the input image and the vertical scale represents the output image. Click the line to create anchor points and then drag those points to alter the tones in your image. This will give you more control over contrast than the Contrast menu will.
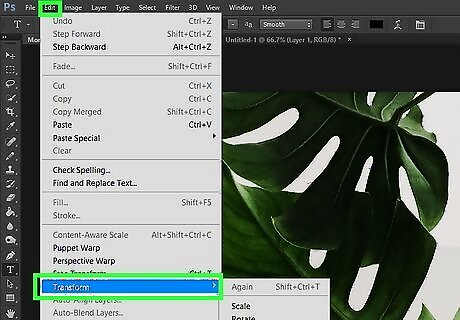
Transform a selection. You can use the Transform tools to scale, rotate, skew, stretch, or warp any selection, layer, or series of layers. Click Edit and select Transform to view all Transform options. Choose which is best for you. Experiment or look up tutorials on the web. Press and hold Shift if you want to keep proportions using the Transform tools.
Saving Files
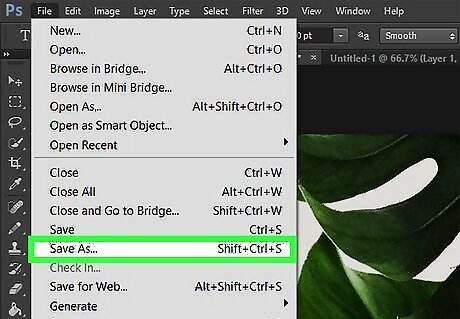
Click the File menu and select Save As to save your work. Begin saving your work early in the creation process.
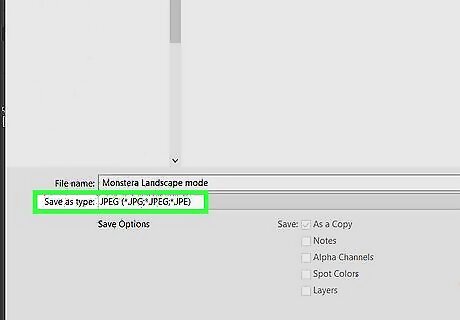
Choose a file format from the drop-down menu. The option you chose depends on how you plan to use the image: If you still need to edit the file, keep it in the default format (.PSD). This will keep all of the editing capabilities of the file intact, including individual layers. If you are done working on the image and want to upload it to the web or use it in another app, you can choose a different file type from the menu. The most common options are JPEG, and PNG, but different apps have different requirements. When you save in one of these formats, you'll be prompted to flatten the image's layers first—don't do this until you're done, or until you've saved a PSD version you can continue to work on later. Save the image as a GIF if you have a transparent background. If you used a lot of colors in your image, saving as a GIF may degrade the quality, as they only support 256 colors. There is also the option to save as a PDF, which can be helpful for images you'll be printing to standard paper.
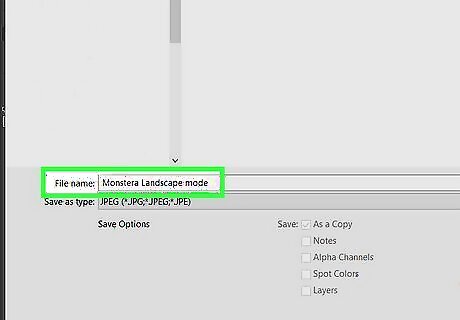
Name the file and choose a saving location. You can also choose to save the file As a copy if you don't want to overwrite the current version.
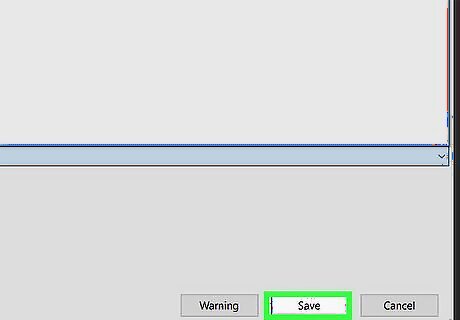
Click Save. Once you save your image for the first time, you can save it again simply by clicking the File menu and selecting Save.






Comments
0 comment