


Capture a Live Photo. If you want to learn more about taking a Live Photo, you can read How to Take Live Photos on iPhone. Essentially, you need to tap the Live button at the top of the camera screen to activate Live Photos mode. Your Live Photo will range from 1.5 to 2 seconds. You can enable and disable Live Photos by tapping on the Live icon at the top of the screen when viewing a photo. If the icon is yellow-orange and says "Live," then the Live Photo feature is enabled.
Open Photos Mac Photos App. You'll find this multicolored pin-wheel app icon on one of your Home screens.
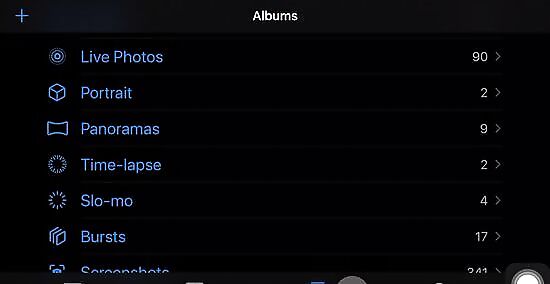
Tap Albums. You'll see this along the bottom of your screen.
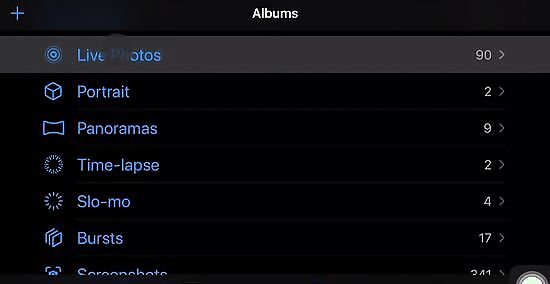
Tap Live Photos. You'll see this under the header "Media Types."

Tap a Live Photo you'd like to save as a video. It will open in a new window. If you tap and hold a Live Photo, you can then tap multiple Live Photos to add to the saved video.

Tap the share icon iPhone Blue Share. You'll see this in the bottom left corner of your screen and a menu will slide up from the bottom of your screen.
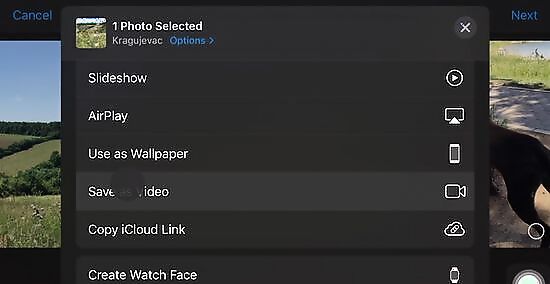
Tap Save as Video. You'll see this next to the icon of a video camera that you'll most likely have to scroll to see. This might not work if you have Live Photos disabled or you've added an effect to the photo. To remove an effect, such as a Loop, tap Edit, swipe up from the bottom of the screen to access the "Effects" heading, then tap the effect to remove it.


Comments
0 comment