
Removing the Old Roof
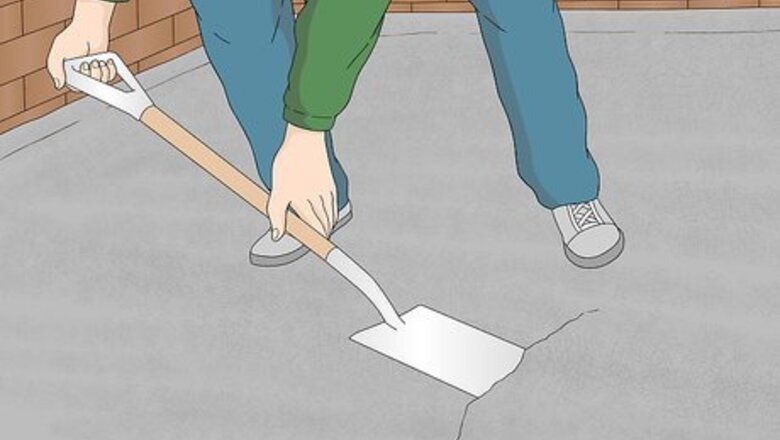
Remove the plies of the flat roof by thrusting into them with a spade. Plies are the layers of felts, fabrics, and mats that make up roofs. Always stand on a firm section of the roof and wear long pants, long sleeves, and safety glasses. Orient the spade at a 30 to 40-degree angle to the roof and start thrusting a spot in the middle of the roof repeatedly. Grip the back of the handle with your dominant hand and use your non-dominant hand to hold the handle ¾ of the way from the back. Keep attacking this initial spot until you get underneath all layers of the roofing and above the decking below. Lever against the timber and the underside of the felt and separate the two layers. Use a small spade with a curve that isn't too pronounced. Remove manageable chunks one at a time. Throw each chunk into a pile on a tarp for disposal later, or into a dumpster if you have one available. Prepare for slower progress if the plies are bonded to the roof. Removing felt also decreases its strength, especially on rotten or wet timber. If you feel the roof beginning to sag downward beneath your feet, find a more stable spot. Take off the gutters and facia so you can take out the roofing underneath them.

Pull off the mortar-filled perimeter framework that is flush to the wall. In many cases, you can remove these pieces with a strong tug. Grab the left and right side of each piece with both hands and begin wiggling it to the left and right while pulling backward. If this doesn't work, place your spade underneath each piece at a 45-degree angle and lever it up and down. Once it is loose, pull it out with our hands. If you're having trouble levering the pieces from the wall, thrust the spade horizontally into the region where it connects to the wall. Be sure that the blade is parallel to the line that marks the connection between the wall and the mortar-filled framework. If you can't break the region flush with the wall, place the tip of a screwdriver to the wall and hit the handle with your hammer to drive it into the mortar. You can also use this technique with a drill-screw and a chisel attachment.

Remove the remaining perimeter with your hands and spade. Place the spade under the piece attached to the wall. Hold the handle 45 degrees outwards from the wall and lift it up and down repeatedly to loosen the perimeter piece. As it comes loose, grab the flashing—the thin materials that connect the roof to the wall and prevent the passage of water—with your hands with and pull it away. Pull off loose pieces with your hands without using a spade. Respect the limits of the spade and use more than one angle of approach for difficult parts.
Scrape off any remaining pieces stuck to the surface of the brickwork. Use a hammer and a bolster or wallpaper scraper. Hold the bolster or scraper at a 45-degree angle to the remaining pieces. Keep the blade vertical and parallel to the wall. Hammer the tip firmly, moving the scraper steadily into the direction of the felt stuck to the brickwork (left or right). Use a bolster or wallpaper scraper with a blade of 4 inches (10 cm) for the best results.
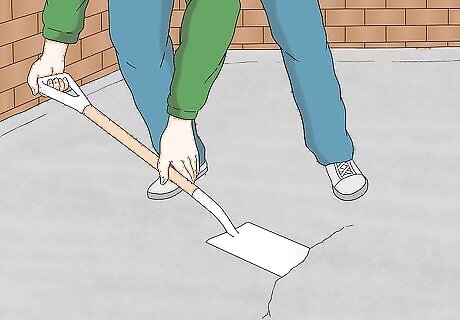
Lever the felt flush to the perimeter that is not against any wall. Remove the felt at the perimeter. Place your spade underneath it and apply pressure upward. Remove the edges of the roof using by inserting your spade between the felt and the roof. Afterward, move the spade in a chopping motion to remove the felt. If you feel any galvanized tack nails, repeatedly thrust the spade directly into them with its front edge until they fly out. Use a hammer or bolster to remove difficult or awkwardly positioned nails.
Discard the last piece of felt from the front of the roof. Place your spade underneath it and lever it up until it comes loose. Thrust a sharp bolster or stripping knife into any leftover felt stuck to upstanding walls in regions too small to get into with a spade. Take care not to stand on any unsupported decking. To check for support, press your toes downward—you should always feel the support of the horizontal ceiling supports underneath your feet.
Lever off the timber fillets if present. Place the stripping spade underneath timber fillets if your roof has any. Lever them up while angling the handle of your spade at 45 degrees to each one. Slowly increase the pressure until they pop off. Use a pry bar for tougher fillets. Hammer it under the fillets and pop them off by applying downward pressure to the bar to lever them up and off the roof.
Attaching an EPDM Roof
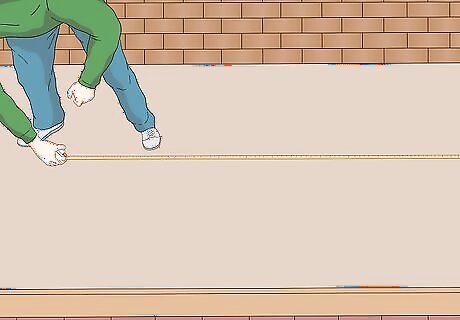
Measure your roof and select an appropriately-sized EPDM membrane. Use a measuring tape to measure the length and width of your flat roof. Most standard EPDM membranes are 1.2 millimetres (0.047 in) thick and 15 by 30 metres (49 by 98 ft) max. If you want something bigger or more durable, select commercial membrane thickness, which is typically 1.52 millimetres (0.060 in). Add about 7.6 centimetres (3.0 in) to your length and width to allow the membrane to overhang the edges of the building. You can purchase EPDM membranes from home hardware stores and online suppliers. Notify the supplier of your roof size when purchasing it and it will be cut to size.
Open the EPDM square vertically along the length of the roof. Lay down the square folded EPDM material in the center of your flat roof. Flip the topmost piece of the EPDM material downward across the length of the roof. Align the bottom so its parallel to the bottom length of the roof. Afterward, flip the next topmost piece upward. Align it so it's parallel to the top edge of the roof. Only install EPDM roofing when the temperature is consistently above 50 °F (10 °C). Make sure the roof surface is completely clean and dry before starting.
Spread the vertical EPDM membrane horizontally along the width of the roof. Grab the top rectangle by its left-most corners and flip it to the right across the roof to align with the right-most edge. Afterward, drag the remaining part of the EPDM membrane to the left until it meets the left width of the roof. Let the EPDM membrane hang off the edge of your roof by 3 inches (7.6 cm). Let the membrane sit for 30 minutes so that it relaxes and fits the roof properly.

Draw the EPDM membrane back from the left and fold it to the right edge of the roof. Check that there are now 2 layers of the EPDM piece covering the right half of your roof. Align the vertical edge of the crease with the center of your roof. Use measuring tape to ensure that the crease of your EPDM membrane is aligned with the center of the roof.
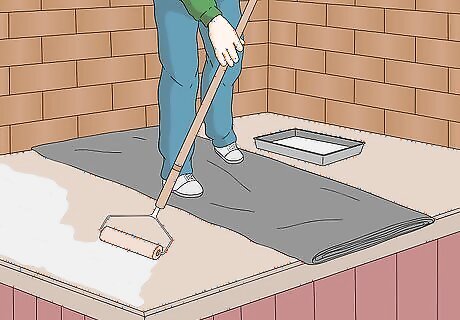
Apply water-based adhesive horizontally from the EPDM crease. Use an adhesive roller to apply the adhesive in 2 to 3 foot (0.61 to 0.91 m) horizontal swipes out from the crease of the EPDM material. Make sure the adhesive doesn’t puddle in any areas. Apply adhesive until the layers are opaque and you can't see the roof underneath. Continue moving outward until you have covered the left half of the roof with adhesive. Be sure that there are no spots where you can see the roof. Use vertical strokes occasionally and be sure to fill in any spots that are light on adhesive.
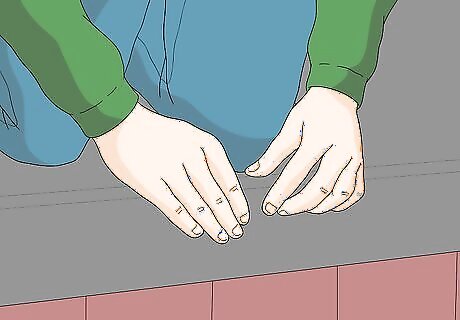
Lay the membrane into the adhesive while it's still wet. Gently roll the EPDM membrane to the left over the adhesive. Make sure that the adhesive transfers to the underside of the membrane. Continue rolling it until you reach the left edge of the roof. Touch the adhesive with your finger to test its wetness. Be sure that it is tacky, but not enough to string to a dry finger touch. If the adhesive begins to dry, roll the membrane out over all that you've placed thus far. Afterward, continue applying the rest of the adhesive and rolling the remaining EPDM membrane over it.
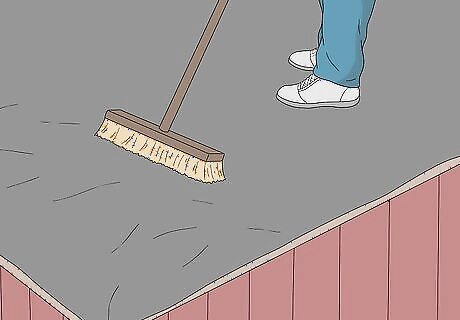
Press the membrane into position with a broom to remove any air. After the membrane has been laid into the adhesive, press a heavy duty 2 by 16 in (5.1 by 40.6 cm) push broom in horizontal swipes over it. Work outward from the crease to the edge of the roof. This will remove air and ensure positive contact. Wait 15 to 30 minutes for the adhesive to dry. This time can vary depending on humidity and temperature.
Attach the other side of the EPDM matrix. Flip the unattached side of EPDM onto the side adhered to the roof. Lay down the adhesive to the remaining bare side of the roof horizontally from the EPDM crease. Be sure you place enough adhesive that it's opaque. Afterward, gently roll the remaining half of the EPDM matrix over the adhesive and press down on it with a push broom to remove air bubbles. Touch the adhesive with your finger before rolling the EPDM membrane over it. It should be tacky, but not enough to string to your dry finger.


Comments
0 comment