
Covering Peeling or Cracking with Leather Paint

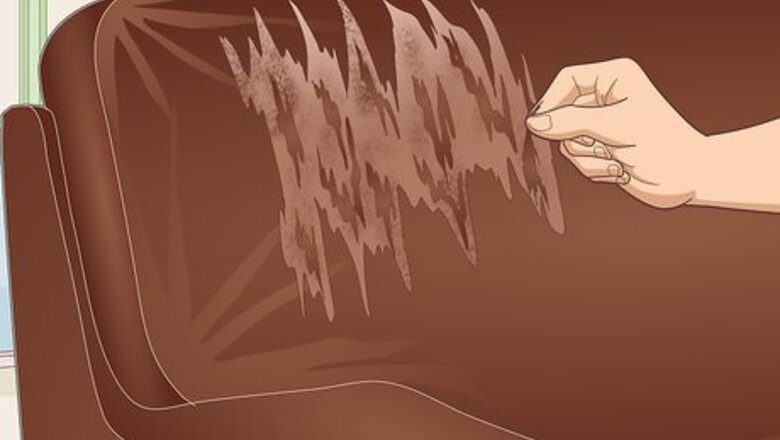
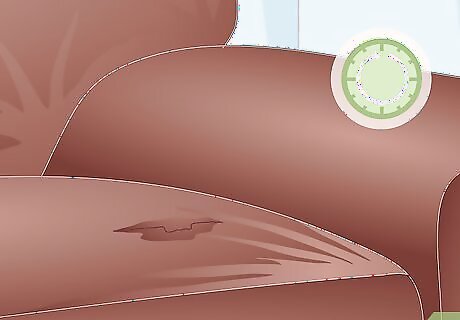
Peel off all the loose pieces of the faux leather. Use your fingers to pull off any loose flaps of the faux leather that are sticking up from the item. Stop when you can’t peel any more off.Warning: If you try to repair faux leather without pulling off all the loose bits, it will just continue to peel away after the repair. You can use a blunt-edged object, such as a butter knife, to help you peel up and scrape away the loose bits of faux leather if it is difficult to do with just your fingers. This method works for all types of faux leather items that are peeling or cracking including furniture, clothing, and accessories. Keep in mind that it will likely only temporarily restore the appearance of the faux leather and it won’t make it look brand new. You will eventually be better off replacing the item.
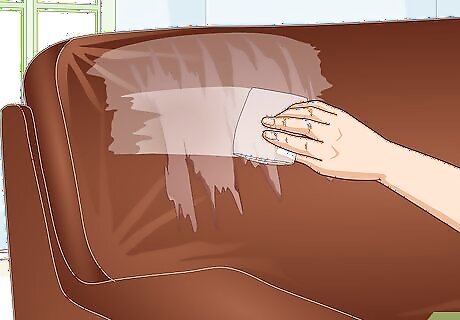
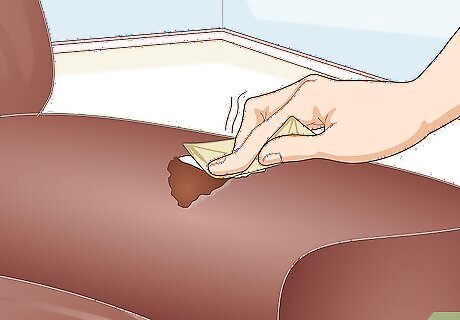
Wipe down the peeled section and surrounding area with a leather wipe. Open up a can of leather wipes and pull out a single wipe. Rub it all over the spot you just peeled and the surrounding faux leather to clean the surface for painting. Leather wipes are specifically formulated for cleaning leather and work well on faux leather, but you could also use a different kind of gentle cleaning wipe, such as a baby wipe.
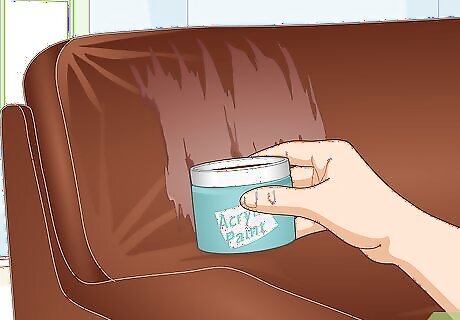
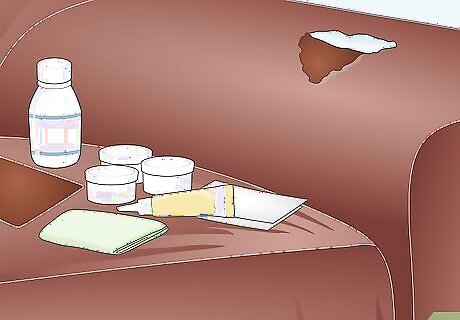
Choose an appropriately-colored acrylic leather paint. Select a color of acrylic leather paint that closely matches the color of your faux leather item. Acrylic leather paint is available online, at craft stores, and at leather supply shops. If you can’t find the right color of acrylic leather paint, you can mix multiple colors together to make a color that closely matches the faux leather.

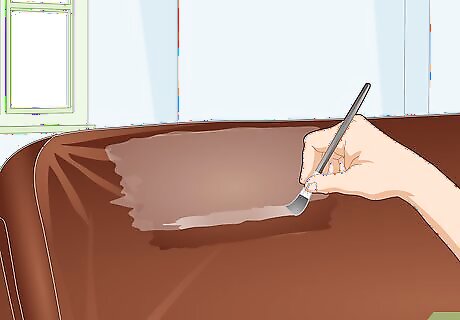
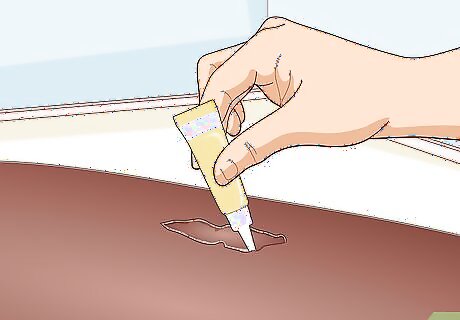
Brush on the leather paint horizontally using a small paintbrush. Pour a bit of your chosen paint out into a plastic cup and dip a small paintbrush, like the kind used for art, into the cup to get some paint on it. Spread the paint over the peeled area in long horizontal strokes. If there are different sections of faux leather of varying sizes that you want to repair, it can be helpful to have several small paint brushes of different sizes to paint smaller and larger damaged areas.
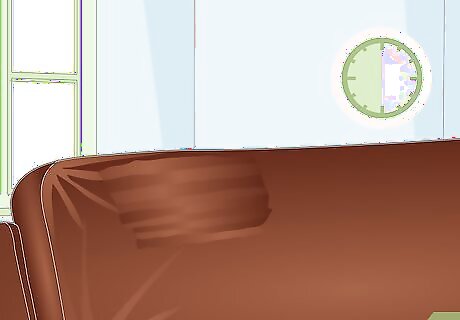
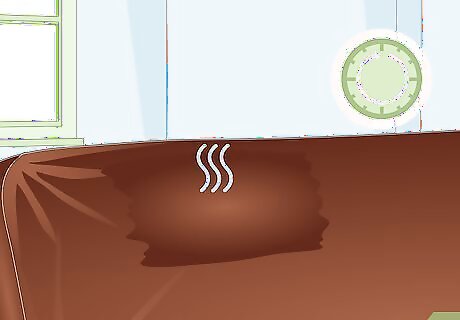
Let the paint dry for at least 30 minutes. Wait 30 minutes and then gently poke the painted area with a fingertip to see if it is dry to the touch. Let it dry longer if it is still sticky until it feels totally dry. You can use a hair dryer to speed up the drying process if you want. Set it to medium heat and hold it about 6 in (15 cm) away from the painted surface, then move it slowly back and forth across the painted patch until it is dry.

Paint on additional coats until you are happy with the finish. Use your paint brush to apply more coats of the same color. Allow each coat to dry before applying the next one. Pay special attention to certain areas that might require more paint to blend the repaired area in, such as around the edges where the paint meets the existing faux leather and any spots near seams.
Add a clear acrylic finisher top coat to seal the paint job. Choose a matte, glossy, or semi-gloss clear acrylic finisher based on how shiny the existing faux leather is. Use a clean paint brush to apply the clear acrylic finished over the entire painted area and the surrounding edges using long horizontal strokes. Don’t worry if the acrylic finisher looks white when you first apply it as it will dry on clear. Watch out for any runs or droplets as you go and wipe them up with your paintbrush.
Let the item dry overnight before you use it. Leave the item alone until the next day so the top coat has plenty of time to cure. Make sure that nobody else uses the item if it is something communal like a sofa. Remember that your faux leather will not look perfect when you examine it up close, but from a distance it will look much better than before when it was peeling and ugly.
Fixing Minor Peeling with Leather Dye

Put on a pair of latex gloves. Use a pair of well-fitted latex gloves like the kind doctors wear. This will protect your skin from getting stained but allow you to use your fingertips to effectively apply the dye. This method works best for small damaged areas where the faux leather is just starting to peel or crack.
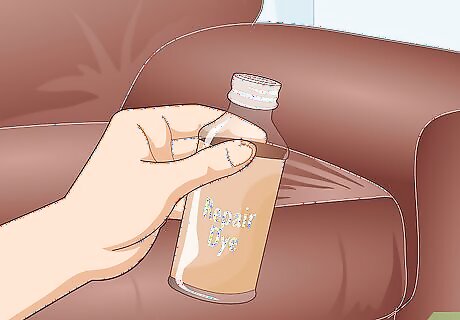
Choose an appropriate color of leather repair dye. Pick out a dye color that closely matches the color of the faux leather item you want to repair. Leather repair dye is available online or at leather repair shops.Tip: Leather dye sometimes comes in kits along with additional items you can use with the dye, such as application tools that look like little spatulas. You can use leather repair dye to color exposed fabric that the faux leather has peeled away from as well as to stick loose pieces of the faux leather back down.
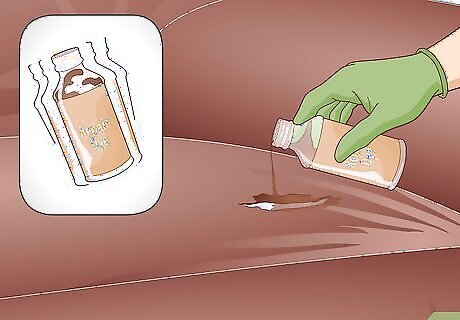
Shake up the bottle and cover the damaged area with dye. Ensure that the cap is on tightly, then shake the bottle up and down to mix the dye. Open up the cap on the bottle of dye and tilt it upside down over the peeling or cracking area. Squeeze out enough drops of dye to cover the exposed material underneath the faux leather. The dye will absorb into the fabric, so go ahead and apply it generously. You don’t need to worry about putting too much.
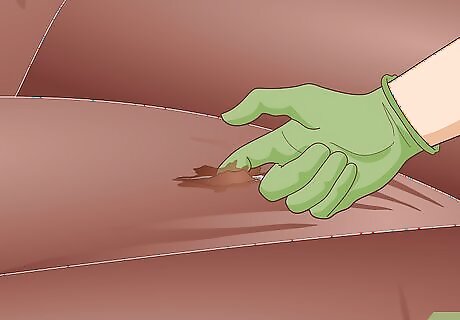
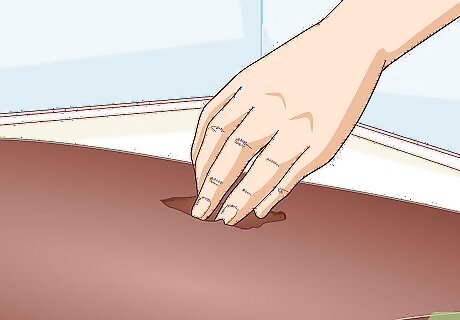
Work the dye underneath any loose pieces of faux leather. Use a fingertip to carefully lift up any loose flaps of peeling faux leather. Spread the dye around underneath the flaps so it soaks into all the exposed fabric underneath and gets on the undersides of the flaps. Apply more dye as needed while you do this until there is enough to get it all over the damaged area and the color of the exposed fabric looks dark enough.

Press the loose pieces of faux leather down into the wet dye with your fingers. Carefully poke all loose flaps of faux leather back down against the dyed fabric with your fingertip. Rub them gently towards the center of the damaged area to smooth them out. The leather repair dye also acts as an adhesive, so the loose flaps will be stuck down once the dye dries. If you purchased a leather dye repair kit, you can also use any application tools that came with the kit to help press down and smooth out the loose flaps of faux leather.

Dry the repaired area with a hair dryer. Turn on a hair dryer to medium heat and hold it about 6 in (15 cm) away from the repaired area. Wiggle it back and forth over the wet dye for a few minutes until it is dry to the touch. You can also use a heat gun to dry the dye if you have one available. If you don’t have anything to speed up the drying process, the leather dye will take 1-2 hours to dry on its own.

Touch up the repaired area with additional dye if needed. Inspect the spot you repaired after it is dry. Add more dye if you want to darken it or if there are still loose flaps of faux leather sticking up that you want to smooth out. You can repeat the process of drying the dyed area with a hair dryer and touching it up as many times as you want to until you are happy with the results.
Let the repaired faux leather dry overnight. Wait until the next day before touching the repaired area or using the item. This will give the dye plenty of time to cure and ensure that the loose pieces of faux leather are strongly adhered to the fabric underneath.
Sealing Tears with a Leather Repair Kit
Purchase an appropriately-colored leather or vinyl repair kit. Leather and vinyl repair kits come with colored patches, sandpaper, a cleaning solution, at least 1 patch, and adhesive. Buy one that has a patch that closely matches the color of your damaged faux leather item.Tip: The exact items that come in the repair kit can vary, so always refer to the repair kit’s instructions for using all of the provided products and tools. These kits are commonly marketed for repairing leather and faux leather furniture and car seats. They are available online, at a home improvement center, or from a leather or auto supply shop. You can use this type of kit to fix tears, rips, and holes in your faux leather items.
Rub the area inside the tear with the supplied sandpaper. Sand down the damaged area, being careful not to sand the intact faux leather around the tear, to remove oils and fibers. Try to get the damaged area as smooth as possible so the patch will adhere well. If your kit did not come with sandpaper, use your own fine-grit sandpaper, such as 120-grit.

Wipe the area down with a soft cloth and the supplied cleaning solution. Pour some of the kit’s cleaning solution onto a soft, clean cloth. Rub down the area inside the tear that you just sanded, as well as the surrounding faux leather, to remove any dirt and residue. If the kit did not provide you with a cleaning solution, you can use rubbing alcohol to clean the damaged area.

Cut away any flaps of faux leather around the tear using sharp scissors. Trim off any pieces of faux leather that are jagged, pointing upwards, or overhanging the tear. This will tidy up the tear so that the patch blends in better. You can use a sharp utility knife or boxcutter to do this as well.

Trim the kit’s patch to be slightly bigger than the tear. Use a pair of sharp scissors to trim a piece of the repair kits patch to the shape of the area you want to patch, making it slightly bigger. This will allow you to stick down the surrounding faux leather on top of the patch to seal the tear. Some kits might have multiple patches, in which case you can choose from different colors to get the closest possible match.

Squeeze the provided adhesive around under the edges of the tear. Carefully lift up the edges around the tear and squeeze some adhesive underneath. Use any provided tools, such as a little plastic spatula, to spread the adhesive around. Be careful not to get any adhesive onto the good faux leather around the tear. If you do, carefully scrape it off using the edge of an old card before it dries.
Press the patch down firmly inside the tear. Slip the patch into the torn area and center it so it is underneath the surrounding faux leather edges. Press and hold it in place for the recommended amount of time, according to your repair kit’s instructions. If the tear is very tiny, like a thin slit from a knife, you don’t necessarily have to use the patch. You can skip to the next step and try glueing down the surrounding faux leather to seal up the tear.
Glue the edges of the surrounding faux leather down to the patch. Apply another thin bead of the provided adhesive underneath the edges of faux leather around the patched tear. Press the edges down firmly and smoothly so that they stick around the patch. If you couldn’t find a patch in a color that closely matches your faux leather item, you can paint over it with leather paint or use leather dye to color it. Some kits might even come with different colorants you can apply on top of the patch. EXPERT TIP Mallika Sharma Mallika Sharma Certified Leather Care Technician Mallika Sharma is a Certified Leather Care Technician and the Founder of The Leather Laundry, a niche spa service for luxury leather gear in India. Mallika specializes in leather cleaning, coloring, repairing, and restoring for shoes, handbags, jackets, wallets, belts, and sofas. She holds a Master’s degree in Finance and Investment from the University of Edinburgh Business School. Mallika is a certified Professional Leather Care Technician and trained with the globally reputed leather care company, LTT in the United Kingdom. Mallika Sharma Mallika Sharma Certified Leather Care Technician Faux leather cannot be repaired. Faux leather and pleather have significant downsides compared to real leather. Once artificial leather materials start visibly peeling, cracking, and falling apart, they cannot be repaired or restored since the damage is irreversible. The affected area would need to be fully replaced since faux leather cannot be fixed once it starts deteriorating.


Comments
0 comment