
Removing a Regular Link Chain
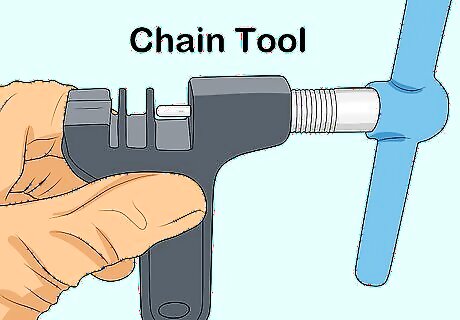
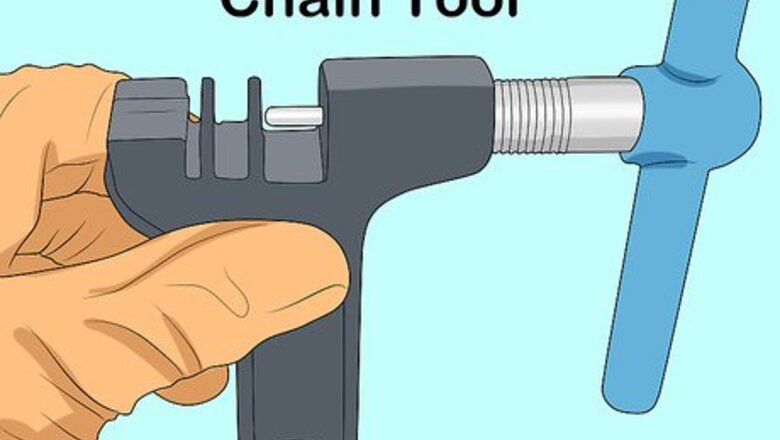
Get a chain tool. A chain tool is a small, handheld tool with a rotating handle and metal pin that pushes the rivet out of a chain link so it comes apart. You can find a chain tool online or at your local bike shop.
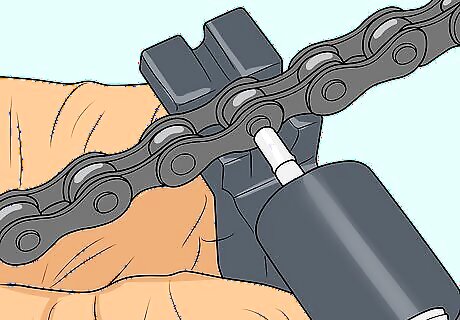
Insert the pin on one of the links on your bike chain into the chain tool. The chain tool should have 2 prongs on it (next to the small metal pin) that will fit around one of the links on your bike chain. Slide the link in between the two prongs so it’s securely in place. The prongs should fit in the gaps on either side of the link. Your bike chain will have outer plates, inner plates, rollers, and pins. You'll use your chain tool to push the pin out of the rollers, which makes the chain come apart. Don't insert your chain tool into any other part of the chain other than the pins, as this can damage the chain.
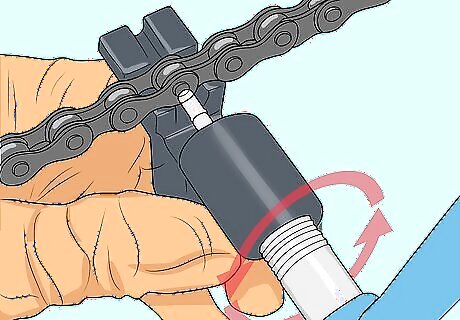
Turn the handle on the chain tool clockwise to push the pin into the link. The pin should make contact with the center of the chain link. When it does, keep rotating the handle clockwise. There may be some resistance, but check that the tool hasn't slipped off of the pin. As you’re rotating the handle, you should see the rivet (the pin in the center of the chain link) being pushed out the other side of the link. Stop rotating the handle when the rivet is almost all the way out of the link, as reinstalling the pin after it falls out is nearly impossible. Be very careful that your pin doesn't come all of the way out because it's very unlikely that you'll be able to get it back into the link. If you do accidentally push your pin all of the way out, you can try taking that link out and shortening your chain to the next undamaged link. However, this can make it hard for you to shift into certain gears. Another option is to visit a bike shop to ask about getting a new pin for your chain or to replace the chain. Sometimes your chain tool will slide so that it's not directly over the pin. Not only will you have a difficult time getting the chain tool to push out the pin, it can also damage the chain by deforming the outer link.

Turn the handle counterclockwise to pull the chain tool pin out of the link. You want the pin to be fully pulled out of the link. Stop turning the handle once you're able to lift your bike chain out of the chain tool.

Take your chain off the chain tool and wiggle the link to pull it apart. Now that the rivet is almost pushed out from the link, the link should easily separate. Grab the bike chain on each side of the link with your fingers and wiggle it back and forth until the link comes apart. Be very careful that you don't accidentally deform the link. If the chain gets damaged or twisted, you'll need to replace it.
Remove your chain from your bike. Now that your chain has been separated at one of the links, you can take it off the sprockets and lift it off of your bike. When you’re ready to put your chain back on, use the chain tool to push the rivet back into the link you separated.
Taking off a Master Link Chain

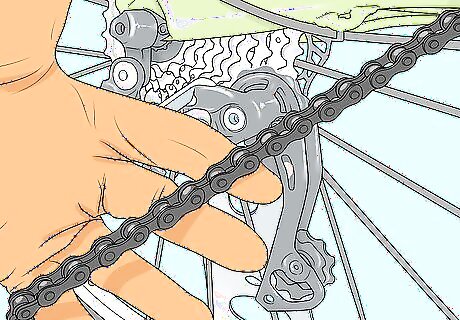
Find the master link on your bike chain. Master links usually look different than the other links on the chain. Look for a link with different coloring on the side, or a link that has pins (the round metal pins in the center of the links) that are different from all the rest. Your master link may also have an arrow on it. Master link chains are the most common chain used on modern, multi-speed bikes. Lennard Zinn Lennard Zinn, Cycling Expert Removing a bicycle chain is a basic yet essential skill for every cyclist. First, check if your chain has a master link or quick-link, which makes removal easier. If so, use quick-link pliers to detach it. If not, use a chain tool to push out a pin. Work in a clean area with proper tools close by. Once removed, clean the chain thoroughly and check for wear. A well-kept chain is vital for smooth shifting and efficient riding. Take chain removal as a chance to perform maintenance.
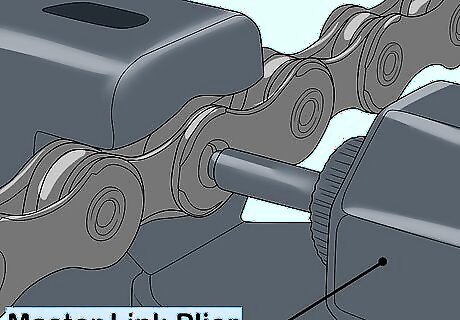
Use master link pliers to squeeze the master link together. Master link pliers are designed to fit in the grooves of a bike chain link. Position the pliers so the 2 jaws are in the gaps on the sides of the master link. The master link should be in between the jaws of the pliers. When the master link is in position, squeeze the handle on the pliers to close the jaws and push the master link together. You can find master link pliers online or at your local bike shop. You can also try using needle-nose pliers to squeeze the master link together, but it may be more difficult than if you use master link pliers.
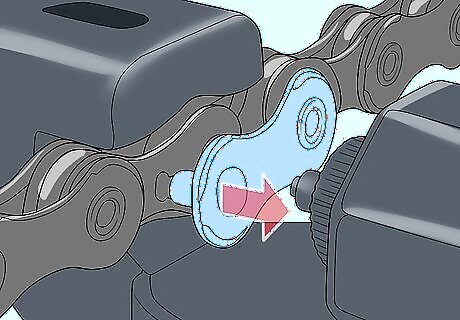
Release the pliers to separate the master link. Pull the jaws of the pliers out from the sides of the master link. The master link should come apart.
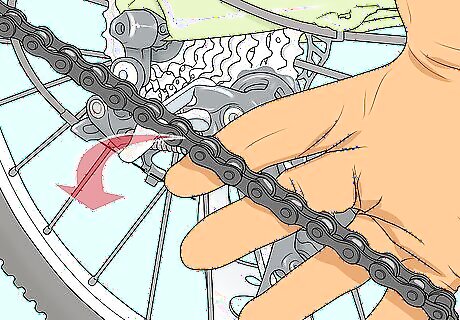
Take your bike chain off of your bike. Carefully pull the chain up and off the sprockets on your bike. It should come off easily now that the master link is separated. To put your chain back on, reattach the rivets at the ends of the chain and use the master link pliers to lock the master link in place.
Removing a Split Link Chain

Locate the split link on your chain. The split link will look different than the rest of the links on your chain. Look for the link with a metal side plate that’s cut out in the middle. Split link chains are normally used on single-speed bikes, such as children's bikes and beach cruisers.
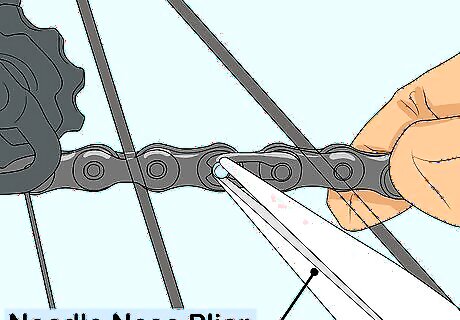
Use a pair of needle nose pliers to release the metal plate on the split link. Place one jaw of the pliers on the right side of the split link’s left rivet. Position the other jaw on the left edge of the metal plate with the cut-out center. Gently squeeze the handle of the pliers so the jaws come together. As the jaws come together, you should hear a click and see the metal plate shift to the right. Don't use too much force when trying to release the metal plate, as it's possible to trigger the spring loaded clip, making it shoot off of the bike. If this happens, you may need to replace your spring loaded clip. You can find a replacement at a local bike shop or online.
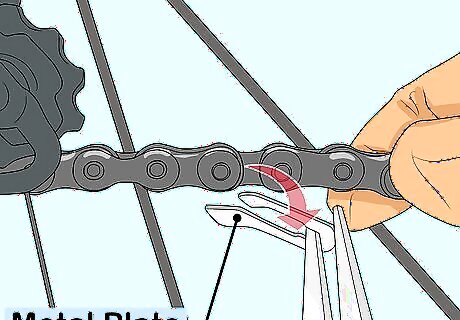
Remove the metal plate from the split link. Once you’ve released it with the pliers, it should be easy to slide off the rivets in the link. Use the pliers to help you slide it off if you’re having trouble. Set the metal plate somewhere safe, like in a plastic bag, so you don’t lose it.

Take off the second metal plate on the front of the link to separate the chain. This is the solid plate that was below the plate you just removed. Use your fingers to slide the metal plate off the rivets in the split link. Place the metal plate with the other one for safekeeping. Once the second plate is off, your bike chain should split apart.
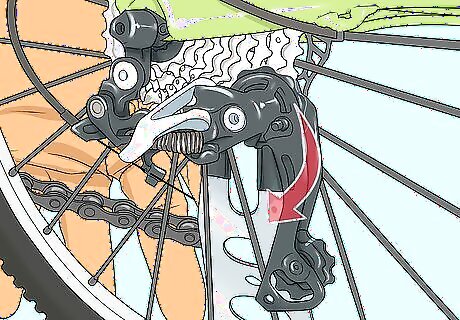
Lift your bike chain off of your bike. Pull it off of the sprockets and lift it up and away from your bike. When you’re ready to put your chain back on, reattach the split link using the 2 metal plates you removed.


Comments
0 comment