

Learning the Basics
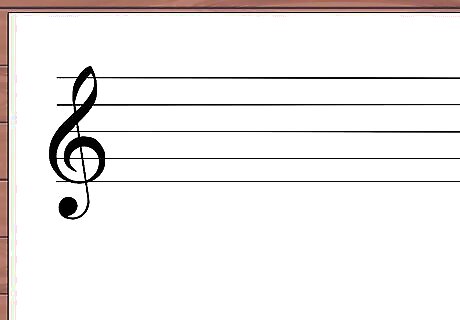
Identify the staff and clef. The staff is the set of 5 parallel lines on the page where notes are marked. The clef (in the case for violins the treble clef) is the very first marking on the staff, at the left-hand side of the first staff line. This signifies the musical register in which you play. Violins only play in treble clef. This is the marking that resembles an &. However, there is a bass clef with other instruments.

Learn the notes. Each note is a round circle on a line or in a space on the staff. The notes in the spaces, from bottom to top, are F, A, C and E. The notes on the lines, from bottom to top, are E, G, B, D, and F. Notes below or above the staff are marked with a round circle and a horizontal line going through the middle of the note, called a ledger line. If there are flats (b) or sharps (#), these may be marked to the left of a note. They may also be marked next to the treble clef. For example, if a sharp is placed on the F line in the space next to the treble clef, this means that every F played in a given musical piece will be played as an F#.

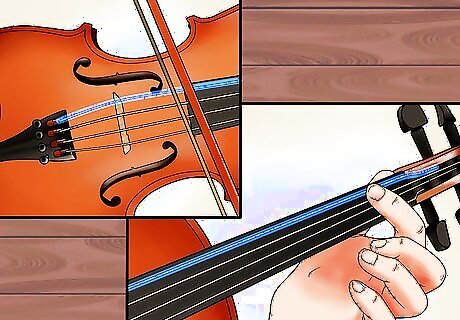
Learn which notes correspond with open strings. An open string means that it is not pressed with a finger when it's played. There are four open string notes on a violin: G, D, A, and E. These strings are in order from thickest to thinnest string, or left to right when holding the violin in playing position. On sheet music, these notes are often marked with a 0.

Match numbers to each of your fingers. In order to play more notes than just G, D, A and E, you will need to press strings with your fingers. The fingers on your left hand are numbered 1 to 4. Your index finger is 1, your middle finger is 2, your ring finger is 3 and your pinky finger is 4. When a note is displayed on beginning violin sheet music, it will be accompanied by a number, 0 to 4. The 0 is an open note, while the other numbers correspond to a particular finger that will press a string.
Learn the fingerings for the strings. The notes on each string will ascend in tone as you place another finger down on the string. Start by drawing your bow across the D string without pressing it down. This will play a D note. Place your index finger on the D string and play. You are now playing the next note up on the D scale, or C#. Play the next three notes on the D scale by placing your middle, then ring, then pinky fingers on the string. After you have placed your pinky finger on the D string and you have played that note, move to the next string (the A string) to play the next note in this scale. Start by playing the A string open (no finger pressing the string). Subsequent notes will be played by pressing first your index finger, then your middle finger, and so on. While you practice pressing your fingers on the string in order, memorize the fingers that match the notes in the music. So, for example, when you see a D, you know that will be the open D string. When you see an F#, you'll know to press your middle finger on the D string.

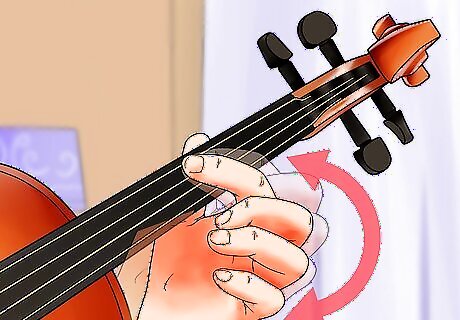
Move your hand up or down the violin's neck when Roman numerals are noted on the music. When playing the violin, one of your hands will wrap around the neck in order to press the strings with your fingers. The strings can be played closer to the pegbox, usually called 1st position, or closer to the bridge (3rd, 4th or even 5th position). These positions are noted on violin music with Roman numerals underneath a note. Move your hand down the fingerboard of the violin to correspond with the numbered position. 1st position, or I, means that your hand will play closer to the pegbox of the violin neck. These positions may also be marked as “1st position” or “3rd position,” instead of using Roman numerals. Most beginner violin music is written for 1st position.
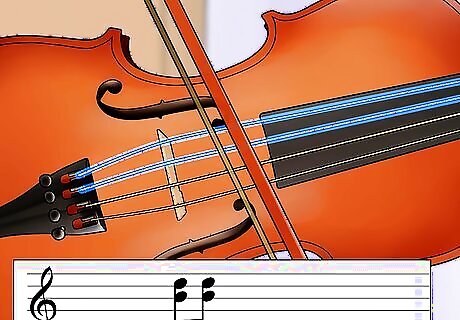
Play two stacked notes as double stops. Double stops are when you play two notes together. On the violin, you'll play two strings at the same time. Double stops are represented on the musical staff with two notes stacked on top of each other at the note position to which they correspond. The notes may not be stacked directly on top of each other. Rather, there is likely a space between each, but one is above the other note. Advanced violin music might have triple or even quadruple stops, meaning you play three or four notes together at the same time.
Reading Bow Movements
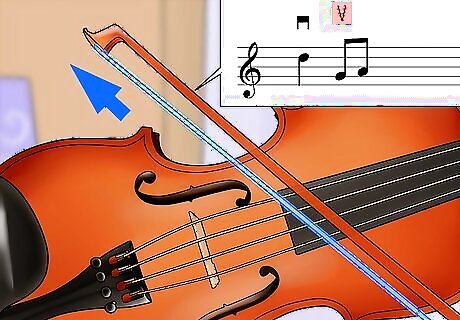
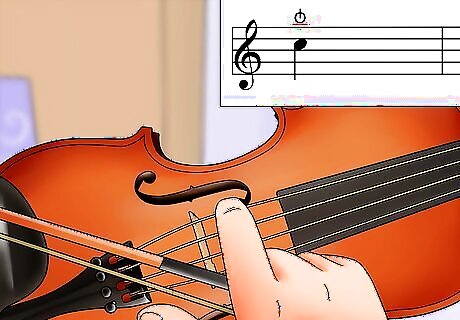
Play the bow in an upward direction for a V notation. There are a number of symbols that indicate how to play with the violin's bow. A V shaped marking under the note indicates bow movement in an upward direction.

Play the bow with a downward motion for a table-like notation. A shape that resembles a table (rectangle with two legs coming out of the bottom) is the notation for playing the bow in a downward motion.

Play an angle bracket symbol by accenting the note. There may be an accent, depicted by an angle bracket symbol (>), above or below the note. This means that you should play the note strongly.
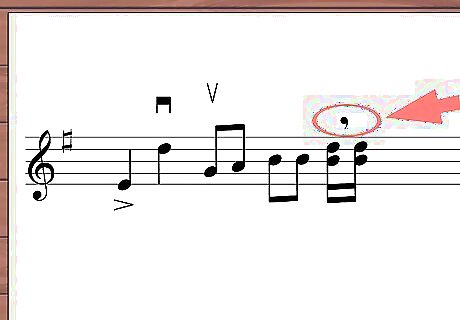
Play a bow lift notation. A symbol shaped like a thickly drawn comma indicates a bow lift. When you see this symbol above a note, lift your bow and bring it back to the starting point.
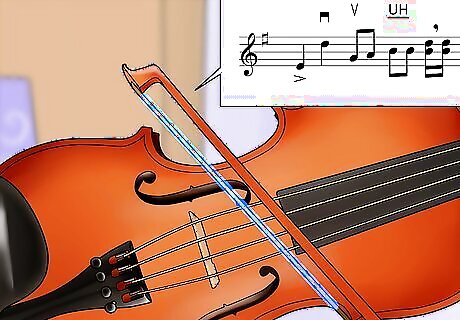
Look at initials to see which part of the bow to use. Sometimes, violin music will include initials, which directs the player on which part of the bow to use on a particular note or segment of music. The following are the typical initials used to determine which part of the bow to use: WB: Whole bow LH: Lower half of the bow UH: Upper half of the bow MB: Middle of the bow
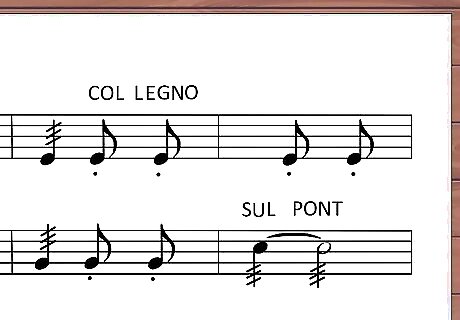
Decipher other bow notations. There are numerous other bow notations, particularly as you read more advanced violin music or music from an earlier era. These notations indicate advanced techniques to achieve certain sounds, such as: Col legno: This means “with the wood.” Use the bow's stick, rather than the hair, to play the strings. This can be damaging to the wood of the bow, so many musicians use alternate bows for these musical segments. Sul ponticello: Position the bow at the bridge of the violin (at the body of the violin) to achieve a whispery tone. Au talon: This refers to a section of music that should be played with the bow at the nut of the violin (the area between the fingerboard and the pegbox). Martelé: This term means “hammered,” and indicates that you put pressure on the string with the bow and then draw the bow across the string with force. Release the bow pressure almost immediately from the string.
Reading Dynamics and Style Markings
Play “Vibr” as vibrato. Vibrato is an effect that warbles a note while you play. Vibrato is achieved by bending and unbending your finger as you play on a string. This dynamic is usually marked as “Vibr” underneath the notes that should be played as vibrato.

Play “pizz” as pizzicato. Pizzicato is a technique, usually noted as "pizz" or sometimes spelled out in its entirety, that indicates you should play a note by plucking the violin string with your finger. If there is no obvious “pizz” or “pizzicato” designated, then assume the musical piece should be played as “arco,” or using the bow to play the notes.
Play a Bartok pizzicato. Pizzicato may also be designated with the Bartok pizzicato symbol, also known as a “snap pizzicato.” This symbol, a circle with a vertical line through the top, will appear above the note to be plucked. This type of pizzicato is given an extra snap by pinching the string with two fingers and snapping it back into the finger board.
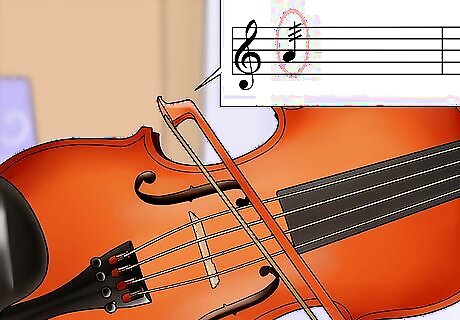
Play a tremolo. A tremolo is a style of playing very quick, rapid sounds as the bow draws back and forth across the string. The tremolo is noted with thick, short diagonal lines drawn through the note or the stem of the note. They can be either measured or unmeasured. One diagonal line means 1/8 note tremolo (measured). Two diagonal lines mean 1/16 note tremolo (measured). Three diagonal lines mean an unmeasured tremolo.
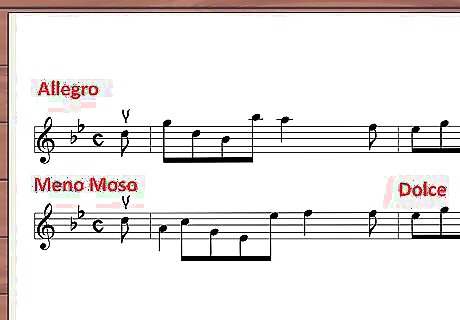
Understand style markings. Style markings give you an indication of the mood with which to play music. These are typically noted in Italian. Some of the more common words you'll see are: Con: With Poco a poco: Little by little Meno mosso: Less movement Dolce: Sweetly Allegro: Quick and lively
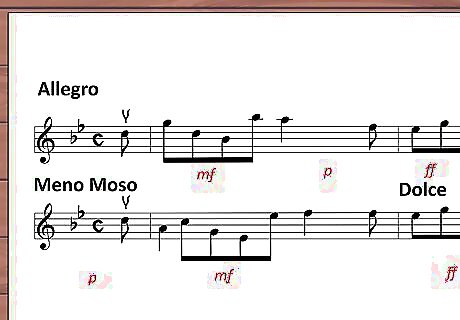
Pay attention to dynamics. Dynamics in sheet music indicate how loud or quiet you should play. These are typically indicated below the staff and will change as you progress through the music. Written in Italian, these range from very quiet (pianissimo) to mezzo (medium) to fortissimo (very loud). Dynamics usually show up as lower-case letters, such as p (piano), mf (mezzo forte), ff (fortissimo) and so on. Crescendos and diminuendos are also used, which indicate that your playing should get louder or quieter gradually. They are typically indicated by a long, thin carrot or accent mark.
Reading Violin Tablature
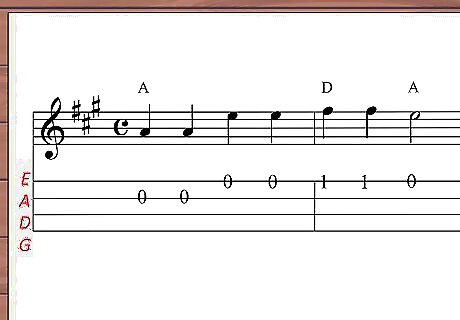
Understand what tablature tells you. Tablature, or “tab,” is a shorthand way of describing where and when to place a finger on a string to play a note. This format often does not tell you note duration, however. A tab has 4 lines, each representing one of the strings on the violin. The lines are designated, from the bottom to the top, as G, D, A, and E.
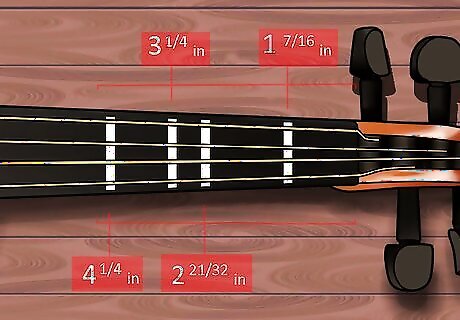
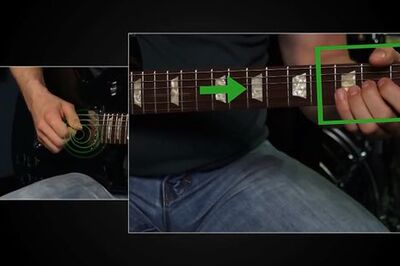
Mark the frets on your violin. A tab will tell you which finger to place where on a given note, and if you have the placements marked already, it will be easier to read a tab. These markings can be made with tape or a dab of paint or white-out directly on the fingerboard of the violin. Measure these placements from the nut, or the connector between the fingerboard and the pegbox and tuning pegs. 1st fret: 1 and 7/16 inches from the nut 2nd fret: 2 and 21/32 inches from the nut 3rd fret: 3 and ¼ inches from the nut 4th fret: 4 and ¼ inches from the nut
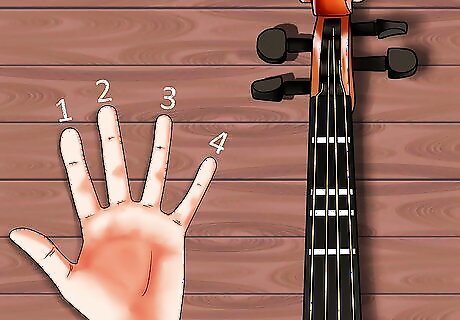
Match each left-hand finger to the frets. Each of your fingers (minus your thumb) on your left-hand will have a number that corresponds to a fret. The index finger is 1, middle finger is 2, ring finger is 3, and pinky finger is 4. A 0 denotes an open string (no finger pressing the string).

Read the notes on the tab. Each note will be marked with a number on a particular string line in the tab. For example, if there is a 0 on the top line of the tab, this means you will play the E string as open (no finger pressing the string). If there is a 1 on the top line of the tab, you will press the first fret with your index finger on the E string. If there is a 3 on the third line up on the tab, you will press the third fret with your ring finger on the A string.
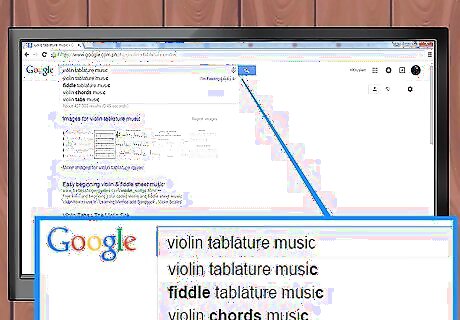
Download violin tablatures to practice. There is a wide variety of songs written in tablature for the violin that are available online. Type “violin tablature music” into a search engine to locate songs of varying difficulty.


Comments
0 comment