
Installing Foam Weather Stripping to Doors or Windows
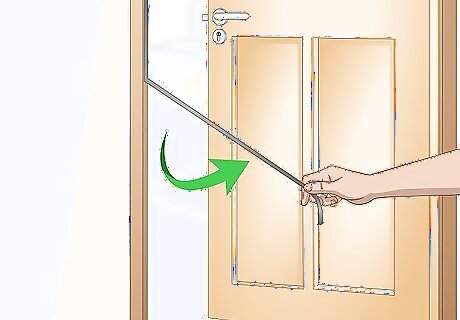
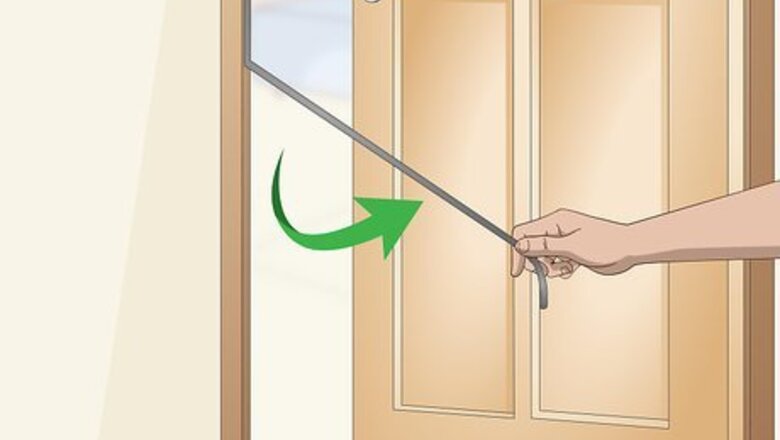
Peel away any old weather stripping. Installing weatherstripping is a great way to cover a window or door for winter. If your door or window currently has weather stripping, remove it before you place the new piece down. If the old stripping is adhesive, pull it off using your hands. If it’s screwed into the frame, use a drill or screwdriver to take out the screws, then lift off the stripping. Try using a putty knife to make it easier to peel away the old weather stripping. That will make it easier to scrape away tape and any small pieces. If you removed any screws, set them aside so you can use them on the new stripping.
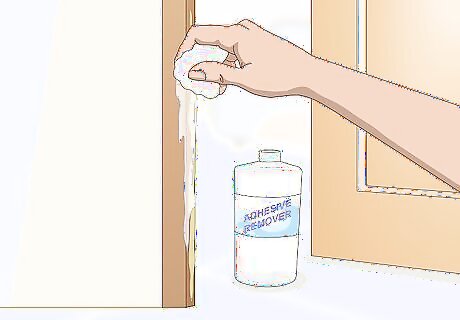
Scrub off any sticky residue with an adhesive remover. If the leftover glue from the old stripping doesn’t peel off easily, apply an adhesive remover with a cloth and scrub the area. Then dry it with a clean cloth.For extra stubborn adhesive that you can't get off with the remover, sand it away with a fine-grit sandpaper. Look for a paper that is between 120 and 220-grit and run it over the residue.
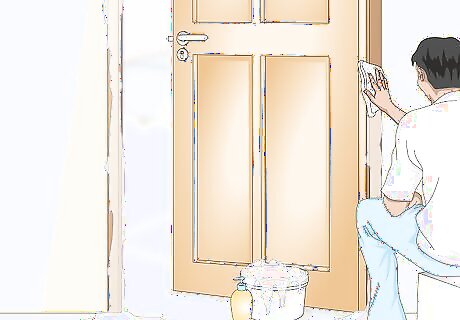
Clean the door or window jamb with soap and water, then dry it. This removes any remaining residue or debris, which could affect how well your new stripping sticks in place. With a cloth, wipe down the entire frame of the door or window with soap and warm water. Use another cloth to dry off the frame. If there are any small holes or cracks in the frame, load a tube of exterior caulk into a caulk gun, then pull the trigger to squeeze the paste into the hole. Let it dry for about 24 hours before applying your stripping.
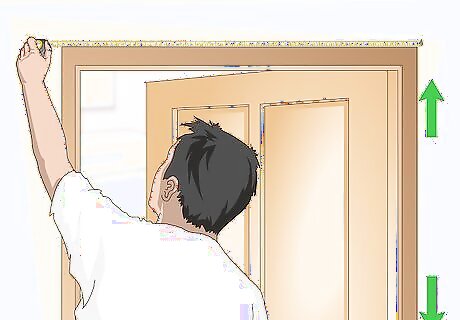
Measure the top and side of your door or window frame. Hold 1 end of a tape measure against the inside edge of the frame, then stretch it to the other inside edge to determine the length of the top and/or bottom piece of stripping. To measure the sides, place the end of the tape measure on the inside edge of the top of the frame and pull the tape down to the floor. Measure twice to make sure you have the most accurate reading. It may help to have someone else read the measurement while you hold the tape in place.

Select the type of adhesive weather stripping to use based on your door. The 3 most common types of adhesive weather stripping are foam, V strip, and rubber or vinyl. Adhesive-backed foam tape is the most popular, as it’s the easiest to install, but if you have a draftier door frame, you might prefer vinyl. Consider the specifics of your door or window when choosing your weather stripping. V strip may also be labeled as “tension seal.” You can find adhesive weather stripping at a hardware store or online retailer. Weather stripping comes in different thicknesses, so it's a good idea to buy a few different sizes, then try them out with your door. If the weather stripping you use is too thick, your door might not close properly. Buy as much weather stripping as you need based on your measurements, plus 10% extra as a precaution. For example, if you need 96 inches (240 cm) for your window, buy 106 inches (270 cm) of stripping. How to Choose a Type of Weather Stripping For the cheapest and easiest solution, go with foam tape. It costs less than $1 per 1 ft (0.30 m). If you don't want to be able to see the weather stripping, choose V strip. It's nearly invisible when installed correctly! For old doors or windows that have large gaps, use rubber or vinyl weather stripping. The tubular pieces seal up cracks better.
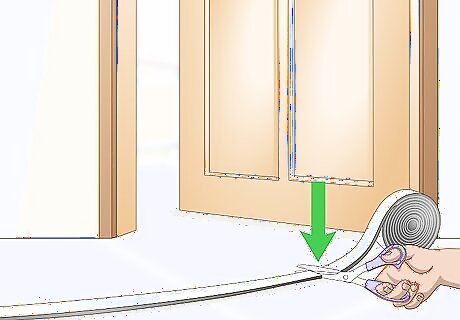
Cut your pieces of weather stripping to the correct length. Mark the length that you measured on the weather stripping using a pencil. Then trim the piece at the marked spot with a utility knife or pair of sturdy scissors. If you’re weather stripping a window, you’ll need 4 pieces, 1 for the top, 1 for the bottom, and 1 for each side. To weather strip a door, you need 1 piece for the top and 1 piece for each side, for a total of 3 strips. The bottom of the door will require a door sweep.

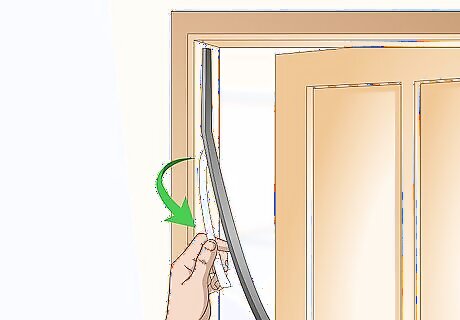
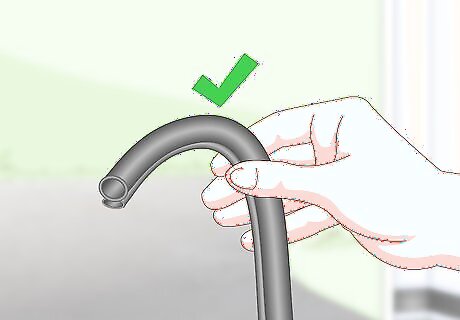
Line 1 piece of stripping along the side of the door or window frame. Start by placing the end of the weather stripping in the top corner of the jamb. Then, arrange the rest of the piece so it lies flush against the door frame. Install the weather stripping when the outside temperature is at least 50 °F (10 °C) to help the adhesive hold better. If you’re using V strip, place the stripping against the frame so that the opening of the V faces towards the exterior of the door or window. Do not put the weather stripping on the door itself.
Peel off the backing and press the stripping firmly into place. Once you have the stripping aligned where you want it to go, remove the paper backing from the piece. Run your hands along the piece and apply pressure to secure the sticky side of the stripping to the door or window jamb. To prevent the stripping from sticking to things it shouldn’t, peel a little bit of backing off at a time as you go, instead of removing it all at once. For extra protection, you can secure the stripping into place by hammering nails through it into the frame, or use a staple gun to insert heavy-duty staples into it.

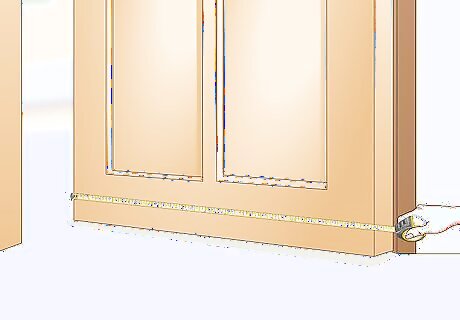
Repeat on the other side and top of the frame. Install the remaining pieces around the door or window by removing the backing and pushing the adhesive against the jamb. Line up each piece in the corners so that there are no gaps between the pieces of stripping. If you’re weather stripping a window, make sure you apply a piece to the bottom edge, too.

Test the door or window to make sure it opens and closes properly. After you've installed all of your stripping, try opening and closing your door or window carefully. Check that it opens without sticking and that you can close it tightly. Be aware that you may need to push or pull the window or door more firmly at first because of the new stripping. If you're having significant trouble opening or closing the window or door, adjust your weather stripping as necessary.
Adding a Door Sweep
Measure the bottom of the door frame. Place one end of a tape measure on the inner edge of 1 side of the door frame. Pull the measure taut along the ground to the inner edge of the other side. Note what the measurement is. This is how long you’ll need to cut the door sweep. Jot the measurement down on a piece of paper or type it in the notes app on your phone so you don’t forget it.

Cut the metal door sweep to the right length with a hacksaw. Mark the length you measured on the door sweep with a pencil or marker. Clamp the sweep to a work table with the section you’re going to cut hanging off the edge of the table. Apply pressure as you push the saw against the sweep and away from you. Repeat these pushing strokes until the saw cuts through the sweep. Always wear safety glasses when cutting with a saw to protect your eyes from debris. Tips for Cutting with a Hacksaw Choose the right blade. Make sure your hacksaw is fitted with a blade that works on metal, not one that’s just for wood. Push, don't pull. Hacksaws only cut on the push stroke, so you don’t need to pull it back through the sweep. Instead, you can lift it up and bring it back to the starting position.
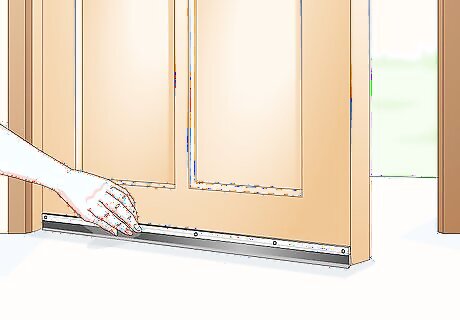
Place the sweep at the bottom of the inside of the door. Position it so that the flexible bottom piece of the sweep just grazes the floor. This will seal the gap underneath the door while also preventing the sweep from dragging against the floor when you open and close the door. You can check that your door sweep is aligned properly by looking underneath the door. If you can see light coming through, move the sweep down a little until all of the light is blocked.
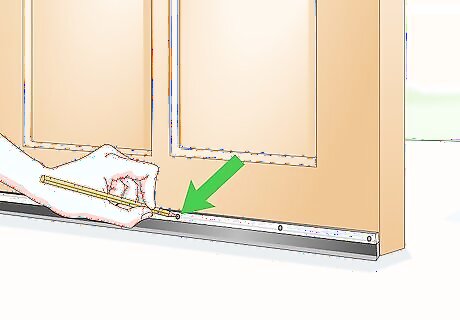
Mark spots for the screws on the sweep and pre-drill pilot holes. Use a pencil to make a mark where each of the provided screws will go along the door sweep, spacing out the pilot holes evenly in a straight line. For example, if you have 3 screws, make 1 hole on each side of the sweep and then 1 in the center. Line up the drill bit with the marks and pull the trigger to drill through both the sweep and the door itself. Your door sweep should come with 3 to 4 screws. If it doesn’t, you can use any #6 screws. For #6 screws, use a drill bit that’s at least ⁄32 inch (0.24 cm) in diameter.

Use a screwdriver to insert the screws into the holes. Place 1 screw in each of the holes and tighten them with a screwdriver until they’re completely secure. This will secure the sweep to the door so it won’t hang off or come loose. Test the door by opening and closing it a few times. If you notice the sweep is getting stuck, unscrew it from the door and adjust it as needed.
Putting Weather Stripping on a Car Door
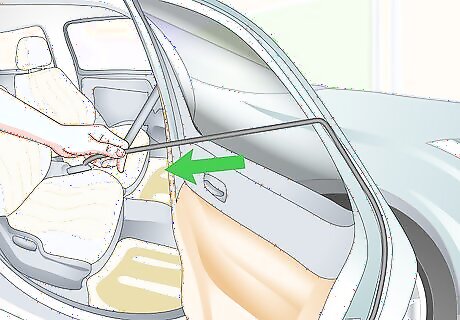
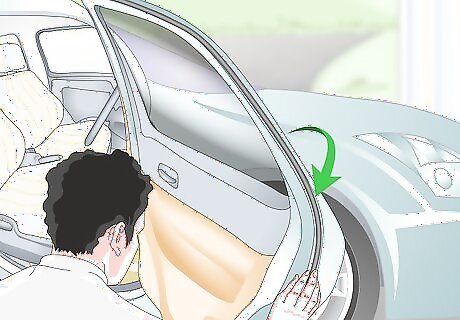
Remove any old weather stripping that’s already on the door. Use your hands to carefully peel off the piece that is currently on your car door. Make sure to pull up what you can of the adhesive layer underneath the stripping, too. There may be screws in the stripping, which holds it in place. Unscrew them and set them aside. If you’re having trouble peeling off the current piece, apply adhesive remover to it and let it soften for 15 to 20 minutes before trying again.

Use brake cleaner to clear out the channel, then dry it with a towel. This will get rid of any remaining adhesive residue or dirt in the channel before you place the new stripping down. Hold the can about 2 feet (0.61 m) from the door jamb and spray it along the channel. Wipe it off with a clean towel to remove any debris. If you have sensitive skin, wear rubber gloves when using brake cleaner.
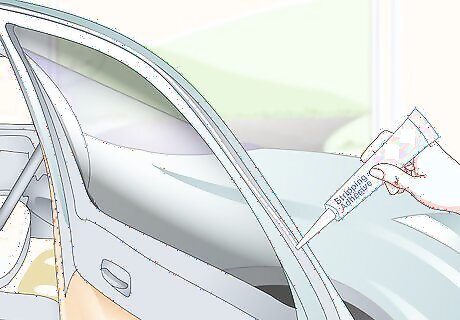
Apply a thin line of weather stripping adhesive along the channel. Less is more when it comes to the adhesive. Squeeze the tube to lay a bead of glue down the groove where you’ll place the weather stripping. You can buy weather stripping adhesive from an auto parts store or an online retailer.
Purchase generic or custom weather stripping based on your preferences. While you can buy generic weather stripping at any auto parts store, you can also get a piece that’s specifically designed to match your car’s make and model from the service department at your dealership. Custom stripping is more guaranteed to seal tightly around your car doors. If you aren't sure what to use, call your dealership or an auto technician and ask their opinion. Custom weather stripping will be more expensive than generic stripping.
Place the new piece in the channel, pressing it firmly onto the adhesive. Line up the new weather stripping in the groove around the door. Push down on the stripping once it’s aligned so that the adhesive holds it in place. If you notice any spots where the adhesive oozed out and hardened, use the brake cleaner to wipe them away If you had to remove any studs when you peeled off the old weather stripping, screw those back into their proper places once you lay down the new piece.
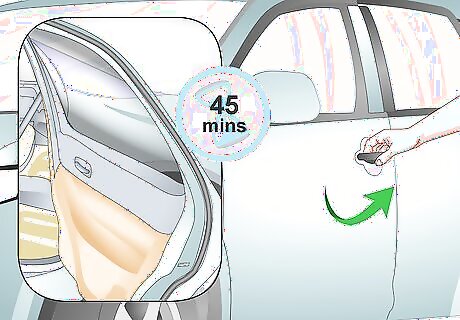
Let the adhesive dry for 45 minutes before closing the door. After the glue is completely dry, you can shut your car door. However, keep in mind it will be harder to close at first because of the new rubber. To make your new weather stripping last longer, you can spray it with a rubber seal protectant after the adhesive has dried. You can also spray silicone on the weather stripping to prevent ice and snow from sticking to it in the winter.


Comments
0 comment