views
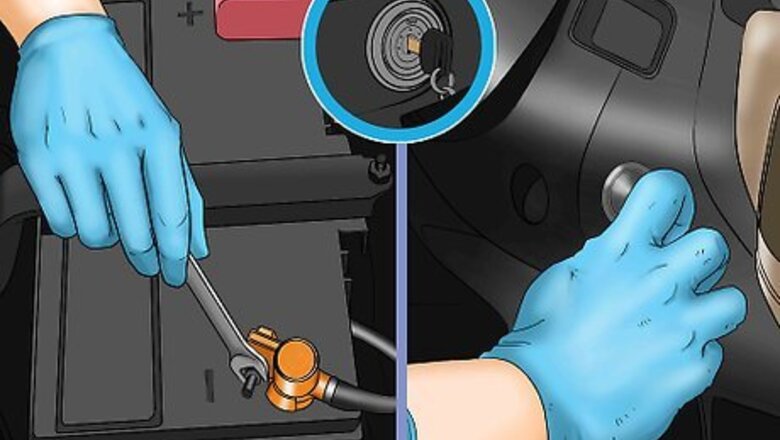
- Be sure to turn off the ignition and disconnect the negative terminal from the car battery.
- When mounting the tweeters, you'll need a screwdriver to remove any panels blocking your car speaker.
- If the tweeters are vibrating during your test, it means it's too loosely attached.
Mounting the Tweeters
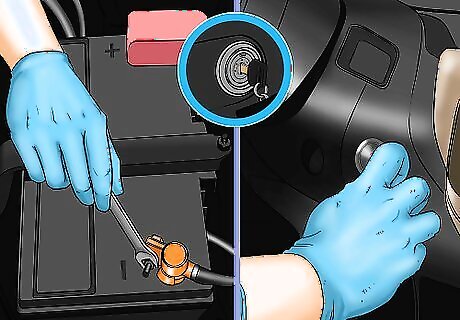
Disconnect the negative terminal from the car battery to cut the power. Turn off the car's ignition before opening the hood and interacting with the battery. Use a wrench to loosen the nut on the negative end of the battery (marked by a “-”), then detach the black negative cable from the battery. Doing this will help prevent a possible short circuit during the tweeter installation process, which could damage your car's other electronic components. For safety, wear insulated gloves that will protect you from any charge the battery might give off. You should also wear safety goggles when working with a car battery, in case any of the corrosive materials inside the battery begin to leak.
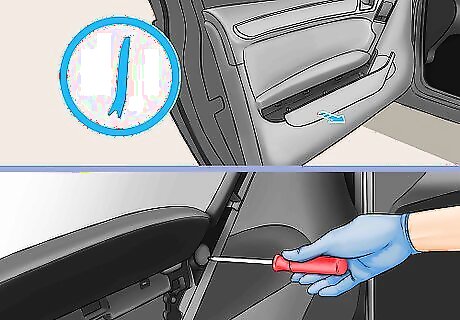
Remove the necessary panels to gain access to your car's speakers. If you plan to mount your speakers under your dashboard or inside a car door, you'll need to remove the dashboard panel or door panel before you can proceed. Use a screwdriver to remove any screws that are keeping the panel attached to the body of the car. Then, use a wide, flat putty knife to pry the panel away. Note that this step isn't necessary if you plan to surface mount your tweeters. The screws on a door panel are most likely located underneath the door lever and underneath the arm rest. The locations of the screws on your dashboard vary based on the make and model of your car. Check your user's manual for specific instructions on how to locate these screws and remove your dashboard.
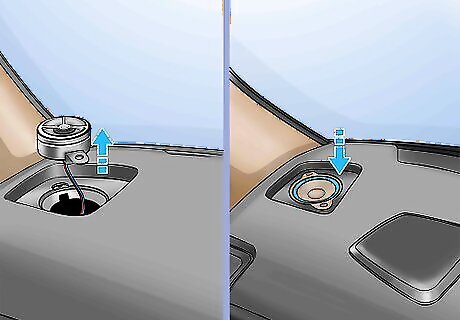
Install the tweeter in the dash for an easy bottom mount installation. In a bottom mount installation, the tweeter is placed underneath an existing speaker grille, meaning you don't need to drill any new holes to install it. Simply use a wrench to screw the tweeter into the factory-installed holes underneath the grille. Note that if your car doesn't have holes underneath the speaker grille that you can screw your tweeter into, you'll need to drill those holes yourself. These will only need to be about 0.25 inches (0.64 cm) deep or so, in order to give the screws enough space to be securely attached.
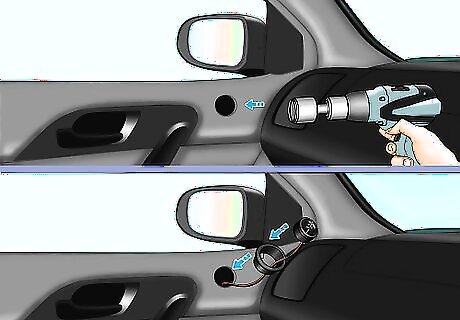
Mount the tweeter in the door panel to put the sounds closer to you. Flush mounting a tweeter in the door panel is the most common installation method. First, drill a hole into the door panel that is almost exactly as wide as the tweeter. Then, slide the base cup (which holds the tweeter in place) into the hole so that it is snugly secure in the panel. Finally, attach the tweeter to the base cup. Refer to the instructions that came with your base cup to see how precisely to attach the tweeter to it. Most cups simply require you to pop the tweeter into it, while others may have you use a screw to attach it. Ideally, you should drill into the door panel after it has been removed from the door itself to avoid inadvertently damaging anything behind the panel. If your door panel has an existing speaker grille in place, this is the best location for your tweeter. However, if there's no grille on your car door, then feel free to install your tweeter wherever you want high-frequency sound to come from! This method of installation is called “flush mounting” because the top of the tweeter sits flush with the surface that it's mounted on.
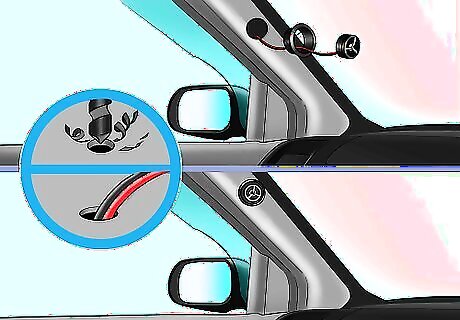
Opt for a surface mount if you can't put the tweeter anywhere else. Use a power drill to drill a small hole in your car's speaker grille; this will be the hole that you'll stick the speaker wires through to wire your tweeter to the crossover. Then, use a screwdriver to screw the base cup into the grille with a pair of screws. Then, attach the tweeter to the base cup by sliding it in so that it's snugly secure inside the cup. Avoid drilling the hole in the grille to deep, as you may cause unwanted damage to the speaker system. You only need to create an opening in the grille just big enough for speaker wires to pass through. Surface mounting is a useful installation method for when there aren't a lot of deep places in your car where you can drill new holes for installing tweeters. The most common location for surface mounted tweeters is on the “A” pillar, which stands between your windshield and your front door window.
Wiring and Testing the Tweeters
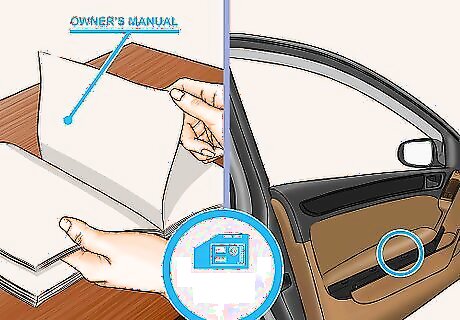
Locate the crossover in your car. The stereo system in your car has a built-in crossover that filters the different frequencies that come through your speakers. Crossover locations vary based on different car models, so you'll need to look in your owner's manual to find your crossover's specific location. Most stereo crossovers are located inside the car door panel.
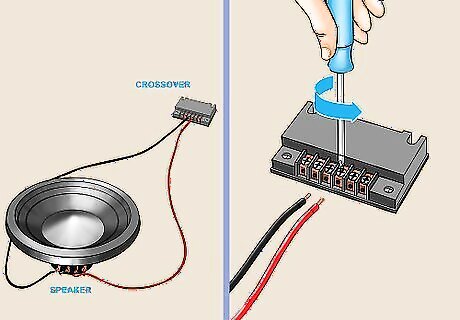
Connect the speaker wires to the crossover. Unscrew the caps on the 2 binding posts on the crossover labeled “Highpass.” Insert the speaker wires into the holes in these posts, connecting the positive and negative wires to the positive and negative posts. Finally, screw the caps back onto the binding posts to secure the wires in place. Your speaker wires will most likely be color coded to indicate which is positive and which is negative. In most cases, the wire with the stripe is the negative wire and the wire with the solid color is the positive wire.
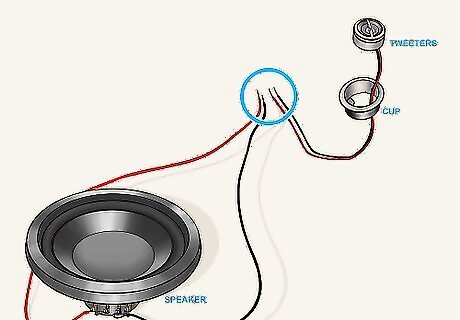
Attach the speaker wires to your tweeter. Unscrew the caps on the binding posts on the back of your tweeter and insert speaker wires into the exposed holes. Screw the caps back onto the posts to secure the wires. Again, make sure you connect the positive and negative wires to their respective binding posts to ensure that the tweeter works correctly.
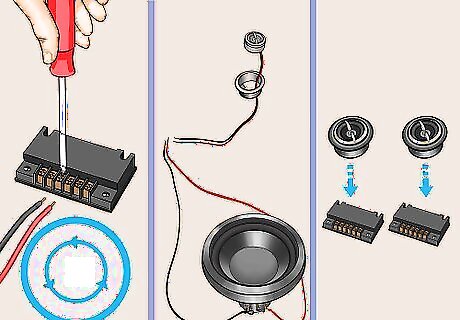
Repeat this process as necessary to connect other installed tweeters. If you installed more than 1 tweeter, use additional pairs of speaker wires to connect them to your car's crossover. The wires should be attached to the same posts that you attached the first tweeter to. Note that if you have more than 2 tweeters in total, you may need to have an additional crossover installed in order to ensure all of your tweeters produce the same quality of sound.
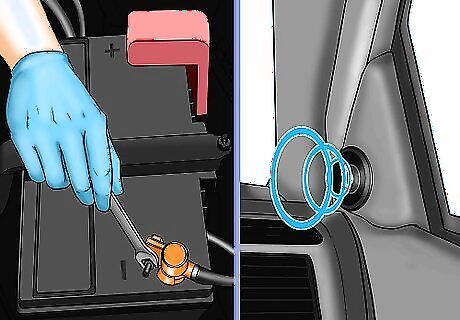
Test the tweeters to make sure they work properly. Reconnect your car's battery, then turn on your car's radio and make sure the volume is turned up so that you can hear it. Listen to the sound coming from your tweeter to make sure there are no unwanted vibrations. If the tweeter is vibrating, it means it's too loosely attached.
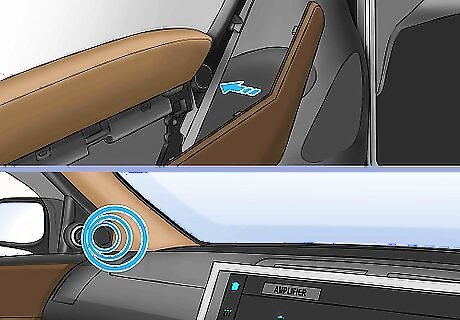
Reattach the panels you removed, if applicable. If you flush mounted or bottom mounted your tweeters, the last thing you need to do to complete the installation is screw the door panel or dashboard back into place. Once this is done, test the tweeters once again to make sure the process of reattaching the panels didn't loosen them up.





Comments
0 comment