
Getting the Right Module
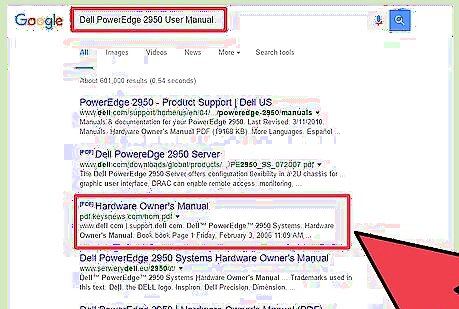
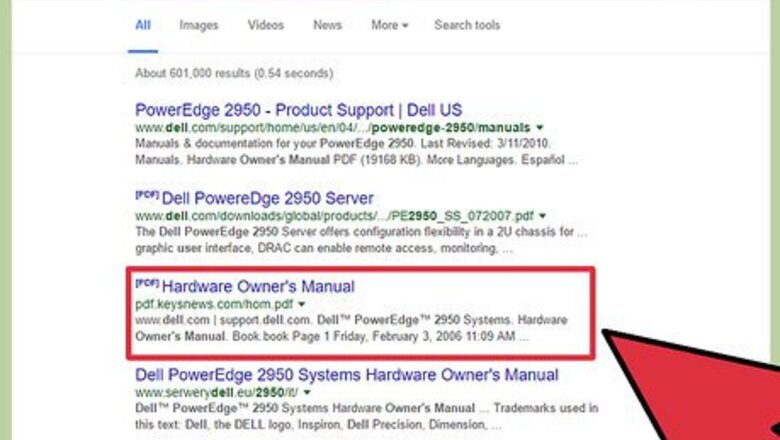
Check to see what expansion ports you have on your motherboard. If you have an OEM machine (like a Dell Optiplex desktop or a laptop of any stripe) you can typically Google the User's Manual for the model number of your computer (so, for example, Dell PowerEdge 2950 User Manual). Once there, check the Table of Contents for a section labeled Expansion.
Find a Bluetooth module that connects via that port. The most common Bluetooth modules (aside from the aforementioned USB) use PCIe, mSATA and M.2. There's no inherent difference between the various ports, in terms of quality of connection; just make sure you buy a module from a manufacturer you trust.
Installing the Hardware
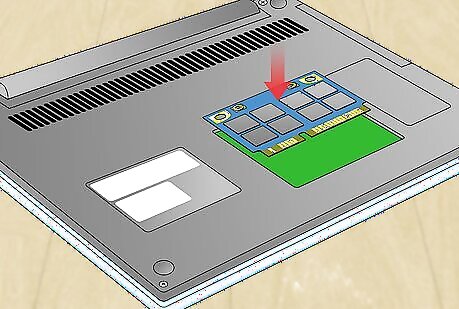
Crack your computer open and physically put the module into place. If this is your first time taking your computer apart, search YouTube for a Disassembly video for your particular module of computer. Follow along with the video. Some expansion ports, like Mini PCIe, typically don't require you to take your computer apart.) If this step scares you a little too much, there is a paid alternative. Most big box computer retailers (like Best Buy or MicroCenter) will let you bring in your machine and the part to be installed, and they'll do it for you, for a fee.
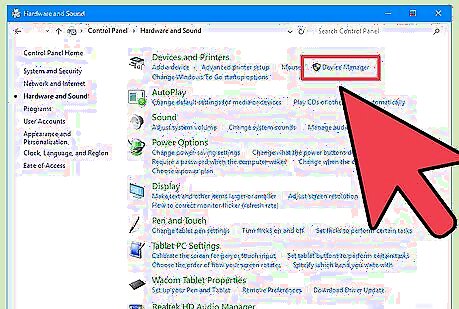
Make sure the part registers as installed. For Windows this means going into Device Manager (Start > Control Panel > Hardware and Sound > Device Manager, requires Administrator access). Look for (hopefully) a new entry labeled Bluetooth, or barring that, a new Unidentified Device with a yellow triangle. For Mac users, ...why are you here? Every Mac since the late 2000s came with Bluetooth preinstalled. If you're replacing a dead Bluetooth module, the new one should appear in the Bluetooth menu under System Preferences; if you're creating a Hackintosh, you are officially beyond the scope of this article. Linux users will want to check the man files for their particular flavor of Linux, when it comes to installing new hardware.
Installing Software and Connecting Peripherals
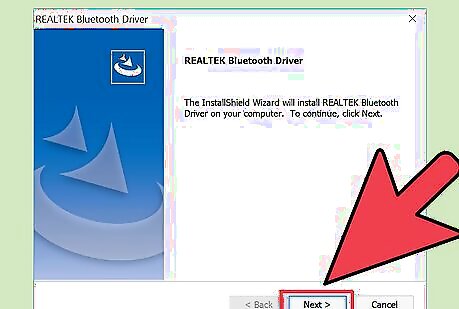
Install the software only if needed. Installing software is really only an issue if you didn't get your Bluetooth device to show up in Device Manager as a Bluetooth device. Go to the manufacturer's website for the Bluetooth module you purchased, and download the drivers appropriate to your particular flavor of Windows (7, 8, 8.1, 10, and x32 vs x64 as appropriate. All of this information is available by going to Start > Control Panel > System and Security > System, under Windows Edition). Run the installer for the drivers, let it process, and reboot the computer as necessary.
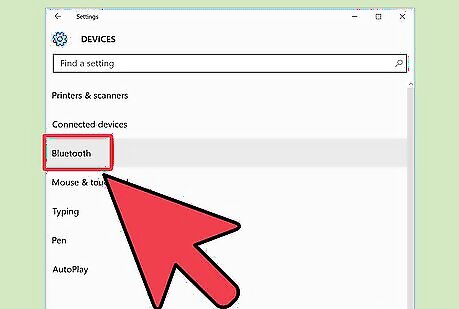
Test it out. Now, the moment of truth - syncing to a Bluetooth peripheral, like a keyboard or headset. For Windows users, go back to Control Panel > Hardware and Sound; there should be an option now for "Add a Bluetooth device." Make sure your Bluetooth peripheral is in pairing mode (consult the manual for this), then click "Add a Bluetooth device" and wait while your computer's Bluetooth module looks for the Bluetooth peripheral. Select your peripheral as it appears, enter any security codes (the default for most is 0000, but check your documentation if they use specific ones), and follow your way through the wizard, and you should have a functioning Bluetooth device. For Mac users, the process is very similar. Under System Preferences > Internet and Wireless > Bluetooth, you should get a small window for bluetooth peripherals. Make sure you check the box for "On" so your computer turns its new Bluetooth module on. Just like for the Windows users, make sure your peripheral is in pairing mode (consult its manual for this), then find it in the listing in the Bluetooth Peripheral window and double-click on it. Follow the prompts, enter any security codes or PINs the computer calls for (again, most default to 0000, but check your peripheral's documentation to be sure), and you should have a functioning Bluetooth device at the end.


Comments
0 comment