
Potential Filter Locations (& Accessing Them)
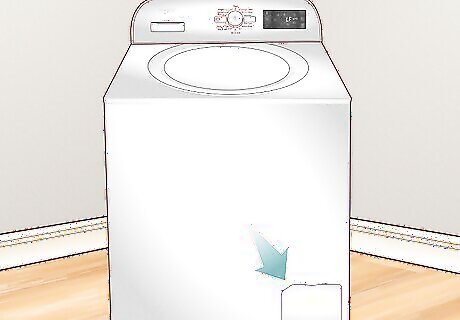
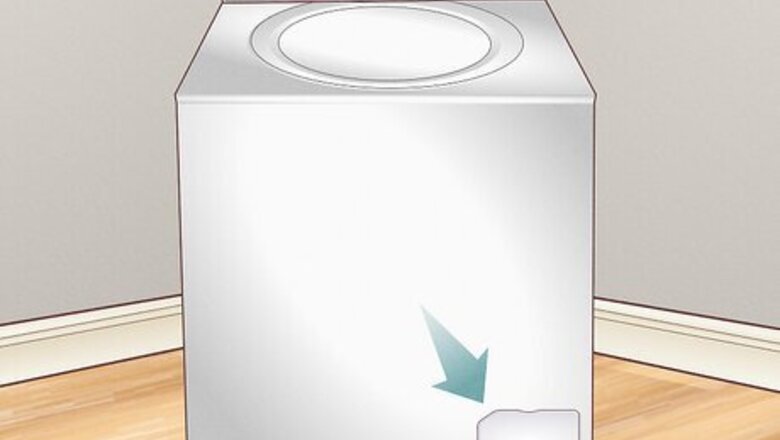
Under the panel at the bottom right. Most modern Whirlpool machines (and almost all top-loaders) hide the filter under the small panel near the floor on the front of the machine. Simply reach under the seam of the panel and gently pull on it to remove the panel. If the panel doesn’t open freely, slide a flathead screwdriver behind it and pry an edge open. If the panel is circular, it opens at the top. There’s a little tab at the top; press it with your fingernail or a flathead screwdriver, and it’ll pop open.

Behind the dispenser drawer. On some front-loading models and all-in-one washers, the filter is behind the drawer where you add detergent and bleach. Pull the drawer out as far as it goes, then press down on the tab on the right side of the drawer and up on the tab on the left side of the drawer. Tilt the drawer up at an angle and gently pull it out. The filter is behind the drawer. If the front of your machine is completely flat (there are no panels) and your machine is on the newer side, the dispenser drawer is the most likely location for your filter.
Inside the machine underneath the drum. This only applies to older front-loading machines. If you don’t see a panel on the front and the dispenser drawer doesn’t come out, shut the water off and remove the supply lines. Then, turn the machine backwards and remove all of the screws holding the back panel in place. Then, look under the drum, near the floor. The filter is inside the round container on the bottom-right of the drum. If this applies to your machine and you’ve been running into problems with it lately, you’re probably getting close to the point where you’ll need a new machine soon.
Removing the Filter
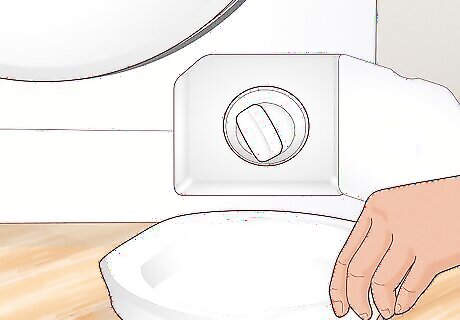
Set a pan underneath the filter to catch water. The filter may still have a little bit of water in it. To avoid spilling water all over the place, set the pan underneath the filter. You’re most likely to have a lot of water in the filter if your filter is inside the machine at the bottom and you had to remove the back panel. If you don’t have any room for a pan and you’ve got a machine where the filter is on the bottom right, lay a towel under the machine.
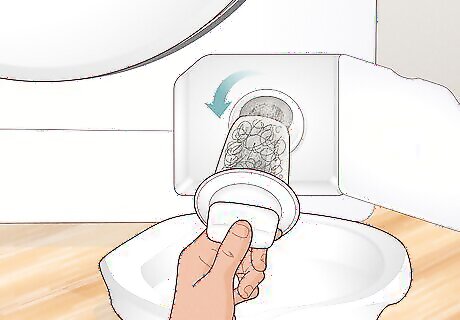
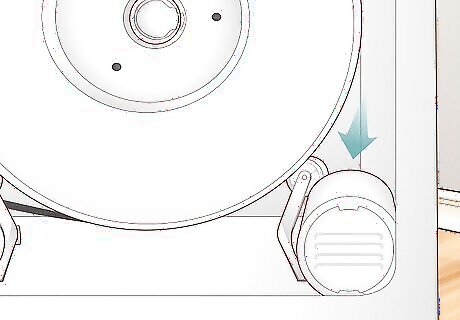
Twist the handle in the middle counterclockwise and slide the filter out. In the very center of the filter, there’s a small handle. Grab that and slowly rotate it counterclockwise until water spills out. Once the water stops pouring out, turn the filter counterclockwise all the way and slide it out of the machine.
Cleaning the Filter
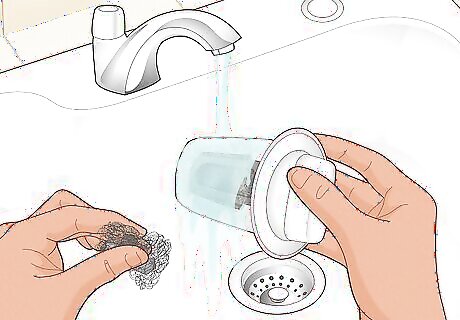
Remove big debris by hand and rinse the filter under water. Cleaning the filter is easy—just remove any big chunks of debris by hand and toss the filter under water. You can wipe the filter down with a cloth if you have any soap scum that won’t come off. Reinstall the filter the same way you removed it. Just insert the filter and turn it clockwise to lock it in place. If the filter isn’t dirty when you remove it and you’ve been struggling with water flow in your machine, contact Whirlpool or an appliance repair person. The pump itself is likely damaged. If the filter wasn’t dirty and you had the F9 E1 code, remove your drain hose and clean it out. It’s probably blocked.
Supply Line Filter Cleaning

Turn the water off and unscrew the supply lines. They don’t normally need to be cleaned, but if you’re running into water-filling issues, it’s worth cleaning the supply line filters. Start by closing the supply line valves by twisting them all the way clockwise. Then, use a wrench to unlock each line from the machine and unscrew them by hand. Do the same on the other end of the supply line where it hooks up to the water system. If you’re getting the Lf, LO FL, or F8 E1 error, your supply line filters are especially likely to require cleaning. A little bit of water may pour out of the lines as you remove them.
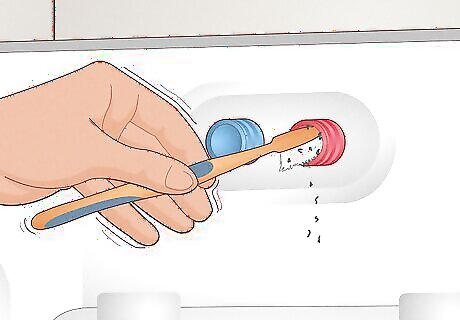
Brush the inside of each valve with a toothbrush. Grab an old toothbrush and gently wipe the inside of each valve stem where the hot and cold water supply lines hook up to the machine. Then, brush the inside of the stems at the supply line. Don’t scrub super hard or use any solvents or cleaners. These filters don’t need that kind of heavy cleaning.
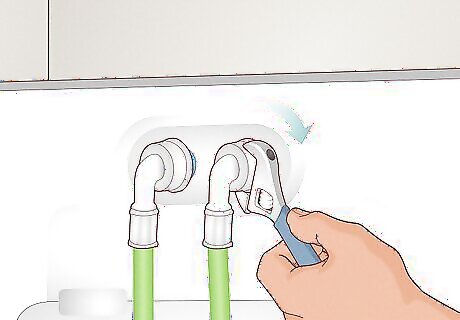
Reassemble the supply lines with a wrench. Reconnect the supply lines by hand and tighten each end of the supply lines. Continue tightening the nuts by hand until you can’t move them any further. Then, use a wrench or channel locks to turn each nut another 1-2 times to ensure they won’t leak. Turn the water valves counterclockwise to open them up and check for leaks by running a test cycle. Make sure you hook up the hot line to the hot water supply and cold to cold. Your machine needs both to be hooked up to run correctly.


Comments
0 comment