
Measuring Insulation
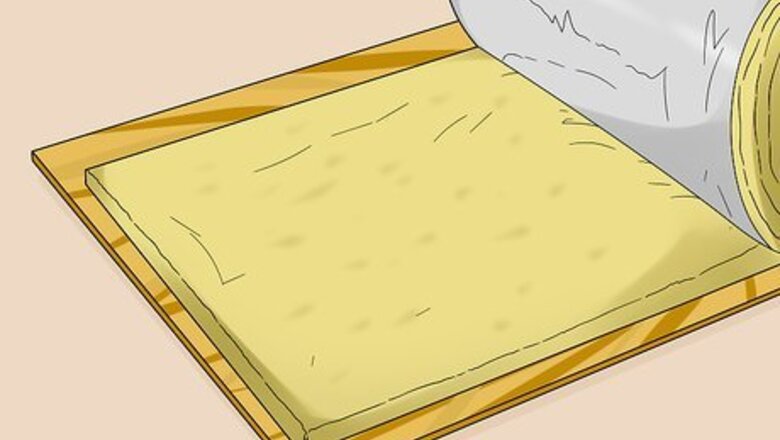
Place the insulation on a scrap piece of plywood. Select a piece of plywood that is at least as wide as the fiberglass sheet. It likely won’t be as long as the material, but it should give you some room to spread out the roll while cutting it. Set it down on a flat surface where you will have plenty of room to roll out the fiberglass. The plywood doesn’t have to be too big, but make sure it fits underneath the part you wish to cut. Choose a piece of solid material, such as an old piece of plywood, you won’t mind getting nicked by your cutting tools. Most people cut fiberglass on the ground, either outside or on the floor. You can lay the plywood on the floor for protection. Avoid cutting over bare surfaces, such as concrete. The surface could get damaged, but it will also wear out your cutting tools.
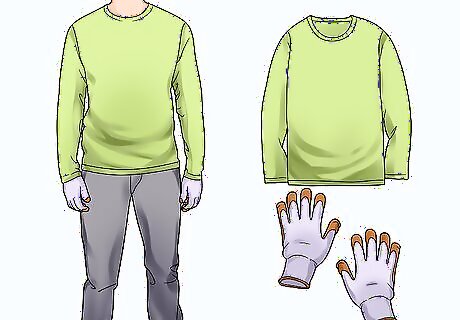
Wear cut-resistant gloves and other protective clothing. Fiberglass insulation is harsh on skin, so cover up as best you can before handling it. Wear long pants and a long-sleeved shirt. Then, put on some gloves capable of both protecting you from the insulation and the sharp edges of whatever cutting tool you plan on using. Some people also wear a disposable coverall to prevent the insulation from spreading onto their clothing. If some of your skin is exposed, put some baby powder on it. The powder prevents the glass shards in the insulation from sticking to your skin. If you come into contact with the insulation, your skin may become irritated. Rinse off the fiberglass in cold water, followed by warm water.

Put on a dust mask and safety glasses for protection. A regular N95 cloth dust mask is fine, but you can use a respirator or full face mask if you wish. If you’re using a mask that leaves your eyes uncovered, get separate eyewear. Safety goggles can be used if you don’t have glasses. Keep your safety gear on whenever you’re cutting insulation. The dust released by the insulation is harmful and can worsen breathing problems like asthma. It isn’t considered to be harmful long-term, but it is very irritating if you breathe it in or get it in your eyes. If you are able to, work outside so the dust doesn’t end up in your home. Otherwise, open nearby doors and windows, then vacuum when you’re done cutting.
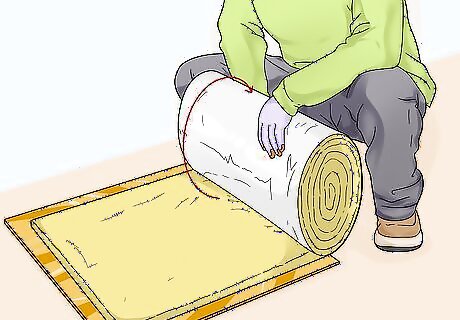
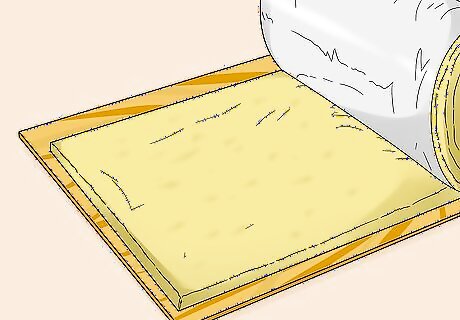
Roll out the insulation with the paper side down. Fiberglass insulation comes in a big roll, but it’s best to roll out only a little bit at a time. Position the roll on the edge of your plywood. Then, push it across and off the plywood. Unroll just enough to complete the cut you wish to make. Most insulation has a paper backing on one side. Cutting through the paper last is usually easier, plus the backing keeps the insulation clean while you’re unrolling it. However, you can cut the insulation perfectly fine when the paper side is faceup.
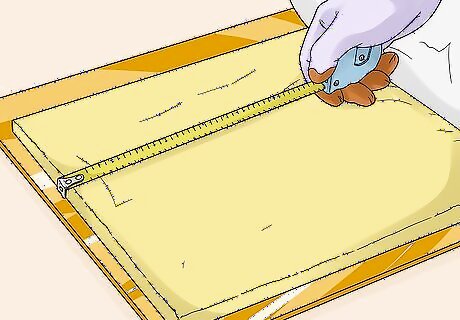
Use tape measure to determine where you will cut the insulation. Measure out the spot where you intend on installing the insulation first. Plan on cutting the insulation about 1 in (2.5 cm) bigger than that on all sides. Since fiberglass insulation is flexible, it can be tucked into tight spots. The extra length will help it stay in place. For example, you might need to cut smaller chunks of insulation to fit between support beams along an attic’s walls.
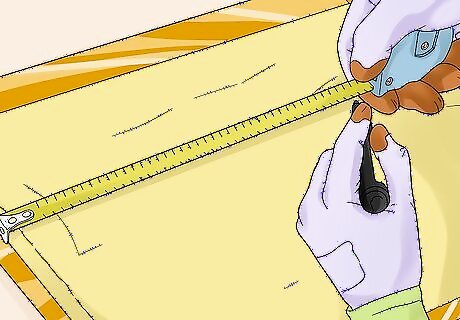
Mark the measurements on the insulation in permanent marker. Use a tape measure to transfer your measurements to the insulation. Measure along the sides of the insulation, making small marks to indicate where you plan on cutting it. You don’t have to trace the entirety of each cut. You could also mark the insulation with a small piece of masking tape. If you’re cutting the insulation roughly to an approximate size, you won’t have to do any sort of additional measuring. If you’re aiming on accurate cutting, you can use a scrap piece of wood in most cases to get a straight cut.
Using a Utility Knife

Select a sharp utility knife with a 3 to 4 in (7.6 to 10.2 cm) blade. Any good utility knife will work, but fiberglass insulation dulls blades very quickly. For this reason, you’re better off using something disposable. Try getting an extendable snap-off utility knife. When the blade stops working, you can snap off the dulled length with pliers. Most of these utility knives can also be refitted with fresh blades. Another option is to get an industrial utility knife. Industrial blades are sturdier and designed to last longer than ordinary ones. You could also use a serrated chef’s knife and spray it with a silicone lubricant like WD-40. The silicone helps prevent the blade from dulling as quickly as it normally would.
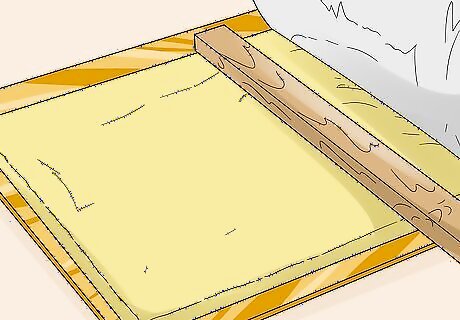
Position a wood board next to where you plan on cutting the insulation. Get a 2 in × 4 in (5.1 cm × 10.2 cm) board that is longer than the insulation is wide. A 12 in (30 cm)-long board works well for most projects. Place it up against the measurement marks you made earlier. The board serves as a handy way to brace the insulation, leading to a more accurate cut. Make sure the board is perpendicular to the insulation and up against both marks you made. It can slip out of place, causing the insulation to look uneven after you cut it.
Kneel on the board to compress the insulation. Walk to the side where you intend on beginning the cut. Place your knee down on the part of the board right over the edge of the insulation. Then, bend forward so you’re able to reach the opposite edge. Place your free hand on the part of the board over that edge of the insulation to compress it. Make sure the insulation is flat, as compressed as you can make it. It’s much easier to slice through this way, and the cut will be much more accurate, too.
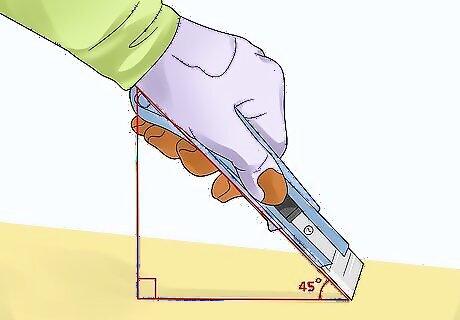
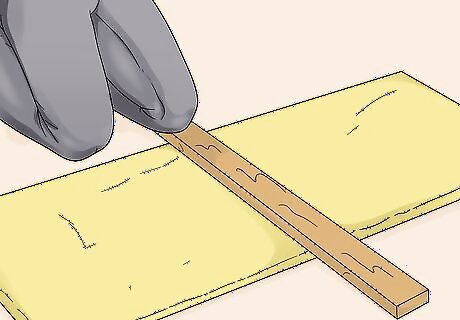
Hold the knife at about a 45-degree angle over the cut mark. Start at the edge opposite from where you’re kneeling. Position the utility knife right next to the board you’re kneeling on. While you’re bent over the insulation, press down on the opposite end of the board with your free hand. You can use the board to brace the knife so it cuts straight down the sheet of insulation. Make sure the board is stable over the insulation sheet and that you have enough room to move the knife toward you.

Pull the blade towards you along the cut line. Use the board as a guide for the cut you’re making. As long as you keep it pinned against the insulation with the knife firmly against its edge, you can easily make the cut. Hold the knife steady and drag it towards the cut mark by your knee. Do it in a single stroke, then go back and clean up any spots where it didn’t cut all the way through. As long as the knife is sharp, it will glide through the insulation very smoothly. If you’re having trouble cutting it, you may need a sharper knife.
Cutting with a Carving Knife
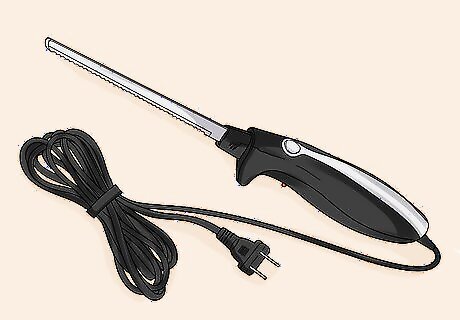
Select a 7 in (18 cm) carving knife with a long cord. Pick a clean, sharp knife and plug it into the nearest electrical outlet. To use it, you will have to place the insulation close to an electrical outlet. After plugging in the knife, turn it on for a moment to check that the blades are working. Electric carving knives have a pair of serrated blades that are constantly moving, making them really great for cutting soft material like insulation. It’s much faster than using other tools. If you don’t have a carving knife, you can always buy a new one, but also, search for used ones at local second-hand stores. Serrated insulation-cutting blades work too, but you will have to move them back and forth like a saw to cut through the insulation.
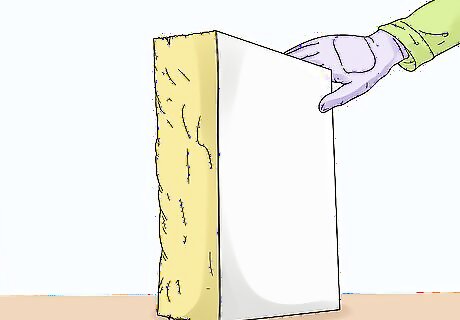
Stand the insulation up so you can access the spot you plan on cutting. When using a carving knife, it is important to give yourself plenty of space. Arrange the sheet so you’re able to hold the knife against its edge. Lightly grip the opposite edge to keep the sheet upright. Make sure you leave plenty of room between your hand and the knife. Be careful not to compress the fiberglass. While you can still slice through compressed insulation, it can make the cut less accurate than usual. Keep the plywood underneath the insulation so the blade doesn’t catch on the surface underneath it.
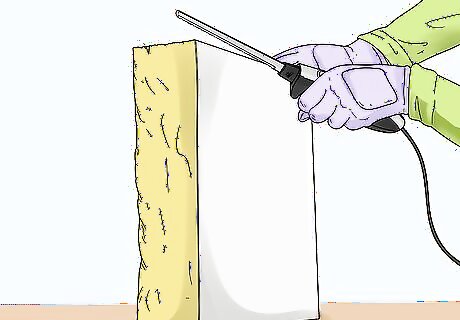
Position the knife so it’s perpendicular to the insulation. Rest the knife against one side of the insulation. Hold the blade straight. If you’re cutting across the insulation’s length, hold it flat with the serrated edge against the left or right side of the sheet. If you’re cutting across its width, hold it parallel to the floor along the top edge of the sheet. Give yourself plenty of room to move the blade down through the insulation, or across it if you’re cutting it lengthwise.
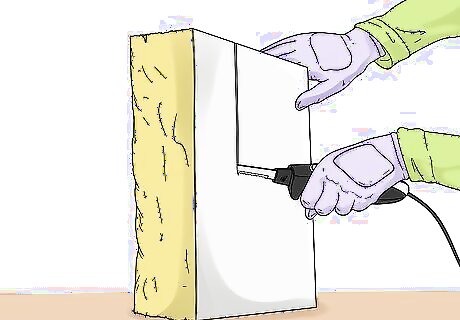
Hold the blade steady as it cuts through the insulation. After turning the knife back on, press it against the insulation. Make sure the middle part of its blades are centered over the insulation. You don’t actually have to move a carving knife very much. The blades will move back and forth on their own, like a saw. As it cuts through the initial surface, you can begin moving it forward. Hold onto the edge of the insulation to steady it, but make sure you don’t compress it at all. Keep a firm grip on the knife’s handle. As long as you maintain control of it and are using sharp blades, it will slice right through insulation.
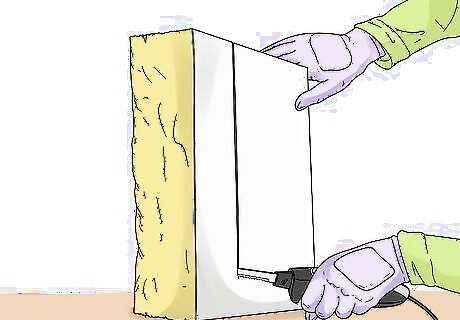
Move the blade through the insulation at a steady pace. As the blade cuts into fiberglass, begin moving it towards the mark you made on the opposite edge. Use the handle to push it at a moderate pace. Hold the carving knife steady while you do this. The serrated blades will saw through the insulation as long as you keep them centered on the insulation. Make sure your hands are out of the blade’s path, especially when it comes near the edge of the insulation. Focus on controlling the knife and keeping it steady until then. If the knife isn’t cutting through the insulation cleanly, slow down. Your blades may also be too dull.
Trimming with Shears

Select a sharp pair of heavy-duty metal shears to cut insulation. Technically, just about any pair of scissors or shears can cut through fiberglass insulation as long as the blades are sharp enough. However, heavy-duty shears made with thick, serrated, stainless steel blades work best. The handles usually are big enough for you to use while wearing a glove, as well. If you have a pair of heavy-duty tailor scissors, for instance, you can use them to cut insulation. Keep in mind that they may be a little duller next time you use them for another purpose. Heavy-duty scissors are available online and at most hardware stores.
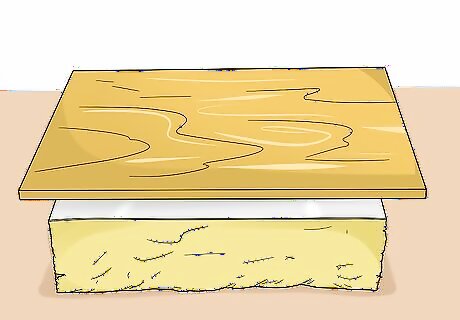
Place a wood board on top of the insulation to compress it. Position the board right next to the spot you wish to cut. Then, kneel down on the board near the edge of the fiberglass. Bend forward so you’re able to place your hand on the opposite end of the board. Doing this will press the insulation flat so it’s easier to cut. If your shears open wide enough, you may be able to cut the insulation without compressing it. However, make sure you cut in a straight line so the sheet maintains its shape.
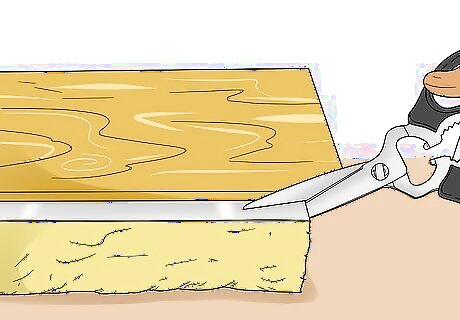
Position the shears around the edge of the fiberglass. Open the shears wide near the mark you made when measuring earlier. Tuck one of the scissor blades underneath it. You may need to lift the insulation up a little. Close the other half of the blade down on the insulation while keeping the shears pressed up against the wood board. For the most accurate cut possible, keep the fiberglass insulation compressed the entire time.

Use the wood board to cut across the insulation. Just keep the scissors close to the board while you cut through the insulation. After the initial cut, you most likely won’t have any trouble finishing. Take your time and make sure the shears are going all the way through the insulation. If the shears get stuck, go back and lift up the cut insulation to reposition the blades.


Comments
0 comment