

X
Research source
Taking the Filter Out of the Filtration System
Remove the filter when the pressure is 7-10 lbs above normal. The operation pressure of your filtration system will increase when the filters are dirty because the pumps are having a harder time pushing water through the filters. This higher pressure on your gauges is a great indicator of when its time to clean the filters. There are cases when the pressure won’t increase even though the filter is dirty, such as if there is a hole in the filter that water can easily flow through. However, in most cases, high pressure is a good sign that your filter needs cleaning. Unless your pool gets very dirty, very often, this should only occur once or twice a year.
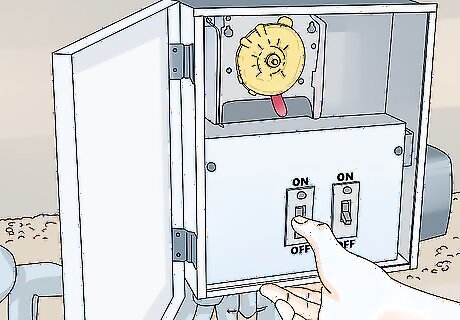
Turn off the pool pump and water supply to the system. Locate the main electrical breaker for the pool filter system and turn it to the off position. Then locate the water supply disconnect and turn it to the off position as well. Turning these off before you remove your filter will ensure that water will drain from the filter compartment and that there will be no risk of shock while you are cleaning out your filter.
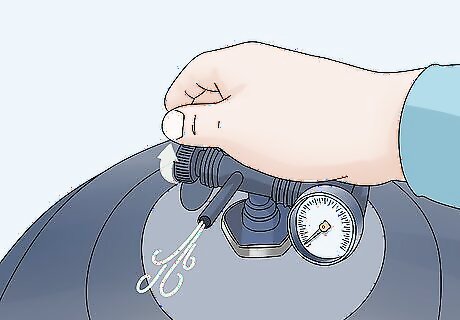
Release the air relief valve to depressurize the filter system. Once the water is turned off, you can release the system pressure by turning the pressure valve. The valve is usually located on top of the filter compartment or near to it. Releasing this valve will allow the water to drain from the filter compartment before you take the lid off. You will know that you have successfully released the valve when you hear pressurized air coming out of it. In most cases, you will turn the valve counterclockwise until it won’t move any more to release the pressure in the system.

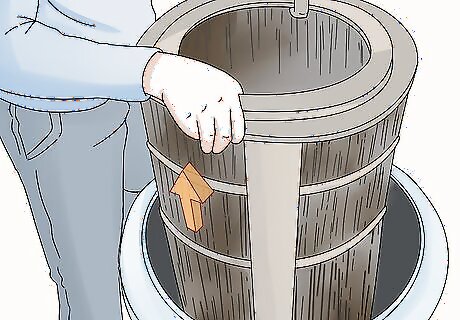
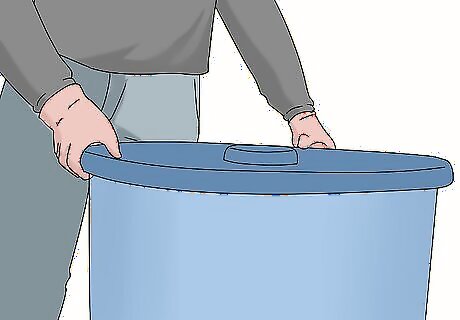
Open up the filter compartment and pull the filter out. The top of the filter compartment is usually held on with a clamp. Use a wrench or pliers to open up the clamp handle, which will allow the top of the compartment to be removed. Once the top is off, you can grab the filter and pull it straight up and out. There are a variety of types of clamps that may be used on your filtration system. Follow the instructions that came with the system to properly detach the lid of the filter compartment if it is unclear to you.Warning: Between the top and bottom sections of the filter compartment will be a seal gasket. Be careful not to damage the gasket when taking off the top. The gasket is very important for keeping the filter compartment airtight and watertight.
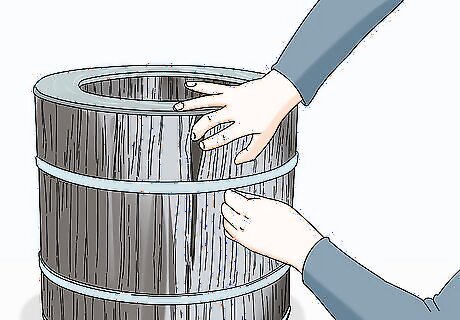
Inspect the filter for damage. Once the filter is out of the filtration system, look over the entire filter for holes and tears. Even small rips can let water flow through without removing dirt and debris. If the filter is damaged, it should be thrown away and replaced, instead of cleaned. It’s best to inspect the filter right away after removing it so that you don’t waste time cleaning a filter that should just be thrown away.
Removing Large Debris with Water
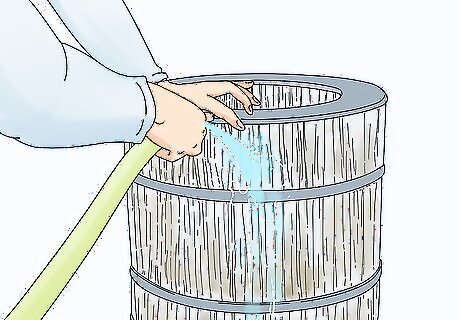
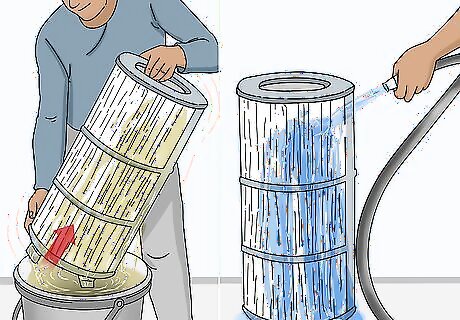
Spray any debris from the filter with a garden hose. Set your hose to a gentle spray and wash off any large debris that you can see on it. Spray the filter right away before it dries after you have removed it from the system. When spraying down the filter, be sure to get in between the pleats on the filter. This is where a lot of large debris can collect. Drying will allow the collected debris to set into the filter media, making it more difficult to remove later.
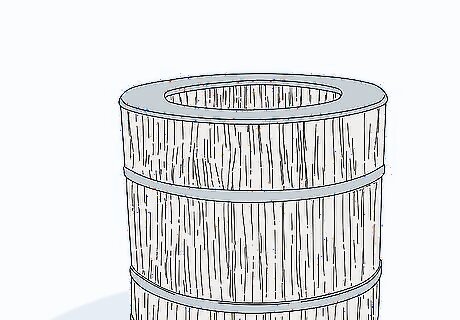
Allow the filter to dry out completely. Once you no longer see any debris on the filter, lay it out to dry. Put it in a sunny spot and let it sit until it’s totally dry. The amount of time it takes for the filter to dry completely will vary. It could take an hour or two in hot weather or several days if the weather is cool or humid. Preferably put the filter in bright sunshine, which will be most effective at killing algae and bacteria that is in it.

Shake the filter or use an air compressor to remove loose particles. Hold the filter with one hand and clean the surface with your other hand. This can be done by tapping the filter on the ground, brushing it with a stiff brush, or using compressed air to blow debris out of the creases of the filter. Even simply tapping or brushing the filter after it has dried in the sun will reduce the amount of organic contaminants that need to be broken down in the chemical soak.Warning: The organic matter captured by the filter can be irritating, so avoid breathing and exposure to the dust when removing it either with a brush or by blowing out with compressed air.
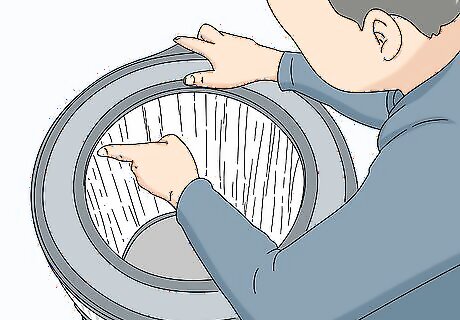
Look for additional debris that needs to be removed from the filter. If spraying down the filter and using air or shaking to get rid of debris doesn't get the filter totally clean, you may need to use additional cleaning methods. However, if the filter is visually very clean at this point, it can be put back in the filtration system. If the filter looks oily, which can occur due to the use of sunscreen, then a chemical cleaner should be used. If there are mineral deposits on the filter, which can appear as dusty, white areas, then an acid bath should be used to dissolve them.
Cleaning the Filter with Cleaning Solution
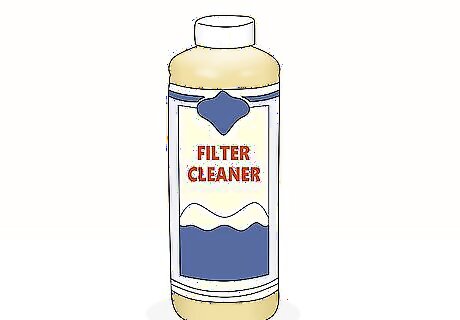
Purchase filter cleaning chemicals to get rid of oils on the filter. Oils, such as sunscreen and perspiration, will create a visible glossy or shiny coating on the filter that can't be removed simply by spraying it off with water. To get rid of them, the filter needs to be soaked in a special cleaning solution. This cleaning solution can be purchased at a pool supply store or from online retailers. In most cases, the chemicals that get on your filter come from the people’s skin. Either perspiration or sunscreen and other skin products will be deposited on the pool filter if they are washed off the skin.
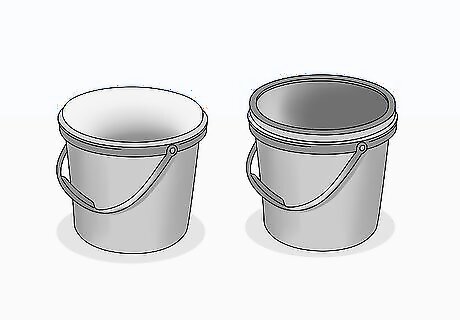
Get 2 plastic containers, one of which should have a tight-fitting lid. You will need one with a lid to soak your filters in chemicals. The other will be used to rinse the filter. Typically, people use a large plastic bucket or garbage can. The container simply needs to be tall enough to submerge the entire filter. The containers you need vary on the exact type of cartridge filter you have. For example, a 5-gallon (18.9-liter) plastic paint bucket will hold about five type C cartridge filters that are used for small pools. However, larger style filters that are taller will need to be soaked in a plastic garbage can.

Combine the cleaning chemicals and water in the lidded container. The exact ratios will vary depending on the cleaner that you purchased, so check the instructions on your cleaner. However, most are mixed at about 1 part filter cleaner to 5 or 6 parts water. Only fill the container about halfway, so that the liquid doesn’t overflow once the filters are put into it.

Submerge the filters in this solution. Once they are in, place the lid on the container. Let the filter soak for as long as the directions on the cleaning product say to soak them. Typically, it will be at least several days. You need to allow the filters to soak to dissolve any oils and kill any microorganisms that are trapped in the filter media, and to break down any organic contaminants. One day is a good start, but 3 to 5 days will provide better results.Warning: The cleaning solution you soak the filter in is very strong. Do not splash on clothes, and keep the bucket sealed tightly and out of reach of children.
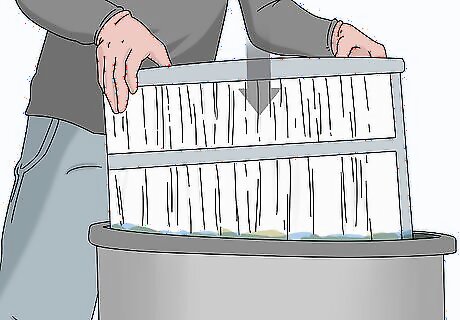
Remove the filter and rinse it in a bucket of clean water. Agitate the filter by holding it at one end, and dunking it briskly in and out of the rinse water. You should see a cloud of rinsed contaminants coming from the filter. Once clean, hang or place the filters in bright sunlight and allow them to dry thoroughly. Any more dirt that is trapped on the surface of the filter should be brushed off, using a stiff-bristled paint or parts cleaning brush, or the filters will need to be cleaned in acid to get rid of minerals.

Store the bucket of cleaner for later use. Seal the bucket you soak the filters in when not in use so you won't have to add additional chemicals each time you clean filters. Some sediment will accumulate in the bottom of this bucket, but it doesn't affect the usability of the solution.
Using Acid to Dissolve Minerals Embedded in the Filter

Put on personal protective equipment before using muriatic acid. The acid you use to clean the filter can be dangerous, especially before it is diluted. If you don't use proper protective equipment it can burn your skin and the fumes can damage your lungs. Before using it, put on gloves that are made for dealing with chemicals. Also put on a respirator and eye protection, so that if the acid splashes it won't get in your eyes. Muriatic acid is similar to hydrochloric acid. It can dissolve many plastics and metals, as well as skin.
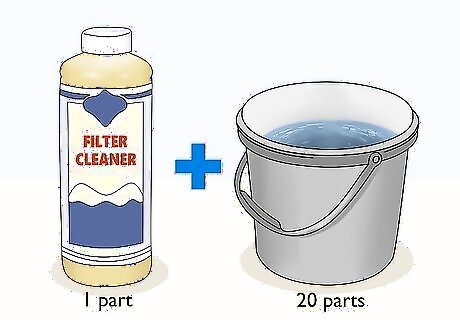
Mix a solution of muriatic acid and water. This mixture is used to dissolve minerals that accumulate in the filter media. Use another clean bucket with a lid that seals tightly. Add about 2/3 of a bucket of clean water, then carefully pour in enough muriatic acid to give you a 1 part acid to 20 parts water solution. In a typical 5 gallon bucket, this means about 4.75 gallons of water to 1 quarts acid. Using a 5% muriatic acid solution to remove calcium deposited in the filter media will increase the filter's performance if high concentrations of minerals exist in your pool water. Too many minerals in the filter reduces the rate that water can pass through the filter. This makes the filtration system work harder than it should have to.
Soak the filters in the acid solution until it quits bubbling. The bubbles are an indication the acid is reacting with the mineral deposits, and when the bubbling has quit, the minerals should be dissolved. This usually takes about 10 minutes.

Spray the acid-cleaned filters with a hose. Use plenty of fresh water to remove all of the minerals that have been loosened by the acid. Once they are clean, allow them to dry before putting them back in your filtration system. Shake any remaining collected dirt from the pleats, and they are ready either to proceed to chlorine soaking, or if this step has followed the chlorine soaking, they are ready for reuse in your pool.
Seal the acid container when you are finished with it. If you keep your container sealed tightly, the acid will not weaken. This means it may be reused repeatedly for filter cleanings. Store the container in an out of the way place where there is no chance of it getting knocked over or opened by a child. . Allowing the containers to remain open will allow the water to evaporate out of your solution, rendering it overly strong in a short time. You should vacuum the pool once a week to keep it in good shape. Vacuuming helps to maintain the color of the pool water. Otherwise, it may become Tahoe blue or gray. It is an affordable method because most vacuums cost less than $200.


Comments
0 comment