views
Downloading Blender
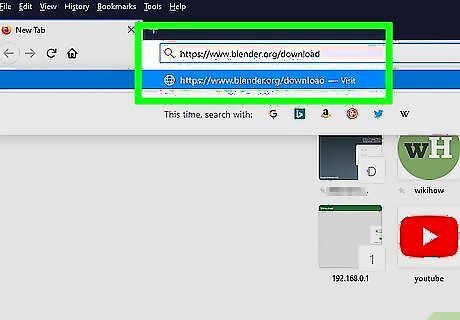
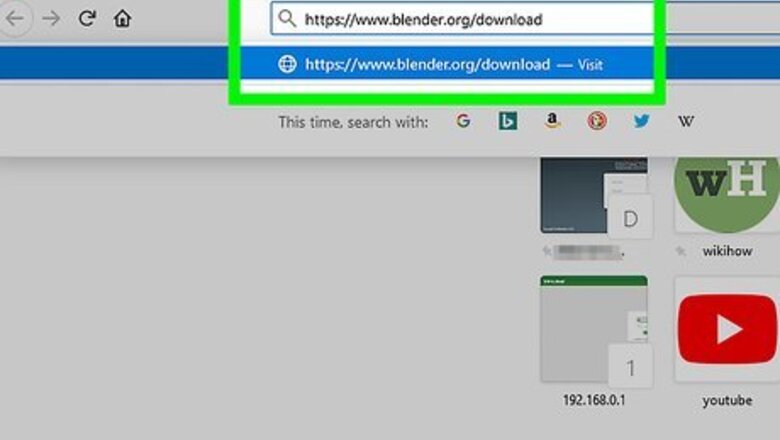
Go to https://www.blender.org/download in a web browser. This is the download page for Blender 3D, an advanced 3D animation suite that is completely free to download and is available for all operating systems. There are other 3D animation suites available, such as 3DS Max and Maya, but these programs can cost thousands of dollars to purchase.
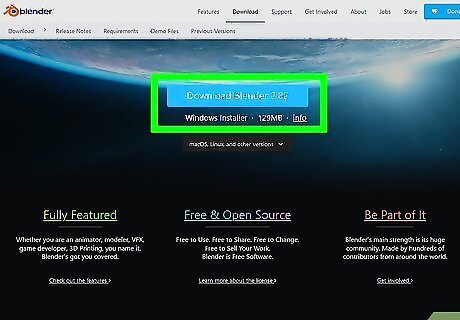
Click Download Blender 2.81a and double-click the Blender install file. It's the blue button in the center of the page. This downloads the Windows install file for the latest version of Blender 3D. Then, double-click this file—you can open downloaded files in your web browser, or in your Downloads folder. Follow the instructions to complete the installation of Blender 3D. If you are using another operating system besides Windows, click the drop-down menu below the blue button in the menu, then select your operating system.
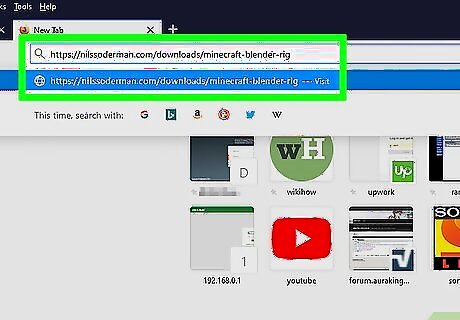
Go to https://nilssoderman.com/downloads/minecraft-blender-rig/ in a web browser. This page contains free downloads of Minecraft Blender files. The download contains Minecraft structures, blocks, and rigs for all the mobs and a Minecraft character.
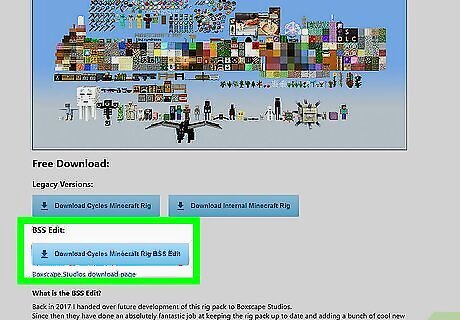
Click Download Cycles Minecraft Rig BSS Edit. It's the third download link on the page. This downloads a ZIP file containing the latest version of the files and rigs.
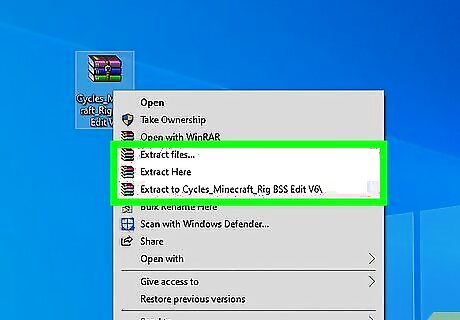
Extract the ZIP file. if you're using Windows, right-click the downloaded file and select Extract All, then extract the files to a location you'll remember. If you have a Mac, just double-click the ZIP file to unzip the files to a folder with the same name.
Starting a New Scene
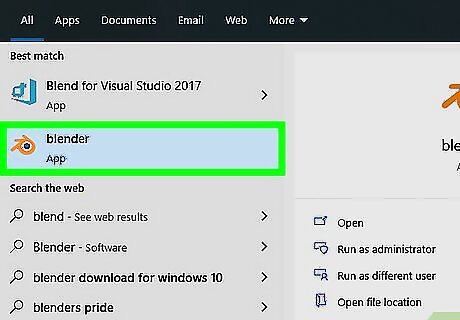
Open Blender 3D. Blender 3D has an icon with an orange and white circle with a blue dot in the middle, and lines to the left side. You'll find it in the Windows Start menu or your Mac's Applications folder. When Blender 3D opens, a new scene containing a cube, camera, and light is generated as a new scene.
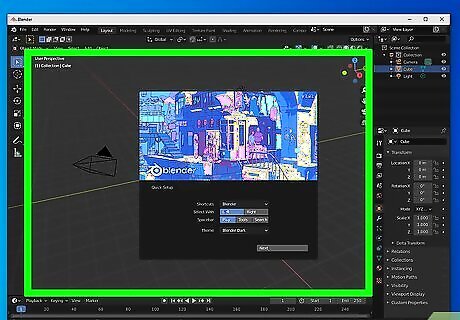
Navigate the 3D view space in Blender 3D. It can be hard to figure out what to do when you first open Blender. Use the following steps to get acquainted: Roll the mouse wheel to zoom in and out. Press and hold the mouse wheel and move the mouse to rotate around the 3D cursor in Blender 3D. Press and hold Shift and the mouse wheel to pan from side to side. Press 7 on the number pad to view from above. Press 1 on the number pad to view from the front. Press 3 on the number pad to view from the side. Press 5 on the number pad to switch to an orthoscopic (flat) view. Press 0 on the number pad to switch to the camera view.
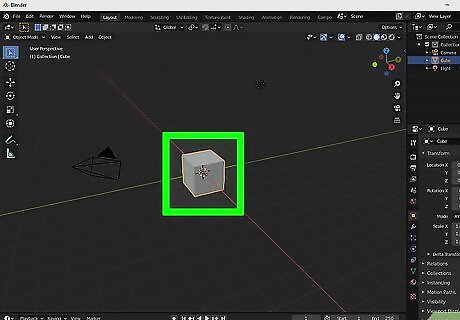
Click an object to select it. A selected object will be highlighted in orange. You can select 3D meshes, lights, cameras, and more. To select multiple objects, hold ⇧ Shift and click each object, or click and drag a square over all the objects you want to select. If clicking an object does not select it, make sure you have the select tool selected. It's the icon with a mouse cursor inside a box in the upper-left corner of the 3D view. Also, make sure you have "Object Mode" selected in the menu in the upper-left corner of the 3D view.
Use your keyboard to delete, move, rotate, resize objects, and do other tasks. The shortcuts are as follows: Press Delete to remove a selected object. The permanently removes the object from our scene. Press G to grab and move an object. Once the object is grabbed, use the mouse to move it, and then click the desired location to set it down. Press R to rotate an object. Click an object to select it, then press R and drag the mouse to rotate it. When you're done rotating, click the mouse. Press S to scale and resize a selected object. After pressing S, drag the mouse to change the object size, then click to set the size. Press ⇧ Shift+D to duplicate a selected object. Once selected, drag the mouse to move the object copy away from the original, then click to place the object copy. Press Ctrl+Z to undo a mistake.
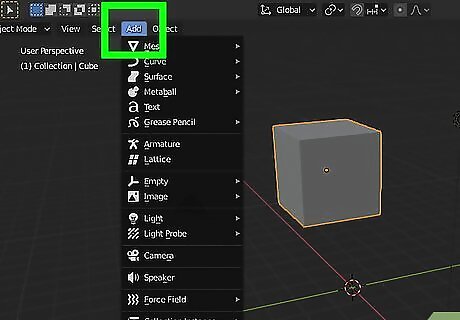
Add new objects to the scene. Objects you are most likely to add to a scene include meshes, lights, and cameras. You can also try other Blender tutorials to learn how to edit objects in Blender 3D. Use the following steps to add an object to a scene: Click Add in the upper-right corner. Select an object category. Click the object you want to add.
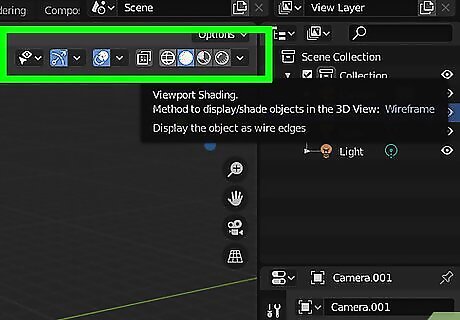
Switch shading modes. There are four different shading modes you can use in Blender 3D. Click the circle icons in the upper-right corner of the 3D view to switch to different shading modes: The icon that resembles a wireframe globe displays objects as wireframes with no shading or textures. This mode is easiest on your processor. The icon that looks like a solid white circle displays objects as solid white objects with no textures. The icon that looks like a pie chart displays objects with textures and colors, but no lighting effects. The icon that looks like a 3D sphere enabled rendered mode, which displays a rough image of what objects look like when fully rendered with textures and lighting effects. This mode uses the most processing power.
Importing and Posing Rigs
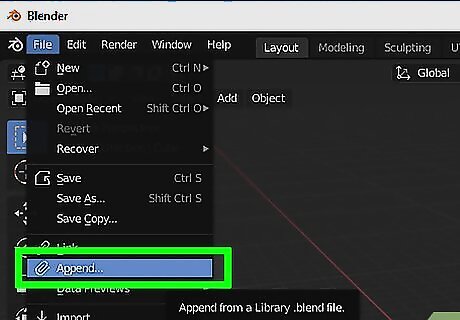
Click the File and select Append. The File menu is at the top-left corner. A file browser will expand.
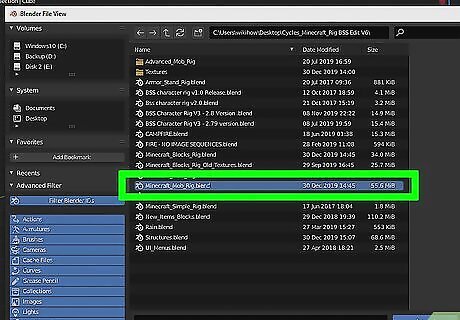
Double-click a Blender file. Blender files have a .blend file extension at the end. This displays numerous folders for the Blender file.The Minecraft BSS edit ZIP file contained numerous Minecraft related Blender files, including characters, structures, mobs, and items.
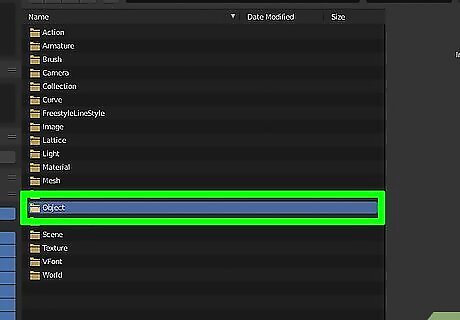
Double-click the Object folder. This displays all objects in the Blender file.
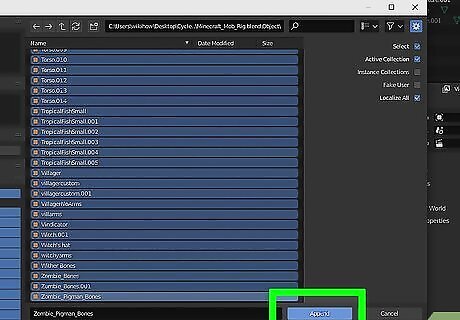
Select all objects and click Append. To select all objects, click the first object in the list and then scroll down to the bottom of the list. Hold the ⇧ Shift key and click the last object to select everything. Clicking Append imports the selected objects into your scene.
Press H to hide objects in your scene. Many objects have lots of boxes and planes that serve a function but don't need to be visible in a scene. To hide objects you don't want to appear, click to select them and then press "H" to hide them. To unhide an object, click the eyeball icon next to the object name in the "View Layer" panel in the upper-right corner. Warning: You'll notice wireframes above character rigs that resemble a control panel, as well as around moveable parts of the rig. Do not hide these. You will need them to animate the rig.
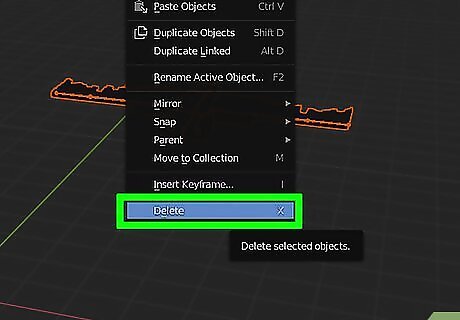
Delete objects you don't want. Many of the blender files contain multiple objects. For example, the mobs Blender file has a rig for every Minecraft mob. You probably don't want to use every single mob in your animation. You can delete rigs you don't want by selecting them and pressing the Del key. Just be careful not to delete any part of a rig you do want to use.
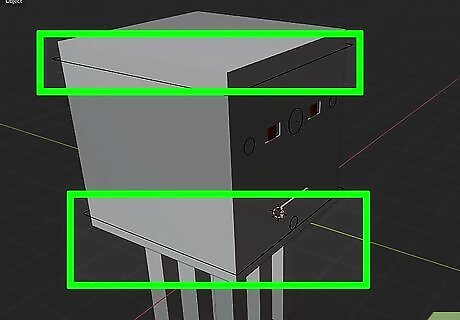
Click the armature controls of a rig. You'll notice black wires around the joints of character models, at the base of the model, and as control panels above the character model. Click this wireframe to select it. The entire wireframe should turn orange. In 3D animation, armatures go inside a character model and act as bones and joints. They keep all the parts of the character attached and allow you to move parts of the model.
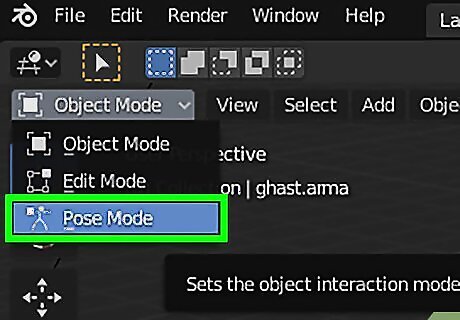
Switch to Pose mode. Object mode is the default mode in Blender 3D. Once you select the armature control rig, click the drop-down menu that says "Object Mode" in the upper-left corner of the 3D view, then select Pose Mode to switch. If Pose Mode is not available in the drop-down menu, you do not have a valid armature rig selected.
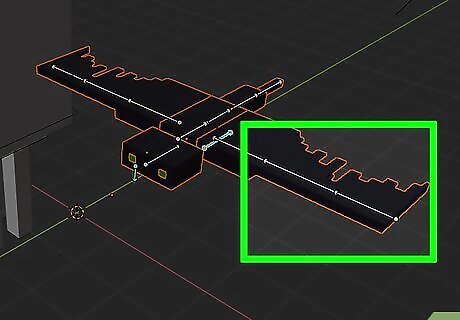
Click a moveable part of the rig. The black lines around the model are generally moveable parts of the right. Click one of the moveable parts. It should turn blue.
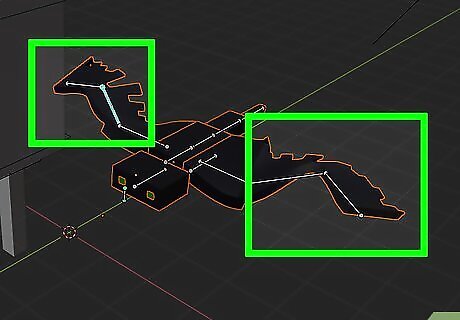
Press G to grab and move the part. To move a part of a character model in Pose mode, click the black line around a joint on the model, or one of the sliders in the control panel above the rig, and then press G to grab the part. Drag the mouse to move it. These Minecraft rigs have many unique animations already programmed in. You can access these animations using the control panel above the rig in Pose mode. Experiment and see what kind of poses you can get from the rigs.
Completing and Rendering the Animation
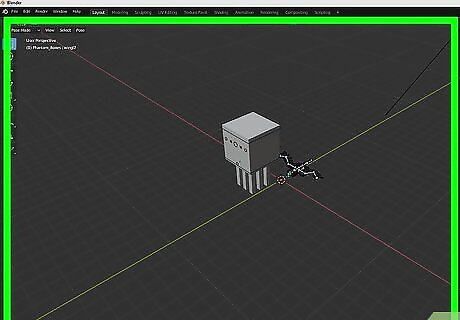
Place all objects in your animation. Make sure you have all objects you want to include in your animation imported into your scene. Place them where you want them to be at the start of your animation. Make sure you have the camera aiming at your scene.
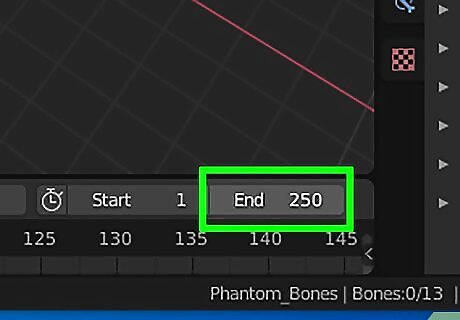
Enter how many frames you want to include in your animation in the timeline. The timeline is the panel at the bottom of the Blender 3D. By default, it starts at Frame 1 and ends at Frame 250, which produces about 8 seconds of animation at 30 frames per second. If you want more frames, click End 250 in the upper-right corner of the timeline panel and enter how a different number.
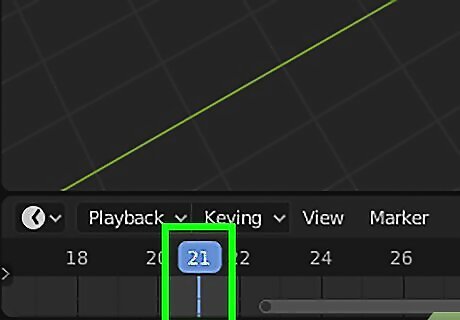
Place the playhead at the start of your animation. The playhead is the blue line in the timeline panel. This represents which frame you are currently on. Place the playhead at Frame 1 at the start.
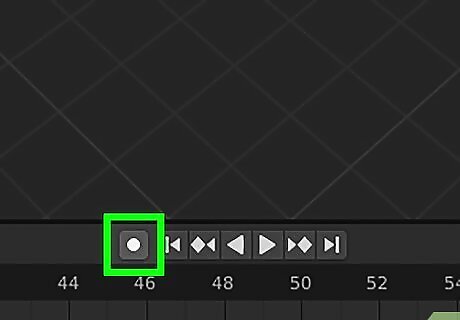
Click the record icon to turn on auto keyframing. It's the icon with the circle above the timeline panel at the bottom of Blender.
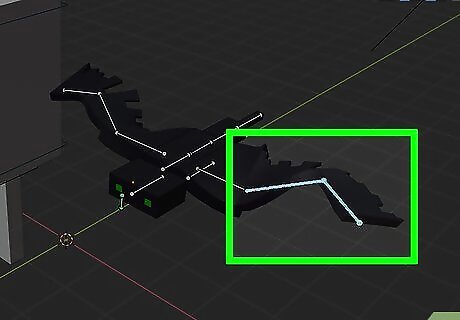
Grab and place an object you want to animate. Select the object you want to animate, press G to grab it, and then click immediately to place it exactly where it is. This records a starting keyframe at frame 1. In animation, keyframes record changes in the motion of an object. You'll need to switch to Pose Mode to animate parts of a rig.
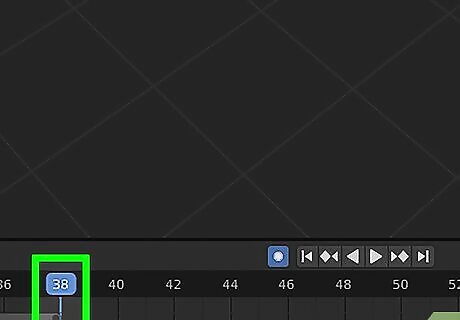
Move the playhead to where you want the object motion to stop or change. Most video is done at about 30 frames per second. This gives you an idea of how much time has passed between frames.
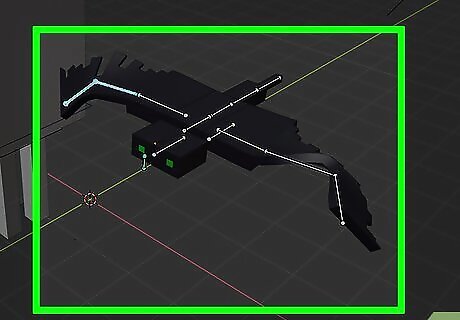
Move the object to where you want the object to be at the second keyframe. This records a second keyframe in the timeline. Blender will automatically calculate the position of the object for each frame in between keyframes. Continue adding as many keyframes as you need for the entire animation. You can also right-click the keyframe in the timeline and click Copy. Move the playhead to where you want the keyframe to repeat, right-click the playhead and click Paste. This is useful for repeating animations, such as a walk cycle. You can animate multiple objects in a scene at the same time in a scene. Each object has its own independent timeline with unique keyframes.
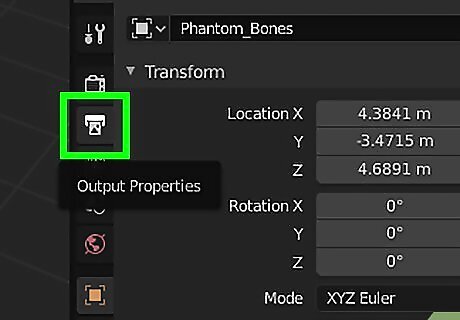
Click the printer icon. It's in the sidebar to the right. This is the Properties Output icon.
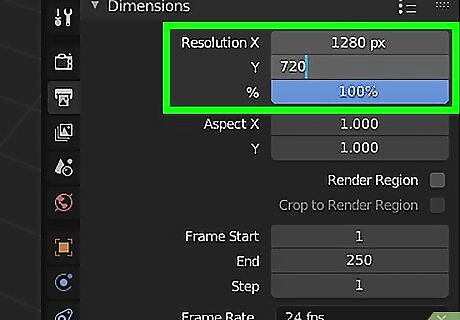
Enter the resolution of your video. This goes next to "X" and "Y" at the top of the Properties Output Window. By default, the video output is standard HD (1900 x 1080). If you want a higher (4K 3840 x 2160) or lower (1280 x 720), you can enter the resolution next in this panel. The higher the resolution, the longer it will take to render. If you don't see this option in the Properties Output menu, click Dimensions at the top of the panel.
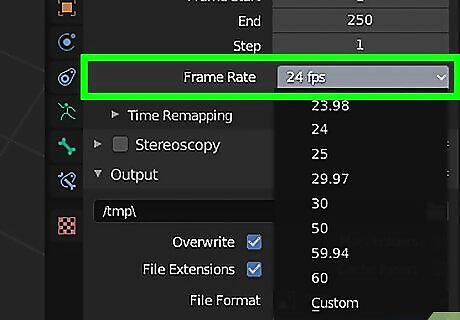
Select a frame rate. Use the menu next to "Frame Rate" to select the frames per second. 30 FPS is standard for film, while 29.97 FPS is standard for YouTube. You can select a number of options between 23.97 FPS, up to 60 FPS. You can also enter a custom FPS.
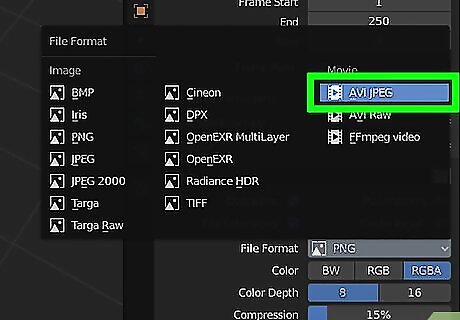
Select a format from the "File Format" menu. The menu is below "Output". Select AVI JPEG to render video in AVI format with each frame compressed using JPEG compression. AVI RAW will render a video in AVI format with no compression. This produces large video sizes. You can also select an image format, such as JPEG or PNG and render each frame as a separate image so you can add frames a sequence in a video editor like Adobe Premiere Pro. This prevents you from losing all the frames you've rendered if something goes wrong during the render process.
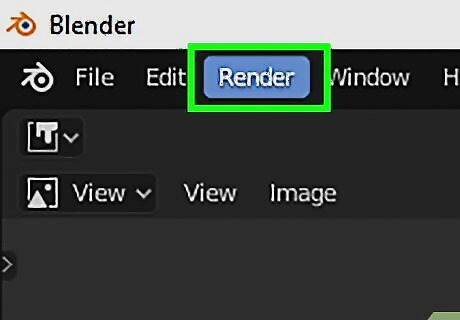
Click Render. It's in the menu bar in the upper-left corner of Blender 3D.
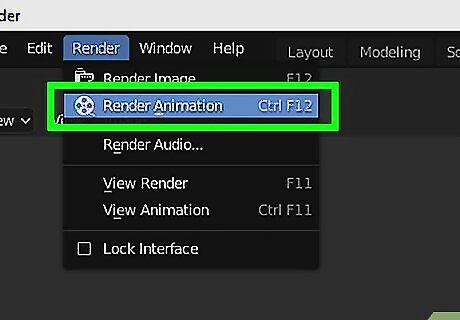
Click Render Animation. It's the second option in the Render menu. This begins the process of rendering each frame of the animation. Be patient. It can take hours or even days to render a video animation. You can view the progress in the Render window as it works.









Comments
0 comment