
views
- When creating an Invert or Black & White layer, the original image will be unmodified.
- To apply an Invert layer, click "Layer", "New Adjustment Layer", and "Invert".
- To apply a Black & White filter, click "Layer", "New Adjustment Layer", and "Black & White".
Inverting an Image

Open a project in Photoshop. This can be a new or existing project. Make sure to import the image you want to invert.
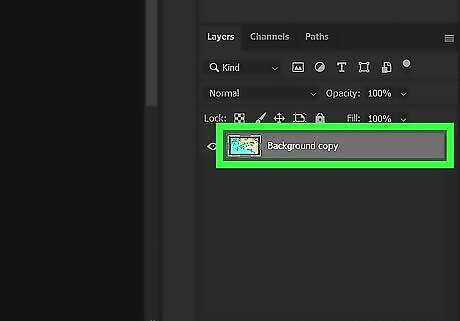
In the Layers Panel, select the image.
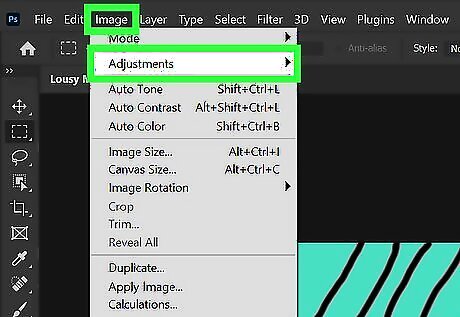
In the top toolbar, click Image, then Adjustments. This will open a drop-down menu.
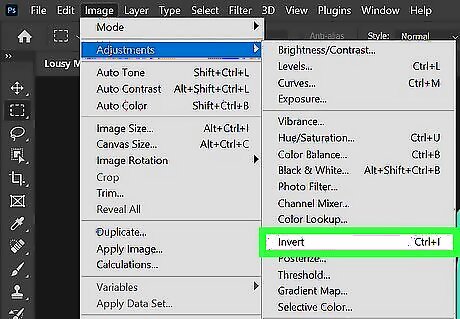
Click Invert. This will invert your image. Alternatively, you can press CTRL + I on your keyboard.
Adding an Invert Layer

Open a project in Photoshop. This can be a new or existing project. If you are starting with a new project, be sure to import the images you want to invert. Make sure your image layer is selected.
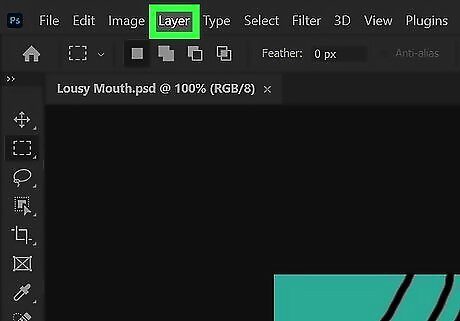
In the top toolbar, click Layer. This will open a drop-down menu.
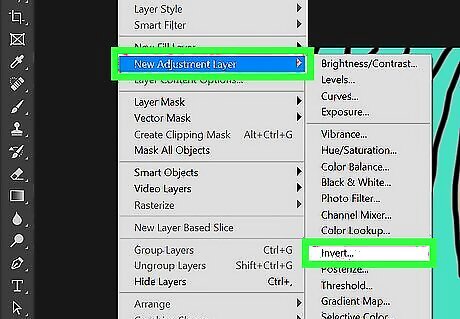
Hover over New Adjustment Layer and click Invert. This will create an Invert layer. Alternatively, you can click the Layers Panel and choose Invert from the drop-down menu. If you want to invert the colors in a specific section of the image, use the selection tools such as the Marquee Tool or Magic Wand Selection Tool to mark out the part that you wish to invert. If you want to invert the colors across the entire image, you don't need an active selection.
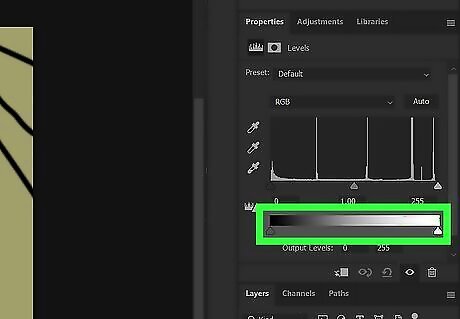
Adjust your Invert levels. Go to Layer → New Adjustment Layer → Levels. Move the sliders back and forth to add dimension. If desired, you can add a Brightness/Contrast layer to make the image high or low contrast. Click Layer → New Adjustment Layer → Brightness/Contrast. After adjusting, click OK.
Adding a Black and White Filter

Open a project in Photoshop. This can be a new or existing project. Be sure to import the image you want to make black and white. You can open or place the image. Make sure your image layer is selected.

In the top toolbar, click Layer. This will open a drop-down menu.
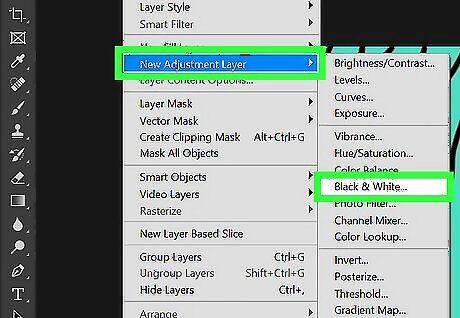
Hover over New Adjustment Layer and click Black & White. This will create a black and white filter. Alternatively, you can click Window → Adjustments. The Adjustments panel will open. Click the Black & White icon resembling two grey squares.
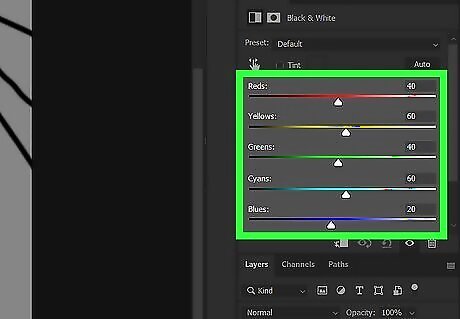
Adjust the Black & White properties. Photoshop applies a default grayscale setting to your image. To select a preset, click Preset and select from the drop-down menu. To apply a color tone, check the Tint box. Open the Color Picker and select a color for your tint. To adjust the grey tones of specific colors, drag the Color sliders to darken and lighten the tones. This is similar to adjusting hues.





Comments
0 comment