
Understanding Blend If
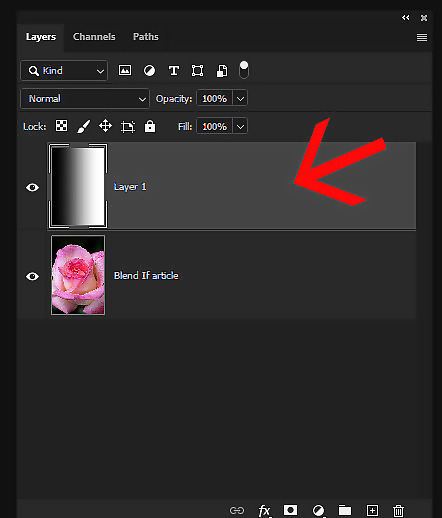
Open Photoshop with your image layer and a blank layer.

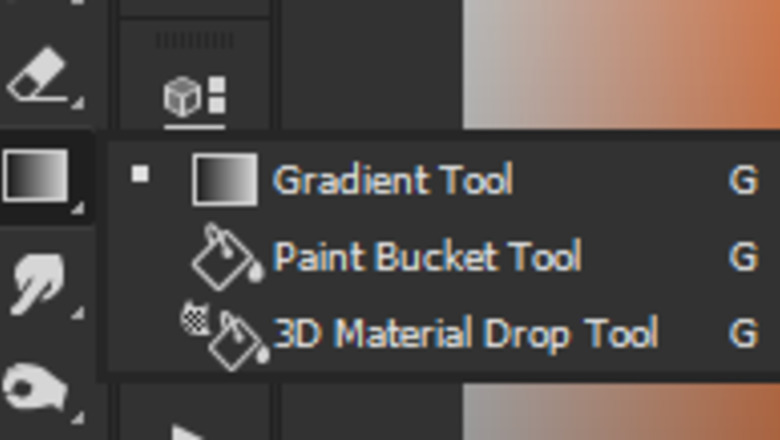
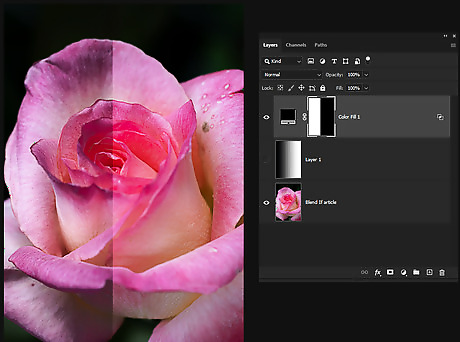
Click on the Gradient Fill tool. Make sure that the selected gradient goes from Black to White. Gradient tool photoshop cc.png
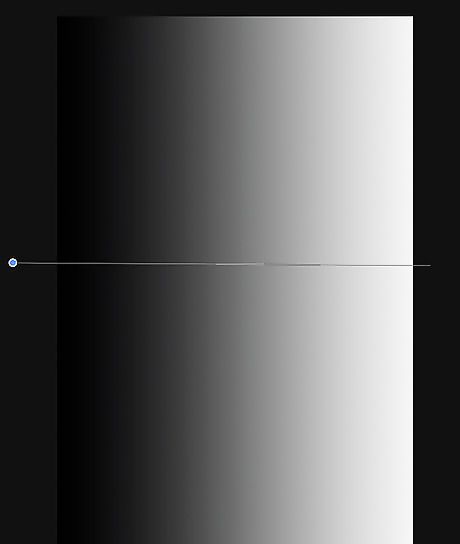
Click on the left side of the blank layer and draw a line that comes up across the image. Use ⇧ Shift if you want the gradient to be perfectly straight.
Double click on the top layer; the gradient layer in this case. This will open up the Blending Options.
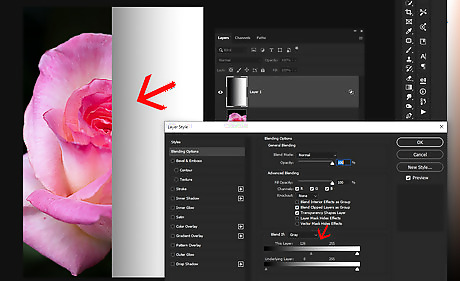
On 'This Layer:', click on the leftmost slider (the black one) and slide it to the left. This slider is eliminating all of the black on that particular layer.
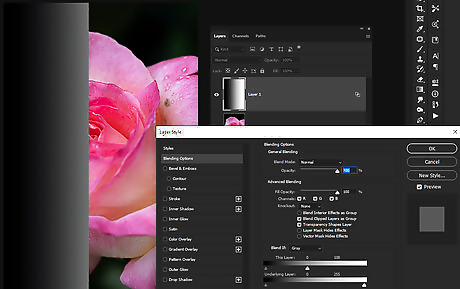
Repeat the process, applying it to the whites this time.
Graduate the effect. Most of the time, you won't want a hard line splitting where the effect is and it isn't. To avoid this, click on Alt and click on one side of the slider. This will 'break' it in half and your effect will be more gradual. The further apart the two pieces are, the more gradual the change is. Keep in mind that this is a gradient layer and is a more black and white example of how this works. When working with adjustment layers, this will be less obvious.
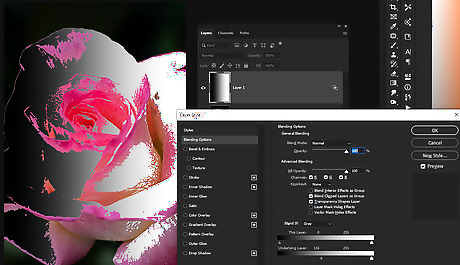
Repeat the process, but do it with the 'Underlying Layer:'.
Using Blend If to Apply Adjustments
Open your image with the adjustment layer that you want to apply. A Solid Color layer or a Curves adjustment layer is a good place to start.
Make the adjustments that you want to apply. Keep in mind that this adjustment will not be applied to the entire image.
Move the sliders. If you are trying to remove or make the change more gradual in the shadows, move the slider on the left. If you are trying to remove or graduate the effect from the highlights, move the slider on the right.
Split the slider. Once you have it about where you want it, press Alt and split the slider.
Use the mask. If you only want to apply the effect to part of the image and not the entire one, after using the Blend If sliders, use the mask to localize the changes.


Comments
0 comment