views
Installing a Tension Rod
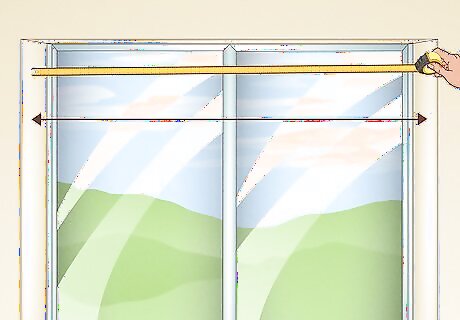
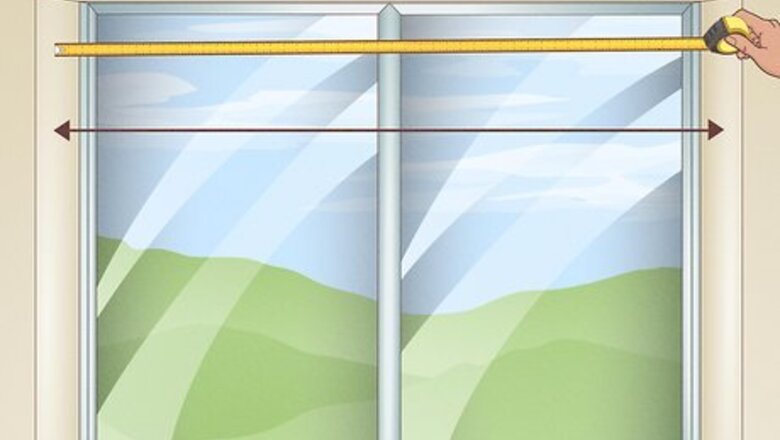
Measure the space between 2 facing surfaces. A tension rod needs to be placed in between 2 hard, flat surfaces that face opposite one another, such as the space between 2 closet walls, 2 cabinets, or in a window frame. Use a measuring tape to measure the distance between these 2 surfaces so that you know what length to get. Even though tension rods are adjustable, they can only expand so much. Be sure to take measurements before purchasing a rod. Be sure the surface can handle the pressure of the rod. If you use tension rods, it exerts force on a surface. That is likely fine for a concrete wall, but maybe not for a painted piece of drywall.
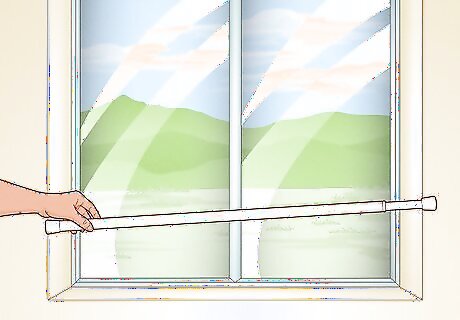
Purchase a rod that's longer than your measurement. Tension rods lose their strength as you expand them. If you were to expand a tension rod to its full length, it won’t be able to hold up very much weight at all. As such, you should buy a rod that's longer than what you need when fully expanded. For example, if you need to fill a 5 ft (1.5 m) space, get a rod that can expand up to 7 feet (2.1 m). Check the weight capacity of your tension rod as well. If you will be hanging heavy items from it, you will need something with a larger weight capacity.
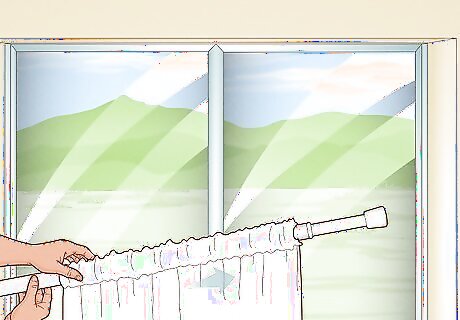
Push the tension rod through a curtain, if desired. If your window is very wide, adding 2 curtain panels might be more convenient. In either case, make sure that the entire curtain is on the rod and that the ends are exposed; you don’t want to trap the ends of the curtain when installing the rod. Alternatively, slide curtain rings onto the rod; you can use the clips that are attached to the rings to hang your curtain later. You don't need to do this step if you won't be adding curtains.
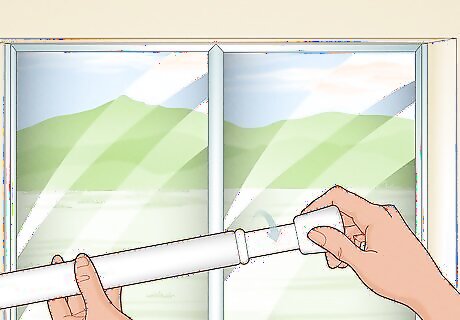
Twist both ends of the tension rod to unlock it. If you take a look at your rod, you'll notice that it is actually made up of 2 rods that are set into one another. Grab hold of the rod to either side of the center seam. Twist the thinner rod clockwise or counterclockwise to unlock it; the direction may vary from brand to brand. Hold onto both ends firmly after you unlock it. Don't let the rod expand wider than the space you need to fill. If you put a curtain on your rod, scrunch the curtain towards the middle so that you have something to grab on to.
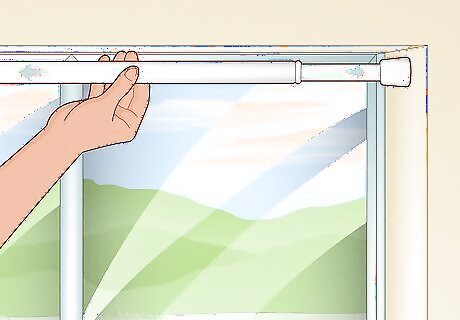
Slide the tension rod between the 2 walls and let it expand. If you need to, push both ends of the rod towards the middle. Slide it into the space between your 2 walls, then loosen your hold on the rod so that it can expand. The spring inside the rod will push the ends away from each other. This tension will cause the rod to become wedged between the 2 walls. If you added curtain rings earlier, now is the time to clip the top of the curtain to the hooks that are attached to the rings.
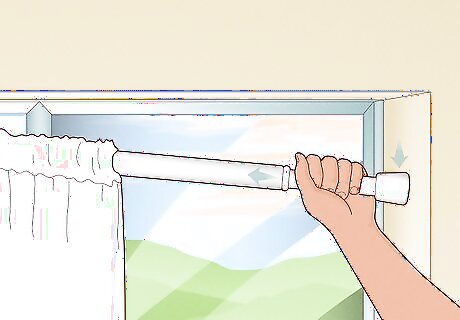
Remove the rod by compressing it. Hold 1 end of the tension rod and pull it down first; this should be enough to loosen it so that you can pull it out. If it doesn't, press both ends of the rod towards the middle to compress it, then pull it down. If the rod is still stuck, ask someone to compress it for you while you pull down on it. To store the rod, compress it all the way, then twist the narrower rod counterclockwise or clockwise to lock it.
Organizing in Your Kitchen
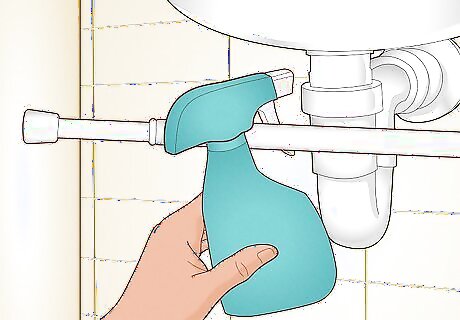
Add a rod under your sink, then hang spray bottles from it. Open the cabinet beneath your kitchen sink. Place a tension rod horizontally inside the cabinet, then hang your cleaning detergents from it. This only works for cleaning detergents that come in a spray bottle. The trigger will act like a hook. Hang the rod high enough so that you have room under the spray bottles for other items. Maximize your storage by adding a small pail, basket, or caddy. Place items like sponges or scrubbies inside.
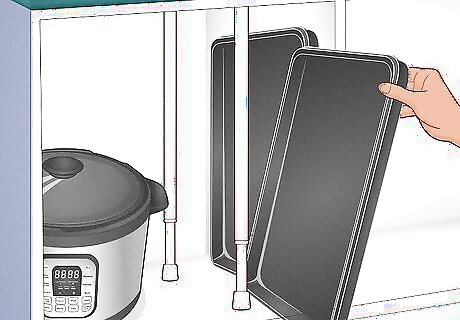
Place rods vertically between 2 shelves to create slots for baking sheets. Stand 2 tension rods vertically between 2 shelves. The first rod should be 1 to 2 inches (2.5 to 5.1 cm) from the edge of the self. The second rod should be 1 to 2 inches (2.5 to 5.1 cm) from the back of the shelf. Repeat this process to create more slots, then slide cutting boards and baking sheets between the slots. How far apart you keep the tension rod pairs is up to you. You need them to be far enough to fit a cutting board or baking sheet. About 3 to 4 inches (7.6 to 10.2 cm) should be plenty.
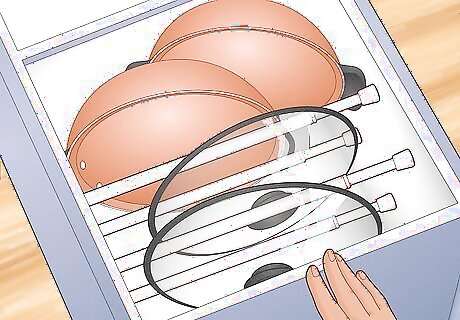
Use tension rods in deep drawers to organize lids. Open up a kitchen drawer that is deep enough to store your lids. Insert a few tension rods, about 3 to 4 inches (7.6 to 10.2 cm) apart to create slots. Slide your desired lids vertically into the slots, like files into a filing cabinet. You can insert the rods across the width of the drawer or down its length. It's up to you. How far down the drawer you place the rods is up to you. About 1/3 to 1/2 way down is ideal. Use the front half of the drawer to store the lids, and the back half to store the matching pots, pans, or Tupperware containers. You can use this technique to store other items too, like rolls of aluminum foil or plastic wrap.
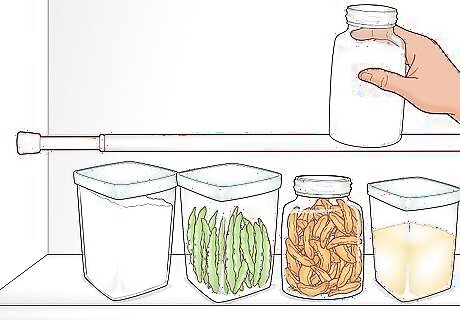
Elevate spice jars with a tension rod to save space. Open up your cabinet and arrange your spice jars in a row along the back. Insert a tension rod just above jars, then stand more spice jars on top of it. If the spice jars won't stand up on the tension rod, move the rod forward by about ⁄4 to ⁄2 inch (0.64 to 1.27 cm) to create a small gap. The jars will tilt back into this gap. You can create more "shelves" by adding more rows of tension rods.
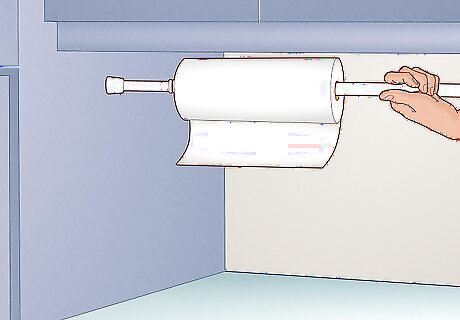
Use a tension rod as a paper towel rack under a cabinet. Slide a roll of paper towels onto the rod first, then place the rod horizontally under a cabinet. Expand the rod until each end is braced firmly against the adjacent walls. You can also use this to store kitchen towels above a sink. Make sure that you hang it low enough so that you can unravel the paper towels without them scrapping against the bottom of the cabinet. If you are using this as a hand towel rod, you can hang other items from the rod too, like spray bottles and scrubbies.
Organizing Other Rooms
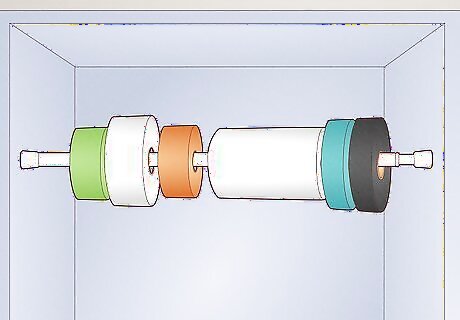
Use a tension rod to store rolls of paper or ribbon. Slide a roll of wrapping paper onto the rod, then place the rod between 2 shelves or walls. Repeat the process with rolls of ribbon, then place it below or above the wrapping paper. Stagger the rods. The lower rod should be closer to you, while the upper rod should be further back and closer to the wall. Maximize your craft storage by hanging baskets from the rods. Place items like scissors or tape into these baskets.
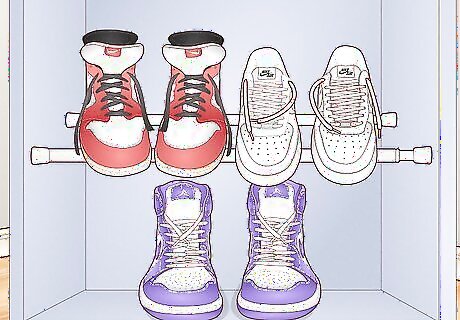
Put several rods into a closet and use them as a shoe rack. You will need 2 rods for each row of shoes. Place 1 rod towards the back of the closet, about 1 to 2 inches (2.5 to 5.1 cm) from the wall. Place the second rod about 1 to 2 inches (2.5 to 5.1 cm) below it, and towards the front of the closet. Set your shoes on top of the rods, with the toes pointing forward. The exact distance between the rods depends on the length of your shoes. The smaller your shoes are, the closer together the rods should be. If your shoes have heels, you can create a steeper angle between the 2 rods, because the heels will hold onto the first rod.
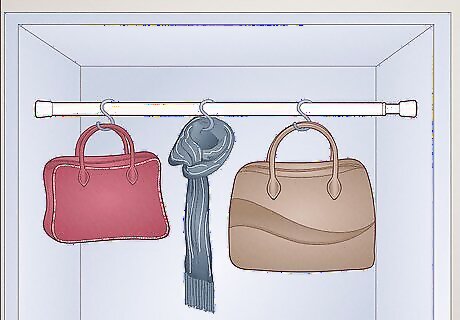
Use a tension rod to display your scarves, bags, or jewelry. Add some S-shaped shower hooks onto a tension rod, then place the rod into your closet. Use the hooks to hang things like scarves, bags, or necklaces. If you are using scarves, you can hang them directly onto the rod without hooks. Keep them in place with slipknots. A slipknot is where you fold a scarf in half, tuck the folded end behind a rod to make a loop, then pull the tails through the loop to tighten the knot.
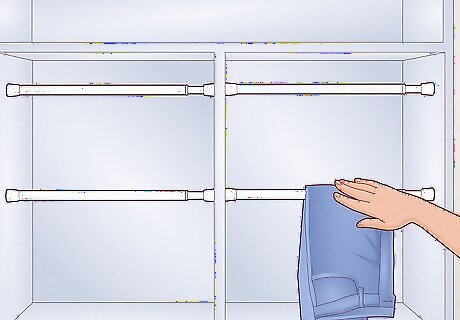
Maximize your closet storage with tension rods and shelving units. Place a shelving unit into the middle of your closet, right against the back wall. Place a tension rod to the left of the shelf, near the top, and a second rod towards the middle. Repeat this with another set of rods to the right of the shelf. Use the shelf to store folded garments, like jeans and T-shirts. Use the rods to hang nicer garments, like blazers and dress shirts. How much space you leave between the tension rods depends on the length of your clothes. Hang them high enough so that the hems of your clothes don't bunch up. The width of the shelving unit is up to you, but something that's about one-third the width of your closet would be ideal.
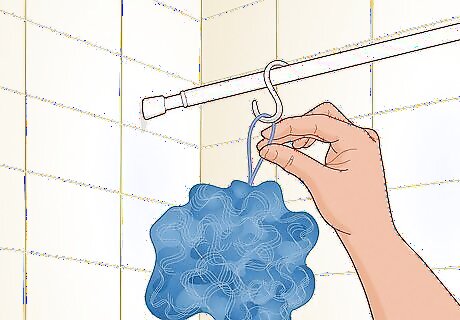
Add a tension rod to your bath or shower to store extra products. Place this tension rod against the wall, so that it is opposite to the shower curtain. Add S-shaped shower hooks to the rod, then hang your loofahs, scrubbies, and other items from the hooks. Hang a mesh shoe pocket organizer from 2 hooks, then fill the pouches with shampoo and conditioner bottles. The shoe organizer must be made from mesh, otherwise it will collect water and develop mildew.
Finding Other Uses for Tension Rods
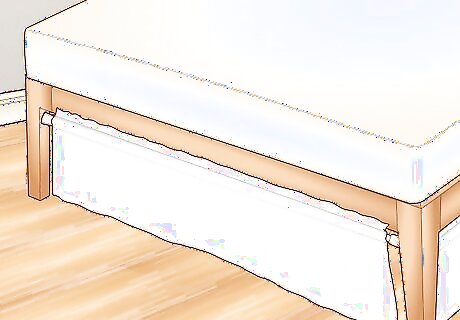
Hide clutter with custom curtains. Measure the height and width of the space you want to cover, such as under a bed or desk. Sew a curtain panel according to these measurements, then slide it onto a tension rod. Insert the tension rod under the bed or desk legs, then adjust the curtain to your liking. Instead of sewing 1 long panel, sew 2 to 3 narrower panels. This will make it easier to access the things you need. This works great for bunk beds, shelves, and entertainment cabinets. You can even use it in place of closet doors. If you have a cat, place the litter box under a table, then cover the sides of the table with your makeshift curtains.
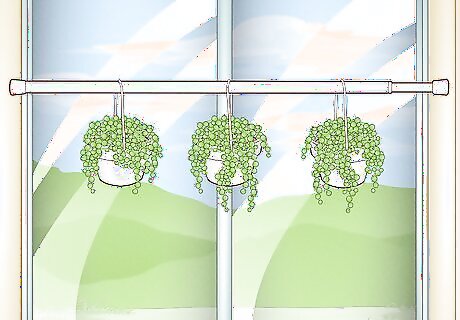
Place a tension rod in a sunny window and hang plants from it. Slide small metal pails onto a tension rod, then place the rod into a sunny window. Place potted herbs into the pails for an instant, mini herb garden! Don't plant the herbs directly into the pails as they don't have good drainage. Put them into smaller plastic pots first, or leave them in the pots that they came in.
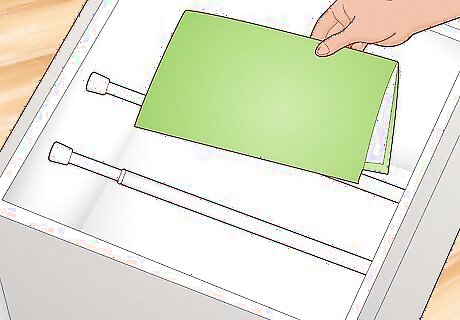
Convert a deep drawer into a filing cabinet with 2 tension rods. Place 2 tension rods inside a deep drawer, 1 on each side. Get some hanging file folders meant for a filing cabinet, and place them inside the drawer; the hooks will sit right on the rods. Place the rods down the length of the drawer on the left and right sides. Don't place them towards the front and back. The rods need to be high enough so that they can hold up the folders. About 10 inches (25 cm) from the bottom should be enough. Thin, slender rods will work the best for this. Don't use thicker ones, or they will create too much bulk.
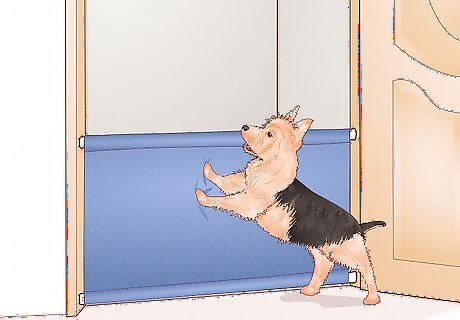
Attach a tension rod to both sides of a curtain to create a pet barrier. Decide on the height of your pet barrier, then sew a curtain panel that has a pocket on both the top and bottom edges. Slide a tension rod through each pocket, then insert it into your doorway. If you need to, use thumbtacks to secure the sides of the curtain to your doorframe. The bottom edge of the curtain must have a pocket and be attached to the bottom rod, otherwise your pet will just crawl under it. Use 1 panel for this, not 2, otherwise your pet will find a way to crawl between the panels. The barrier needs to be tall enough so that your pet can't climb over it, but low enough so that you can step over it.
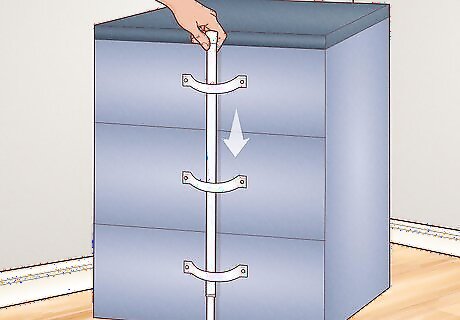
Slide a tension rod through the handles of drawers to baby-proof them. Simply close all of your drawers, and slide your tension rod vertically down through all of the handles. Keep in mind that this only works with drawers that have C-shaped handles, and not with knobs. This is best for drawers that you don't use regularly, as you will need to remove the tension rod each time that you want to open them. This is also a great solution for nosey pets who have learned how to open drawers.






Comments
0 comment