views
Changing Strings for a Steel String Guitar
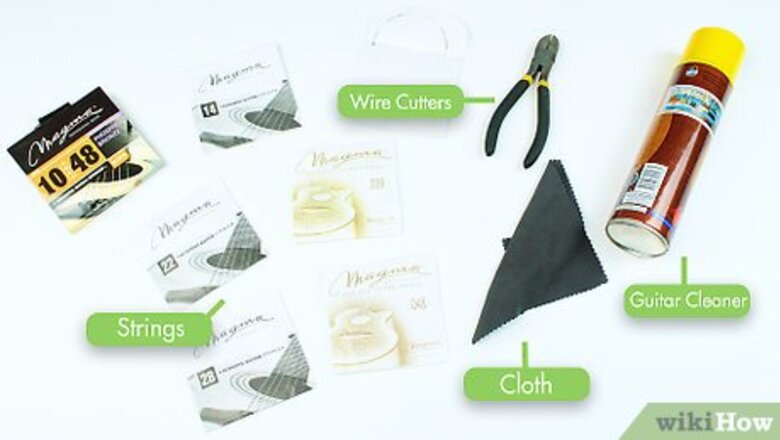
Buy a set of strings. There are a few different options for steel-bound strings. You’ll need to determine which gauge string you use and what type of finish you prefer. The standard size for strings is .11 or .12, but you could go higher for lighter strings or lowers for heavier strings. Decide what type of finish from the following types: Bronze strings have a clear, ringing, and bright tone, but age quicker. Phosphor bronze strings are warmer and darker than bronze strings. The sound is crisp and lasts a long time due to the phosphor finish. Brass strings have a bright, jangly, and metallic texture. Polymer-coated strings have less sustain and brightness, but are warm sounding and resistant to corrosion. Silk and steel strings are popular among folk guitarist and finger picking players due to their softer touch and delicate tone.

Position your guitar. Lay your guitar on a flat surface, for example on a table, and put yourself in front of your guitar. You could also lay it across your lap or even hold the neck while the body stands upright on the ground.
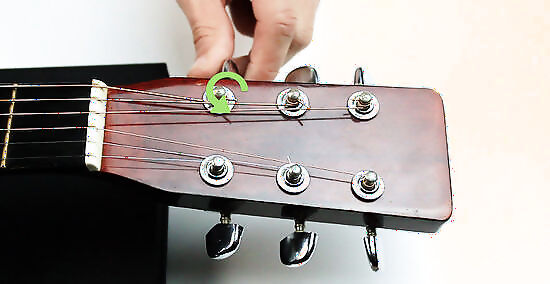
Remove the current strings. Begin by removing the deep E or the 6th string which is the thickest string on the guitar. Start unwinding your string by turning the tuning peg to loosen the string. You can figure out which direction to turn the peg by plucking the string and turn it one direction. If it gives off a higher note that means you are tightening the string. Keep turning the peg until the string falls off the guitar. If the strings are very old then consider just cutting them off with a wire cutter. Remove each string moving from the thickest to thinnest.
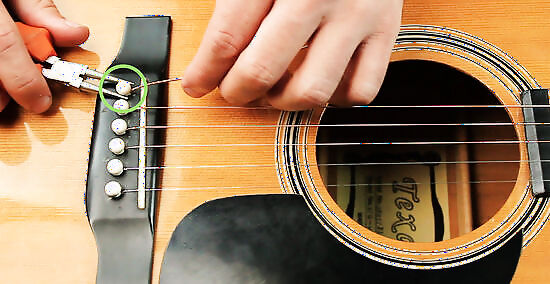
Remove the strings from the bridge. Now the string should be hanging from the bridge of the guitar. The bridge is underneath the sound hole where the guitar strings are attached. Depending on what type of bridge your guitar has, you may need to remove the bridge pin. If your guitar doesn’t have bride pins, you should be able to wedge the strings out of their socket. Pull the pin to remove it. If you can’t wedge it out, use pliers. Bridge pin pullers are available for about $5.00 and are a nice accessory. Pull the string out of the hole.

Prepare your new strings. Open the package and uncoil the first string (the thinnest high E string). Look for the string labeled 6th string and uncoil it. Each brand of strings use different legends to help users identify which string is which.
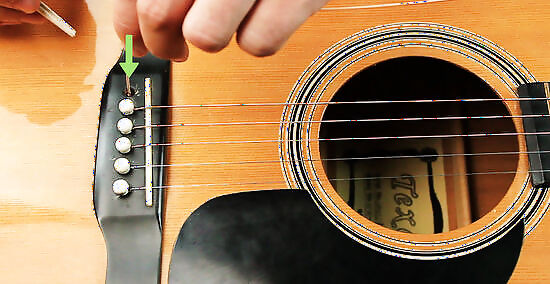
Begin stringing. Isolate the lightest string from your new pack. Place it through the bridge's hole that is farthest to the right of the guitar. Begin pulling the string with slight pressure. Thread the new string until the end of the string falls into place. Now place it in the groove on the bridge of the guitar. If your guitar has bridge pins, you'll need to remove them before inserting the new string. The best way to remove the pins is by using a bridge pin puller. Lodge the tool into the pin and rock it from side to side until the pin becomes loose. Wait until you've fully thread your new string into place before reinserting the pin.
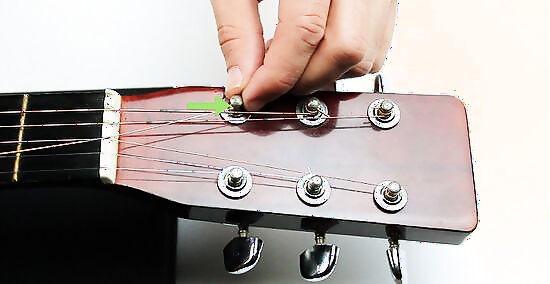
Attach the string to the tuning peg. To attach it to the head, begin by lightly pulling the string up the neck. Bring the string an inch above the tuning peg. Wrap the string around the peg twice and insert the string into the hole between the two loops you created. Begin tightening the string, but don’t tighten the string too much. While tightening the string, use your other hand to stretch the loose string so it holds tune quicker.
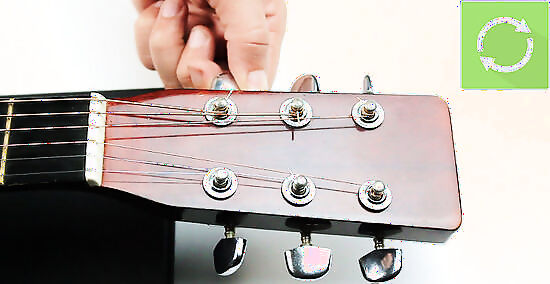
Repeat for the rest of the strings. Take time to do this process to each thicker string. Never fully tighten a string until every string is attached to the guitar. Use a tuner once every string is attached and tune to the following tuning: EADGBE. Wait a few days to cut the excess string.
Restringing a Nylon String Guitar

Purchase a set of nylon strings. While there are different types of materials that go into these types of strings, they are generally called nylon strings or classical guitar strings. Like steel strings, there are different options for nylon strings like the following: Clear nylon strings are the most popular and are known for their rich and clear tones. Rectified nylon strings have mellower and have a more rounded tone than clear nylon. Black nylon strings produce a warm, pure sound with more treble overtones. These are popular with folk guitarist. Titanium strings are exceptionally brighter than the other strings. Composite strings are bright and have a strong projection.
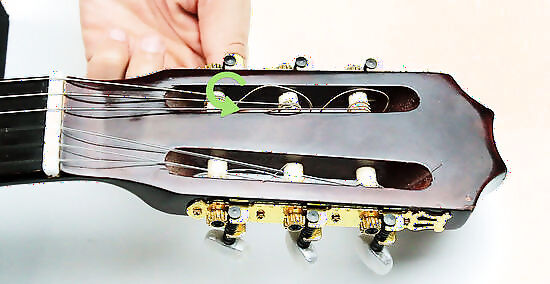
Remove any strings. Like the steel string guitar, you must remove all the strings to restring your acoustic guitar. If you plan to change one string, don’t worry about changing all the strings. Change all the strings for consistent tone and wear. Unwind the strings until the strings get loose enough to remove from the tuning pegs. Pluck the string and turn the peg in one direction. If the tone becomes higher, turn it the other way to loosen the string. If the strings are old then consider just cutting them off with a wire cutter.

Prepare your new strings. Open the package and uncoil the first string (the thinnest high E string). Look for the string labeled 6th string and uncoil it. Each brand of string makers use different legends to help users.
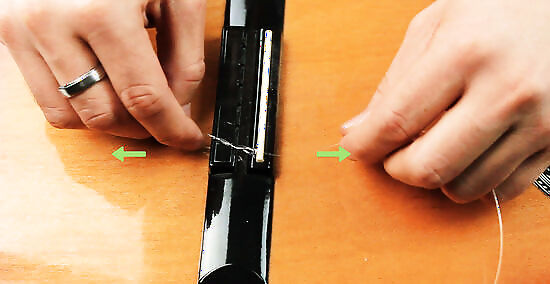
Attach the string to the bridge. The proper looping of the strings is the most difficult and unique part of attaching strings to a classical guitar. Insert the string into the hole farthest to the right of the guitar, and leave about three inches of slack. Loop the free end of the string under the string just behind the saddle and pull it down towards the bottom of the bridge. Pass the free end under the loop below the back corner of the bridge creating a second loop.
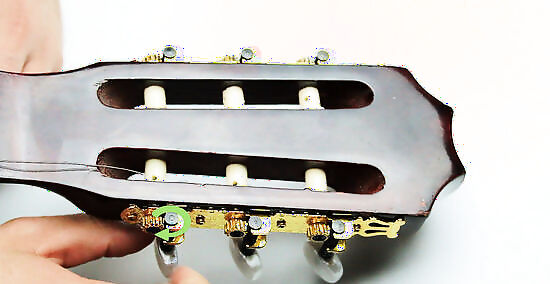
Attach the string to the tuning peg. Loop the free string around the tuning peg twice. Separate the two loops for room to pass the string through the hole. Tighten the string to secure the hold.
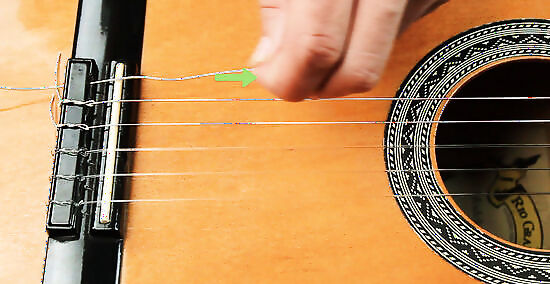
Tighten the string. Tune the guitar tighter while stretching out the string with your free hand. Do not tighten the string fully until each string is attached.
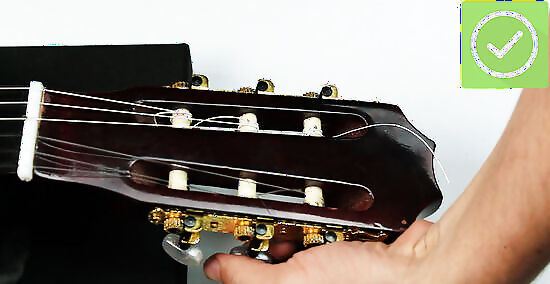
Repeat this process. String each string in your packet using the same process. Be sure to take time to create a proper and secure loop around the bridge for each string.

Tune the strings. After attaching the rest of the strings, use a tuner to tune to EADGBE. Classical guitars with fresh strings will take a longer time to hold tune. You’ll need to constantly adjust the tuning with the first handful of times using the new strings.
Caring for Your Guitar Through the Process

Clean your guitar. When all the strings have been removed, you should use this opportunity to wipe down your guitar of dust and grime. Use a slightly damp cloth to clean the spots that were inaccessible when the strings were attached. Some people like to use guitar polish which can be found at many guitar and music shops. This is not a necessary technique and is even criticized for reducing the quality of the finish.

Check the truss rod. You can examine the state of your truss rod, the metal rod that can be used to adjust the necks action, yourself. Position the guitar so that your eye is in level with the neck of the guitar. If the truss rod is in good condition, the neck should be straight. If there is an area that is sloping in, you either adjust it yourself using an hex key or take it into a repair shop. Unless you’ve fixed a truss rod before, you should not try to repair this type of damage yourself.

Store your guitar. If you plan to leave your guitar unattended for a long period of time or in travel, you should loosen your strings. Do not store a guitar without strings or else your neck could become warped. Try to store your guitar in a case in the upright position if possible. Store the guitar in a comfortable environment like a closet or in an environment where you could stand to live. Never store the guitar in a garage or basement that is not heated or controlled by a proper air unit.



Comments
0 comment