
Massaging Therapy for Carpal Tunnel Syndrome
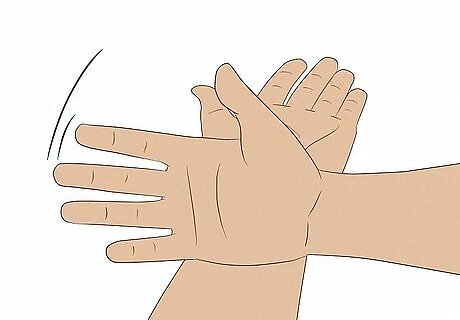
Apply light pressure to the muscles in your shoulder, arm, wrist and hand. Start your massage using light strokes and avoiding too much pressure (a technique called effleurage). Start from the shoulder and move down the arm to the small muscles in your wrist and fingers. Apply effleurage for at least 30 seconds to each section/muscle between your shoulder and hand. This will prepare the muscles for a deeper massage. Use the palm of your hand and your thumb and fingers to apply the massage. Try turning your palm up towards the ceiling, then use the palm of your opposite hand to rub the muscles in the front of your forearm. If you push on a tender or tight spot, make a fist with the hand that's hurting. That will activate those muscles, and you can push with the opposite thumb into that tight spot.
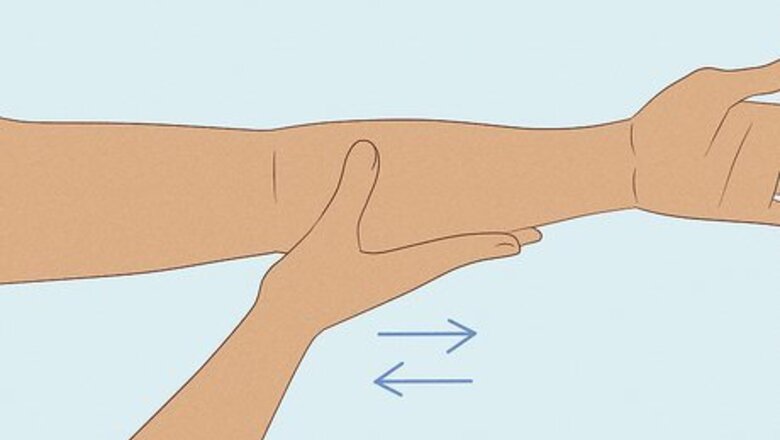
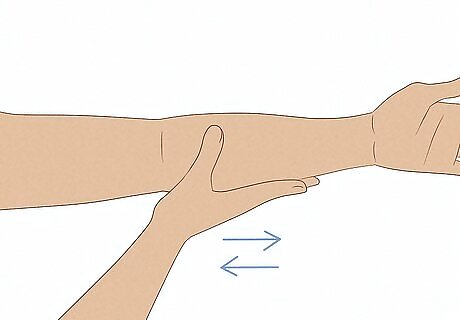
Apply deeper pressure friction massage to the shoulder, arm, wrist and hand. Friction technique accelerates the return flow of lymphatic and venous drainage and relieves edema. It also works in the treatment of scar tissues and adhesions. Apply deeper pressure using long, gliding strokes with your thumb. Start at the wrist area by pushing into the muscle in the center of the wrist, while gliding up to the elbow at the same time. Return back down the upper arm, into the elbow, forearm, and wrist. You can use your knuckles to provide more pressure without straining your hand. Apply enough pressure to feel the effect in the deep tissues but not so much that it causes severe pain. Also, massage your fingers and the palm of the hand by using light pressure and gentle stretches. Use caution with deeper massage—if you press too hard on a nerve, like the one in your forearm, you could irritate the problem even more. Do at least 60 seconds of friction massage on each section/muscle, concentrating on the wrist but also working the knots and adhesions in the shoulder, arm and hand.
Apply kneading massage to the muscles in your shoulder, arm, wrist and hand. The kneading technique, also called petrissage manipulation, causes the metabolic residues that have accumulated in the muscles and under the skin to join back into the circulation. Kneading may also improve the tonus and elasticity of your muscles. Use the palm of your hand to apply kneading technique to the muscles in your shoulder and arm, and your thumb and fingers to knead the muscles in your hand and wrist. Do at least 30 seconds of kneading to each section/muscle, concentrating on the wrist area.
Apply shaking manipulation to the muscles in your shoulder, arm, wrist and hand. Shaking manipulation is shown to have a pain-relieving effect, while strengthening your atonic muscles. Extend your fingers and use the side of your hand to gently strike the muscles. You can also use the tips of your fingers or the heel to apply the technique. Do at least 30 seconds of shaking massage to each section/muscle, again concentrating on the wrist.
Apply effleurage to finish the massage. The massage should start and end with light massaging (or effleurage). Effleurage technique helps relax muscles and calms the nerves. Do at least 30 seconds of effleurage manipulation to each section/muscle to finish the series of massaging techniques. After you have completed one hand, repeat the massage to your other shoulder, arm, wrist and hand. The number of massaging sessions you need varies depending on the severity of the carpal tunnel syndrome. Sometimes you may see a relief in just one session, but often times you should see improvement between five and 10 sessions. If the symptoms persist or become worse, consult a doctor or a physical therapist.
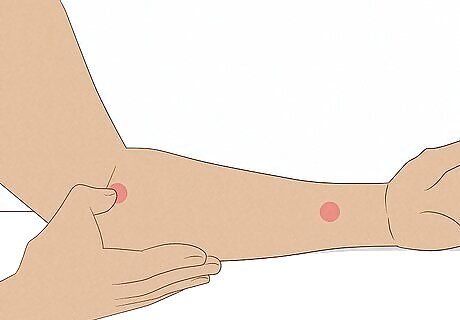
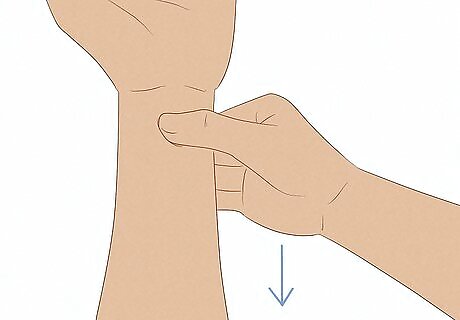
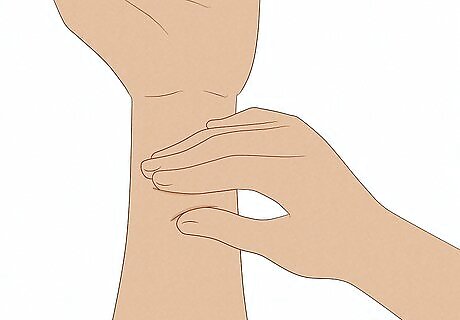
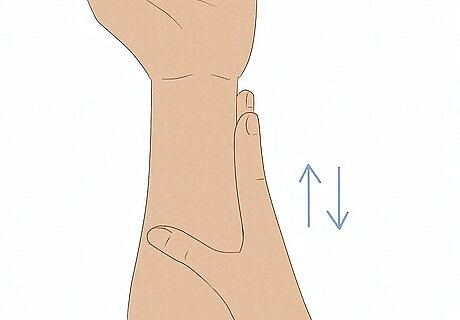
Apply acupressure to the muscle trigger points. Acupressure spots, or more commonly known as trigger points or muscle knots, can refer pain to the carpal tunnel area. These spots can also be found in the neck and shoulder area. To fully get any benefit, it's important to see a health professional that is trained in trigger point or acupressure treatments. Rest your forearm on a table, palm-up. Apply pressure to the muscles near the inside elbow — press down and see if this recreates your carpal tunnel pain. If it does, press gently for up to 30 seconds; the pain should gradually reduce. Move down the length of your forearm, testing for spots that recreate the carpal tunnel pain, then applying pressure for 30 seconds. Turn your arm so that it is palm-down and perform similar pressure on any tender spots you find between your elbow and wrist. To get some relief, you can also try standing against a wall and rolling a ball between your shoulder blades—sometimes problems with your posture in your shoulder and neck can contribute to carpal tunnel syndrome.
Stretching Exercises for Carpal Tunnel Syndrome
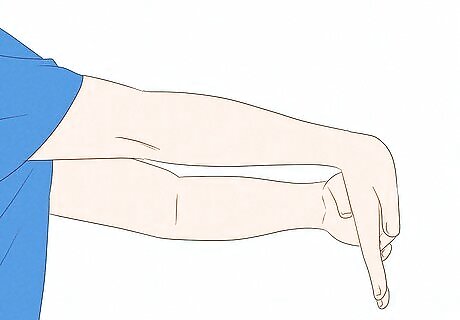
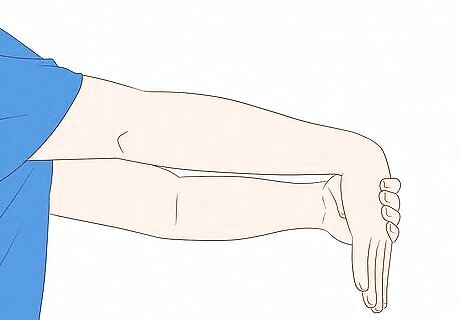
Stretch your wrist flexors and forearm. Hold your arm straight out in front of you, palm up, and bend your hand down so that your fingers point to the floor. Optionally, you can do this kneeling on the floor by placing the palms of your hands on the floor (fingers pointing toward you). Shift your body backward until you feel the stretch. Hold the stretch for at least 30 seconds. Repeat with the other hand.
Stretch your wrist extensors and forearm. This is almost identical to the previous stretch except you will extend your arm with your palm downward this time. Bend your hand down so that your fingers point to the floor. Hold the stretch for at least 30 seconds. Repeat with the other hand.
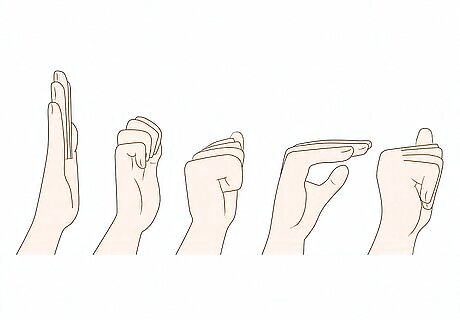
Perform tendon gliding stretches. This is a series of movements during which your fingers reach five positions: straight, hook, fist, tabletop, and straight fist. Start with the straight position by holding your fingers straight up and together. Bend your fingertips down to lightly touch the palm (if you can). Move your fingers to a partially closed fist. Bend your fingers straight forward with your thumb underneath (like forming a birds head). Finally, form a fully closed fist with your thumb relaxed on the side. Repeat this series of movements a few times with both hands.


Comments
0 comment