views
Using the Shadow-Stick Method During the Day
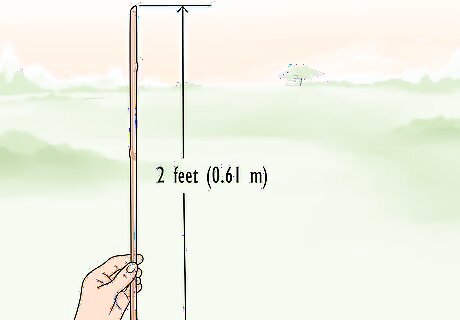
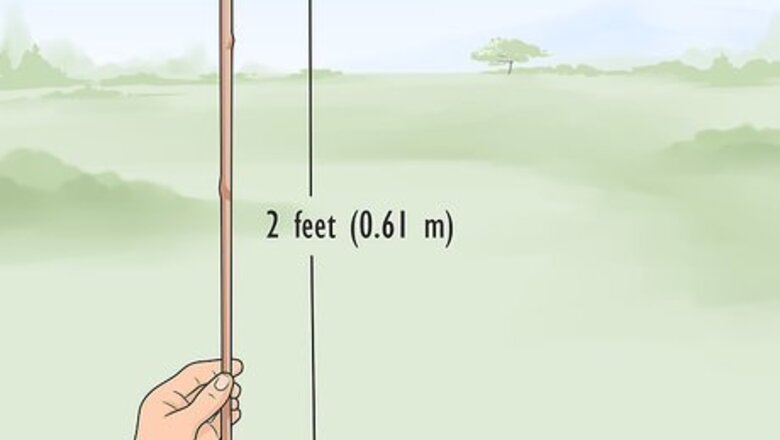
Find a straight stick that is 2 feet (0.61 m) long. If you’re in a wilderness situation, there are likely branches all around you. A straight stick at least 2 feet (0.61 m) long will cast a clean, visible shadow so you can find your direction. Generally the longer the stick, the longer the shadow will be. This helps make the shadow more visible. Note: This method requires a straight stick. If you use a curved or crooked stick, your directions will be off because the shadow won’t be straight. The thickness of the stick can vary, but something around 0.5 inches (1.3 cm) should work in most situations. If the sky is overcast, a thicker stick can help cast a more visible shadow.
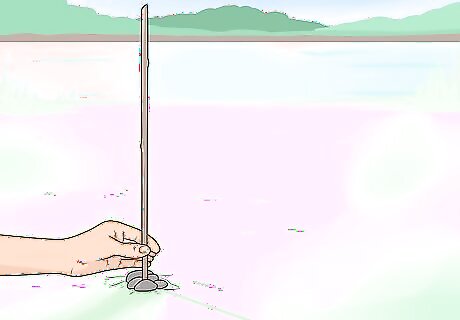
Poke the stick into flat, clean ground. Insert the stick so it's standing straight up. If the ground is hard, poke a hole with a knife or other tool you may have. Notice how the stick casts a shadow—that’s the shadow you’ll use to find your direction. Use rocks or dirt to keep the stick standing up straight. It’s important that the shadow is cast on flat ground, free of grass and other vegetation. If the ground is uneven or grassy, the shadow will be distorted. Clear some ground if you have to.
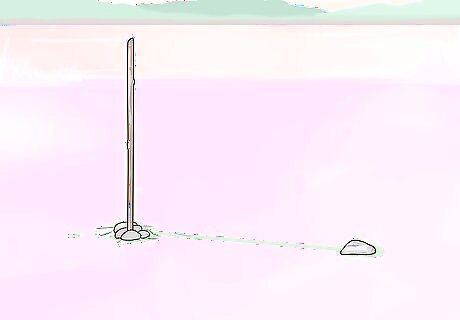
Put a rock at the end of the shadow. This rock marks the shadow’s original location. Mark the original location because as the sun moves across the sky, the shadow will move too. Since the sun moves across the sky east to west, it’s casting a shadow on the opposite side. This means that the shadow’s original location is your western-most point.
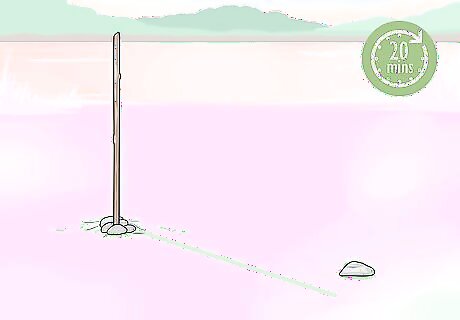
Wait 20 minutes. This allows enough time for the sun to move across the sky. If the shadow hasn’t visibly moved enough after 20 minutes, wait another 10. If you have no way to keep time, then just keep an eye on the shadow. When you see that it’s moved, you can mark the new location and proceed.
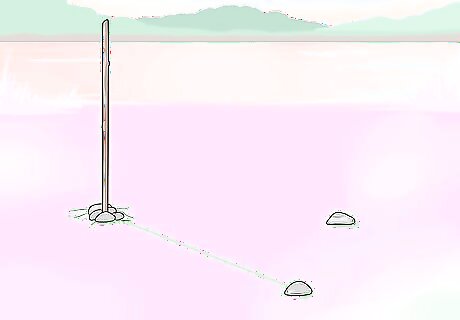
Mark the shadow’s new location. As the sun moves, the shadow will move east. Put either a rock or stick at the end of the shadow to mark it's new location. Remember, use something that won't blow away. If you lose both shadow locations, you'll have to start over.
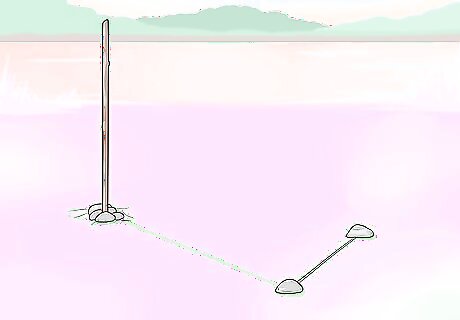
Draw a straight line between the rocks. Since the sun is moving west across the sky, the shadow’s new location will be further east. Connecting these 2 rocks creates an east-west line, the first step in finding which way north is. To connect the 2 rocks, you can either draw a straight line in the dirt or lay a straight stick between them.
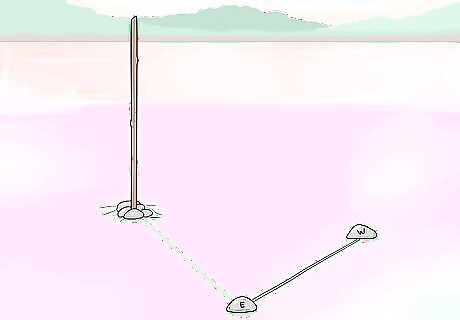
Mark a ‘W’ on the original location and an ‘E’ on the new location. This creates a compass so you don’t forget which side is which. Remember that the directions on a compass are North, East, South, and West in a clockwise direction. If you forget the order of the directions on a compass, remember the phrase "Never Eat Soggy Watermelon," a memory device to remember the directions.
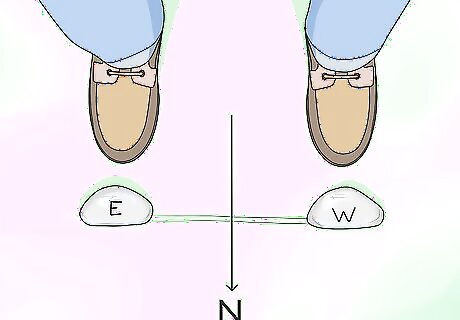
Put your left foot on 'W' and your right foot on the 'E' to find north. When you're in this position, your front will be facing north and your back will be facing south. This completes the compass. The north you’re facing is true north, because you’ve used the sun rather than the Earth’s magnetic field. If you want to keep track of these directions, mark an ‘N’ where your front is facing and an ‘S’ where your back is facing to keep track. This method works the same in the Northern and Southern Hemispheres. The only difference is that in the Northern Hemisphere, the sun will be at your back, and in the Southern Hemisphere the sun will be in front of you.
Using an Analog Watch and the Sun

Remove your analog watch and hold it in front of you. Get a good view of the watch face and where the hour and minute hands are pointing. For this method, use an analog watch with an hour and minute hand. A digital watch won’t work.

Point the hour hand toward the sun if you’re in the Northern Hemisphere. In the Northern Hemisphere, the sun points toward the south. Line up your watch's hour hand with the sun as the first step to discovering the north-south line.
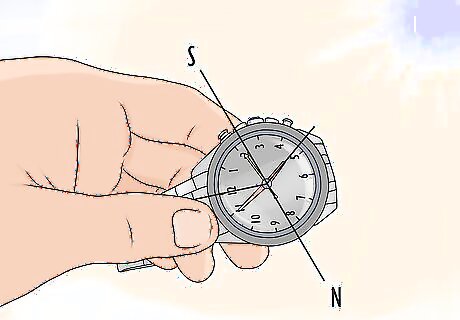
Find the halfway mark between the hour hand and 12 o’clock. In the Northern Hemisphere, this halfway point marks the north-south line. True north is the side pointing away from the sun. Some analog watches have an adjustable rim for direction finding. If your watch has this, you can adjust it so an arrow sits at this halfway point. Note that this method isn’t perfect because time zones throughout the world are not always consistent. You may not be able to locate the precise point of true north, but it will give you its general location.
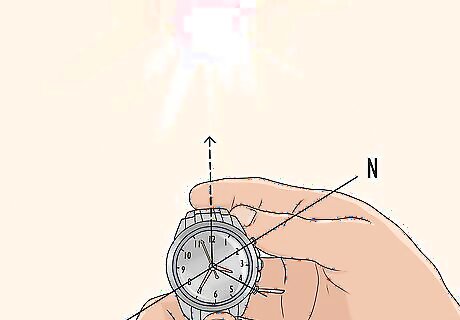
Point the 12 o’clock mark towards the sun if you’re in the Southern Hemisphere. Then find the halfway mark between the hour hand and the 12 o’clock point to locate the north-south line. In the Southern Hemisphere, true north is the side pointing towards the sun.
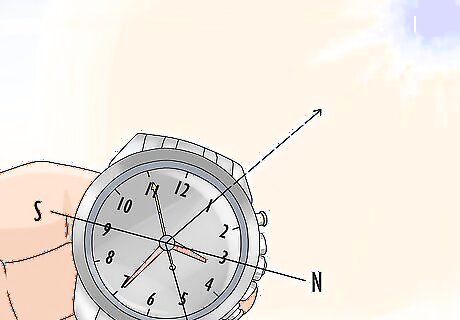
Use 1 o'clock instead of 12 during Daylight Savings. Depending on the time of year and area of the world, Daylight Savings time could be in effect. The method works the same, but use since there is a 1-hour time difference, use 1 o'clock instead of 12. Remember that Daylight Savings is between March and November in participating areas.
Finding the North Star in the Northern Hemisphere
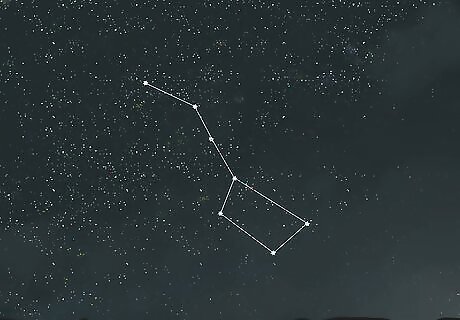
Locate the Big Dipper constellation. This constellation, also known as Ursa Major, is the key to finding the North Star (Polaris), the star that shows you where true north is in the Northern Hemisphere. This is a large constellation, and finding it on a clear night is easy. The Big Dipper gets its name because it looks like a large spoon and is made up of some of the brightest stars in the sky. Look up and find the collection of stars that look like this. Contrary to popular belief, the North Star is not the brightest star in the sky. Use these constellations to locate it.
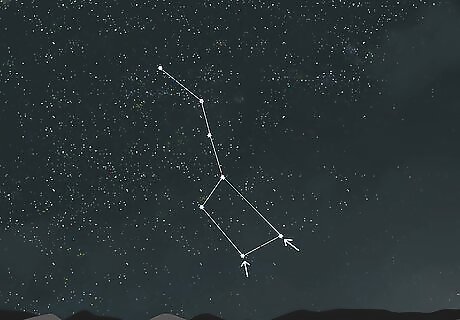
Find the outer edge of the Big Dipper. The outer edge, what looks like the end of a spoon, is made up of 2 stars. These 2 stars are known as “pointers,” because they literally point towards the North Star.
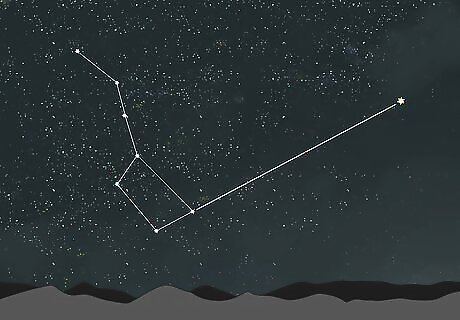
Draw an imaginary line outward from the pointer stars. This line should extend through the top of the spoon. The North Star sits at the end of this line. The North Star forms the end of the handle on the Little Dipper and is the brightest star in that constellation. When you think you’ve found the North Star, look around it and see if it’s part of a small, spoon-shaped constellation. If so, then you’ve located it.

Stand facing the North Star. When you’re facing the North Star, you’re facing true north. You can now use this knowledge to figure out the other directions. Remember if you’re facing north, the other directions from right to left are east, south, and west.
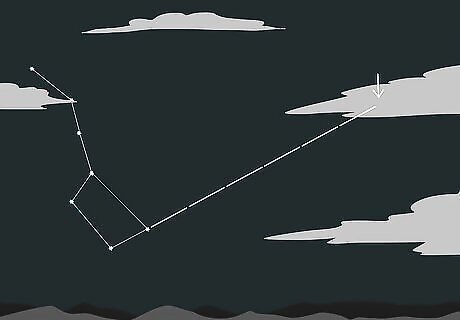
Estimate the distance if the sky is cloudy. Sometimes the weather doesn’t cooperate with this method. In this case, you can still find the Big Dipper and estimate the distance to the North Star. The North Star is approximately 6 times the distance between the 2 pointer stars. Look at the space between those 2 stars and then multiply that distance by 6. This gives you the approximate location for the North Star.
Navigating with Stars in the Southern Hemisphere
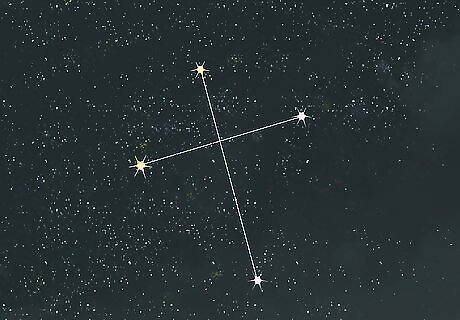
Locate the Southern Cross constellation. If you’re in the Southern Hemisphere, the North Star won’t help you navigate. Instead, find true south using the Southern Cross constellation. This constellation is always visible in the Southern Hemisphere. The constellation is made up of 4 bright stars that form a kite shape if you trace the border around them.

Find the pointer stars. Outside the Southern Cross are 2 more bright stars known as the pointers. These are roughly parallel with the 2 stars in the Southern Cross that are closest together. The pointer stars are some of the brightest in the Southern Hemisphere. If you're having trouble finding the Southern Cross, locating the pointer stars is a good starting point.
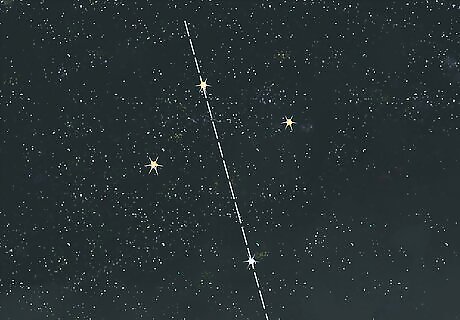
Draw an imaginary line down from the longest angle in the Southern Cross. Two stars in the Southern Cross, Gacrux and Acrux, are the furthest apart in the constellation. Starting at the top, imagine a line extending between these 2 stars, and then continuing at the same angle outward. Hold a strong or a straight stick out in front of you to help envision a straight line. Depending on the time of year, this line may hit the ground since the constellation rotates along with Earth.
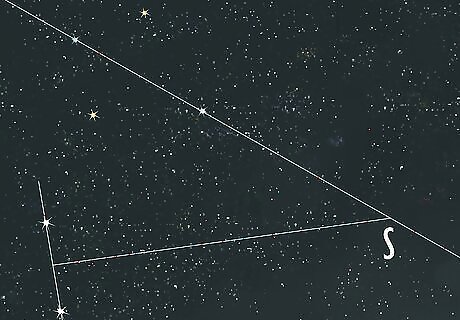
Draw an imaginary line from the midpoint between the pointers. The same way you drew an imaginary line from the Southern Cross, now find the midpoint between the pointers and extend a line outward. This line should intersect with the line you drew from the Southern Cross. That intersection point is true south. Use a natural landmark as a reference point. For instance, a tall tree in the distance could mark the intersection between the 2 lines, indicating where true south is.
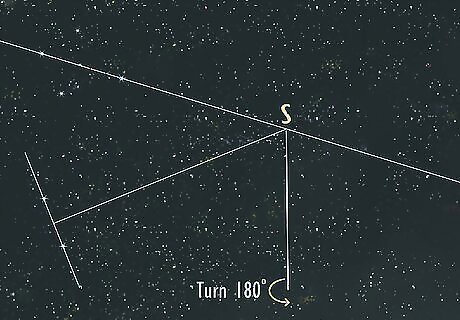
Turn around 180 degrees with your back facing south to find true north. When you locate true south, it’s simply a matter of turning around to find true north. Make sure you rotate exactly 180 degrees, or you'll be off-center and not facing true north.


Comments
0 comment